Touching Well’s top tips
General tips for stretching
They should “feel good” and not hurt. Some may feel a little uncomfortable or stingy (that is the fascia unsticking).
Go slowly. Give your fascia time to lengthen. Breathe. Hold for 10-12 seconds. Then move gently for a slightly different stretch.
Stay safe, hold on if needed.
Be creative, playful. Notice how you are feeling. Go with your body. Be kind to yourself.
You can reach Touching Well by mobile on 0794 227 6538, or via our landline 0115 648 9636, or the contact form.
Sessions are available Monday to Thursday daytime.
I hope to see you soon. With warm regards, Regina
Leg massage
Easing your legs can have benefits beyond the legs themselves. Tight hamstrings and/or hip flexors (the top bit of the quads) can pull on your pelvis and contribute to lower back pain.
Let's start with a warning: your legs can be exquisitely and surprisingly tender. Go easy, start lighter. Don't go over pain level 6 on a scale between 0 and 10, preferably stay well below that.
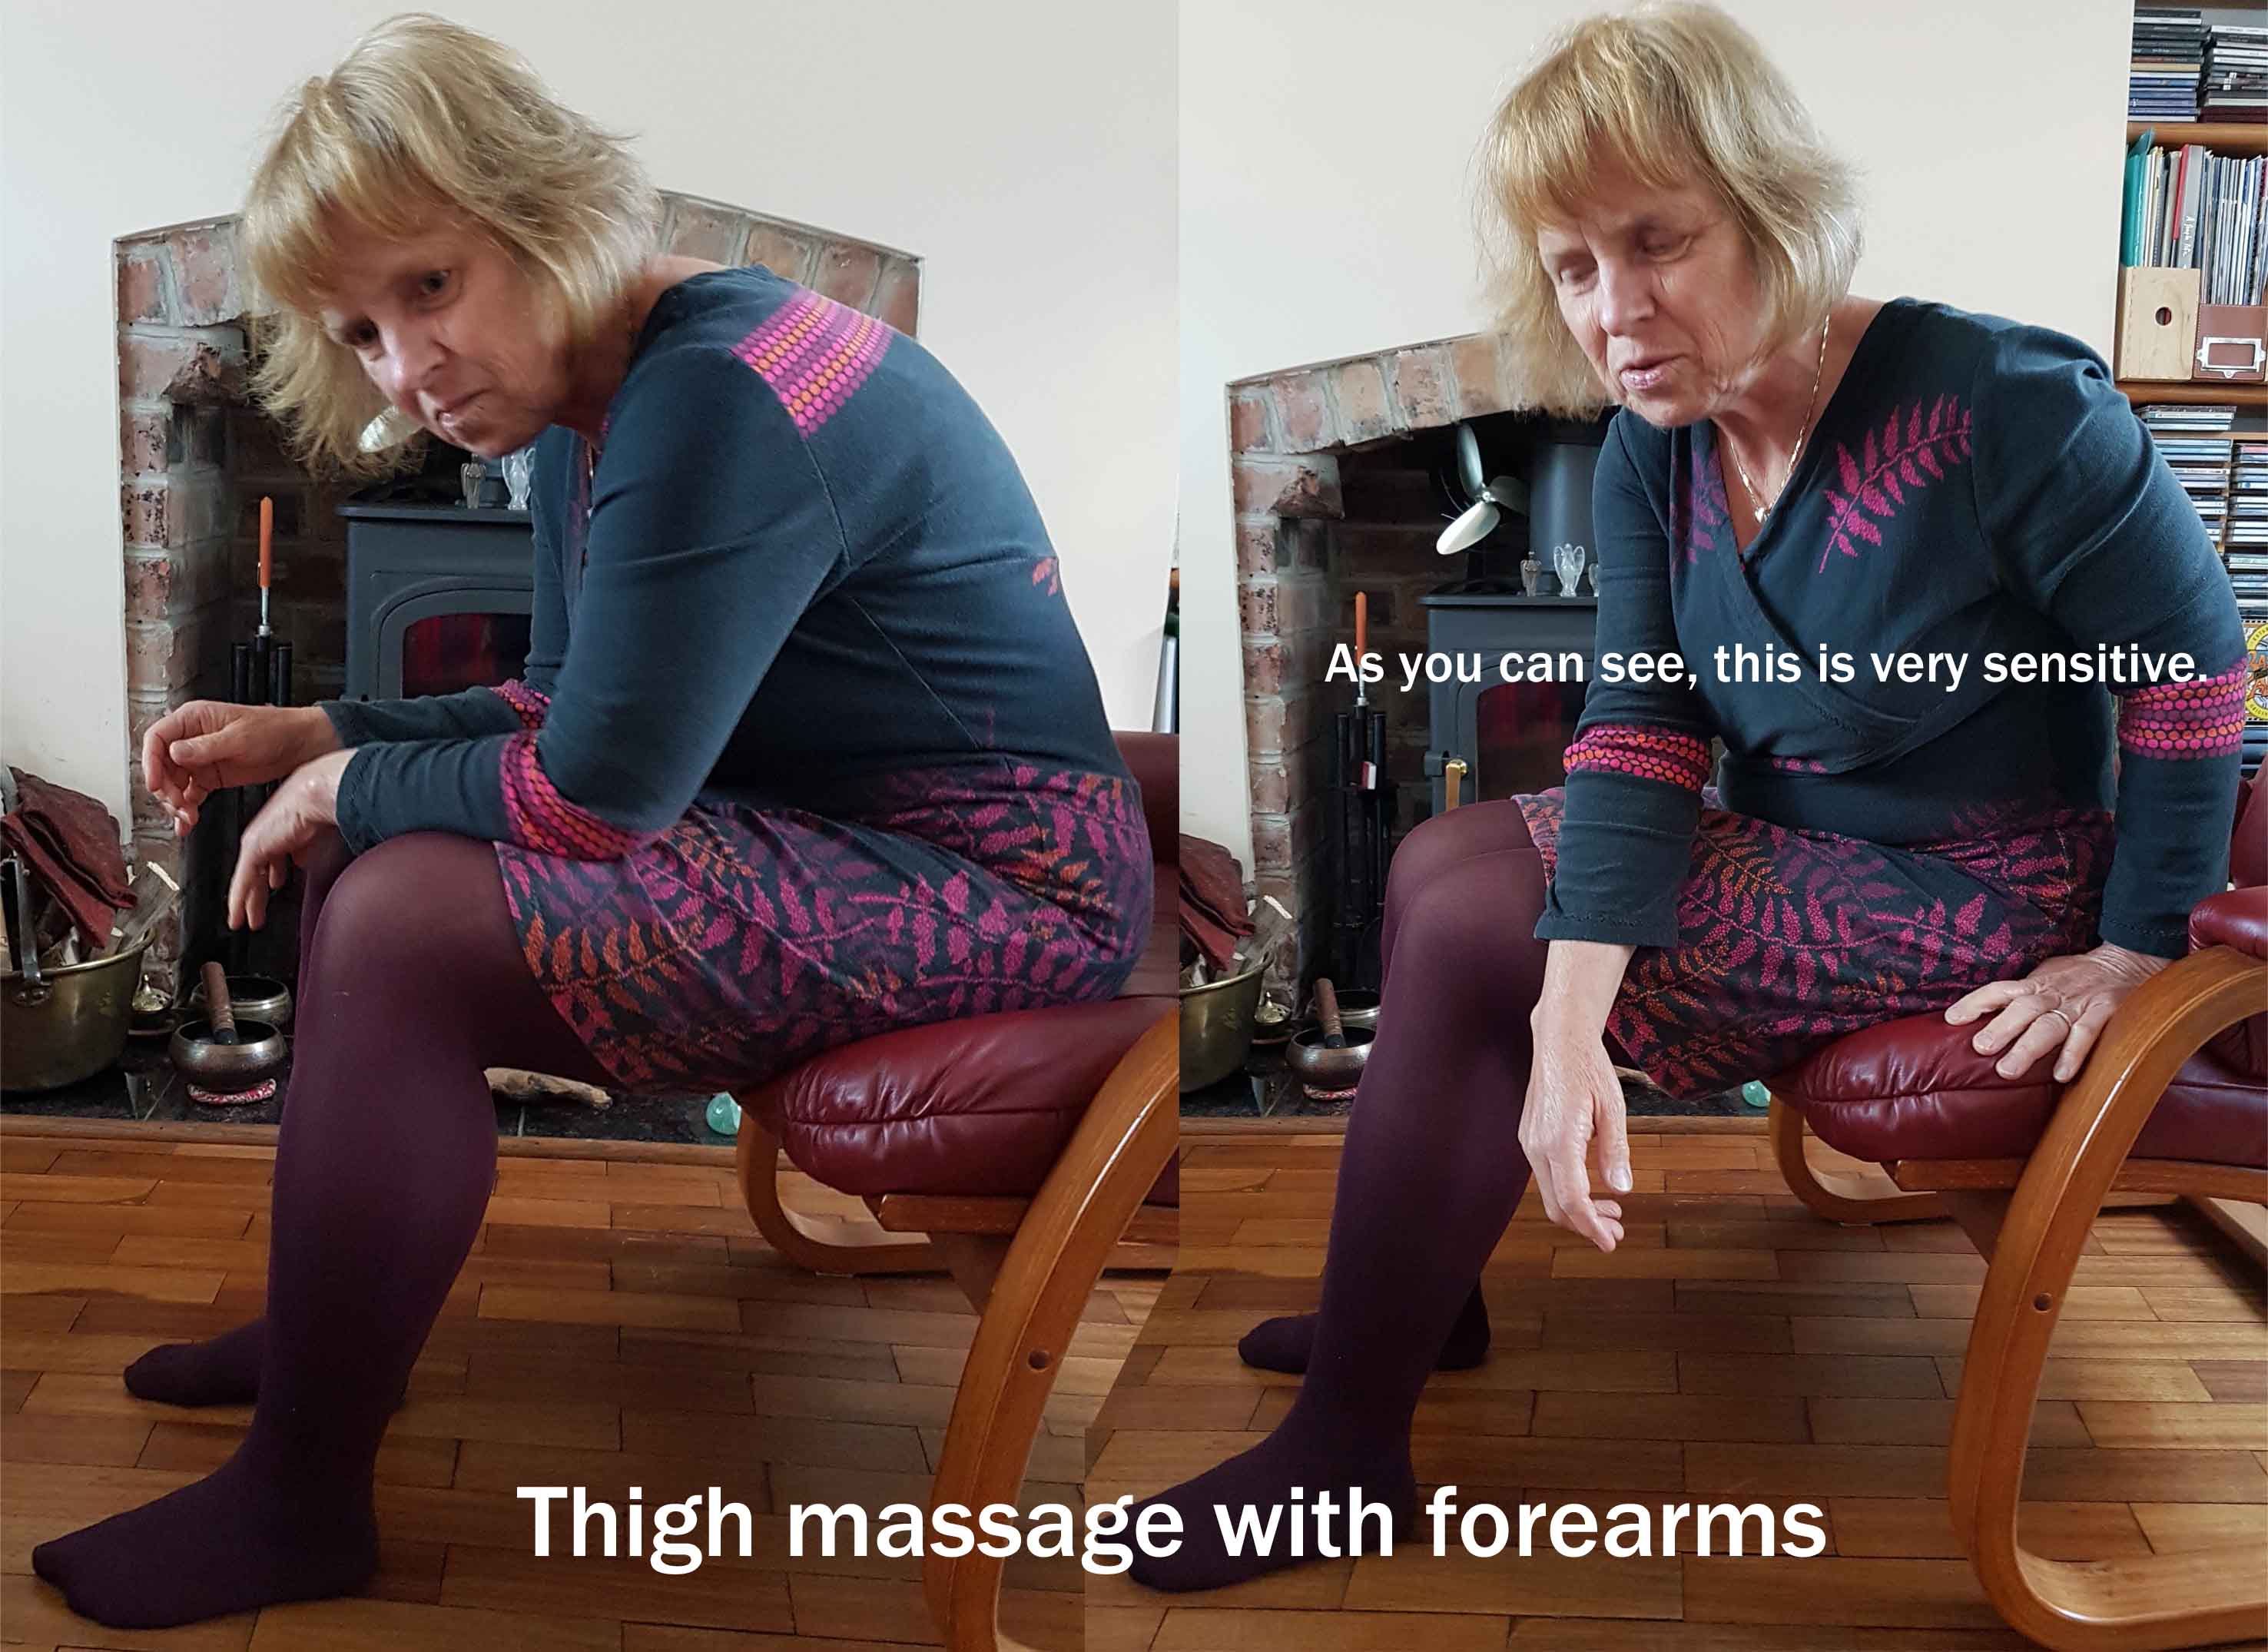
You can massage your legs with your forearms. Rest the fleshy part of your forearm on the front of your thigh and relax. Perhaps try another spot. Or move your ankle. Alternatively you can slowly move your forearm towards your knee. Don't go over your knee. Or you can move across the muscle, in this case the quads. Imagine you are giving your quads a stretch sideways. You can go from the inside out, or the outside in. This will feel different depending on your direction. You can also use your forearm to go across the muscles on the outside or inside of your thigh.
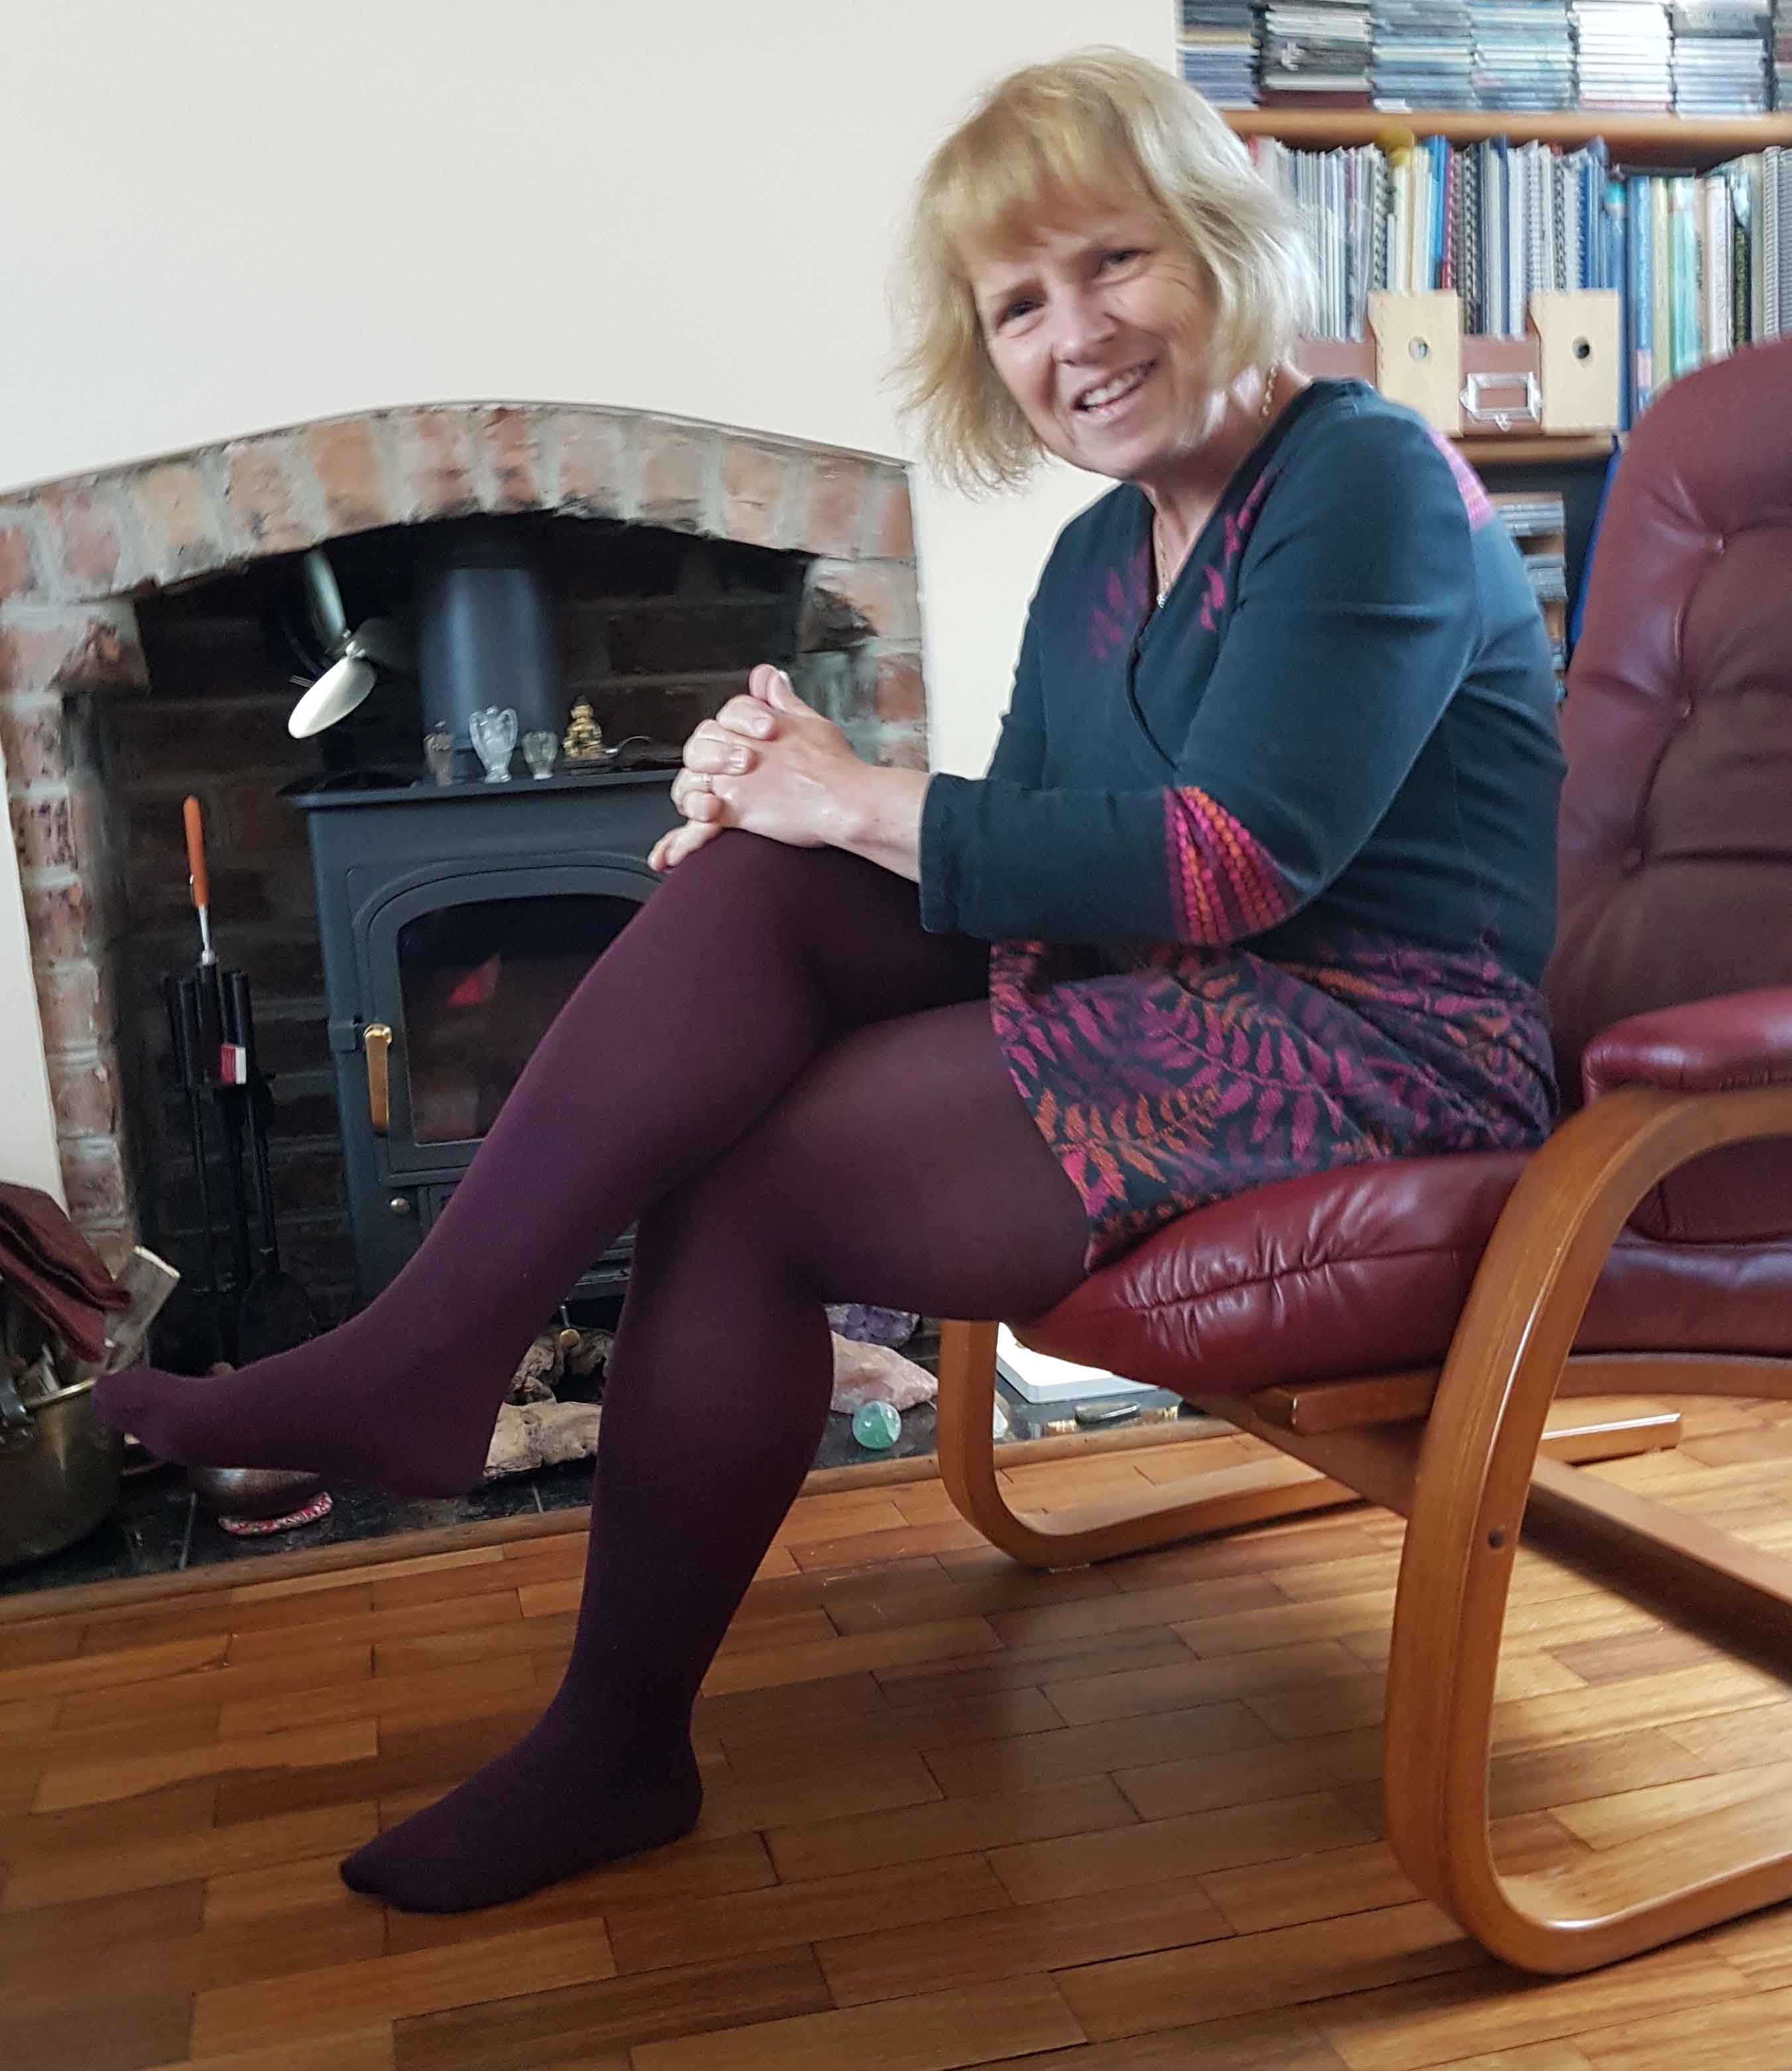
In the picture I am using my knee to massage my calf. Be careful, calves can be very
tender; mine certainly are. I can move the ankle of my upper leg to move my calf,
thus adding intensity. I can
also slightly alter the angle of the upper leg, exploring all the tender
areas in my calf.
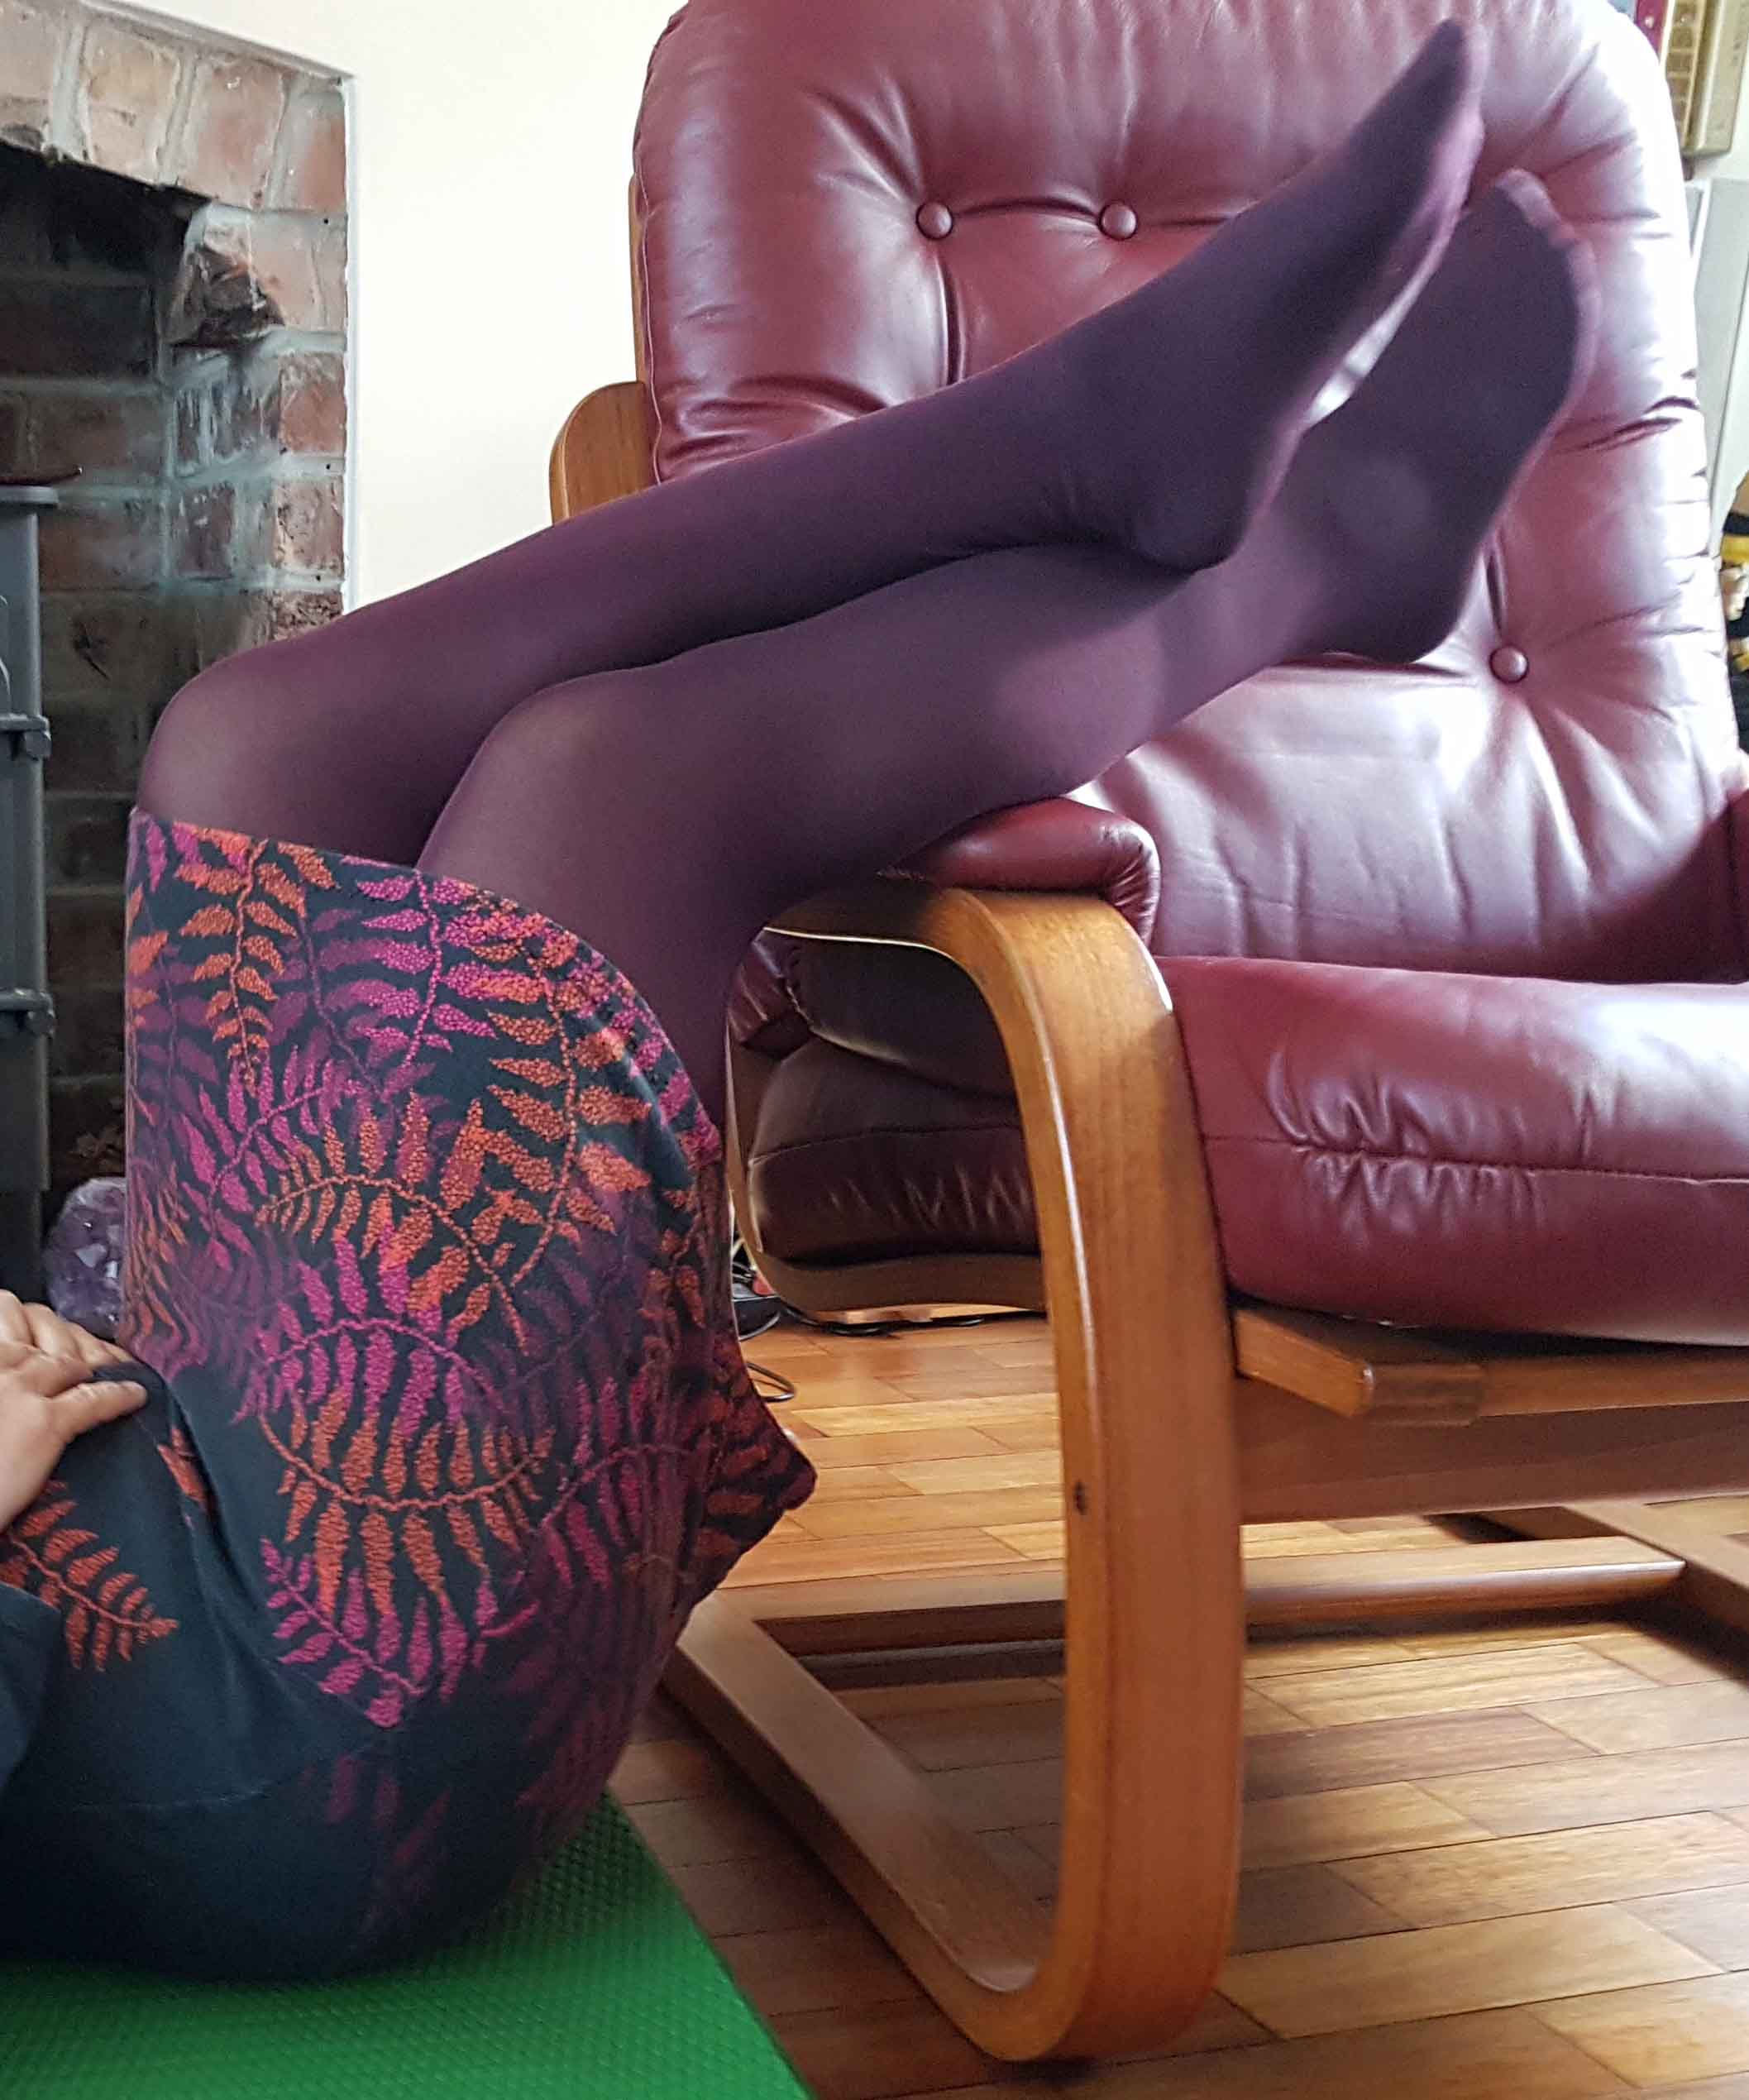
Alternatively, I am using the arm rest of my armchair to massage my calf. This is already more intense, as I am using my other leg to add pressure.
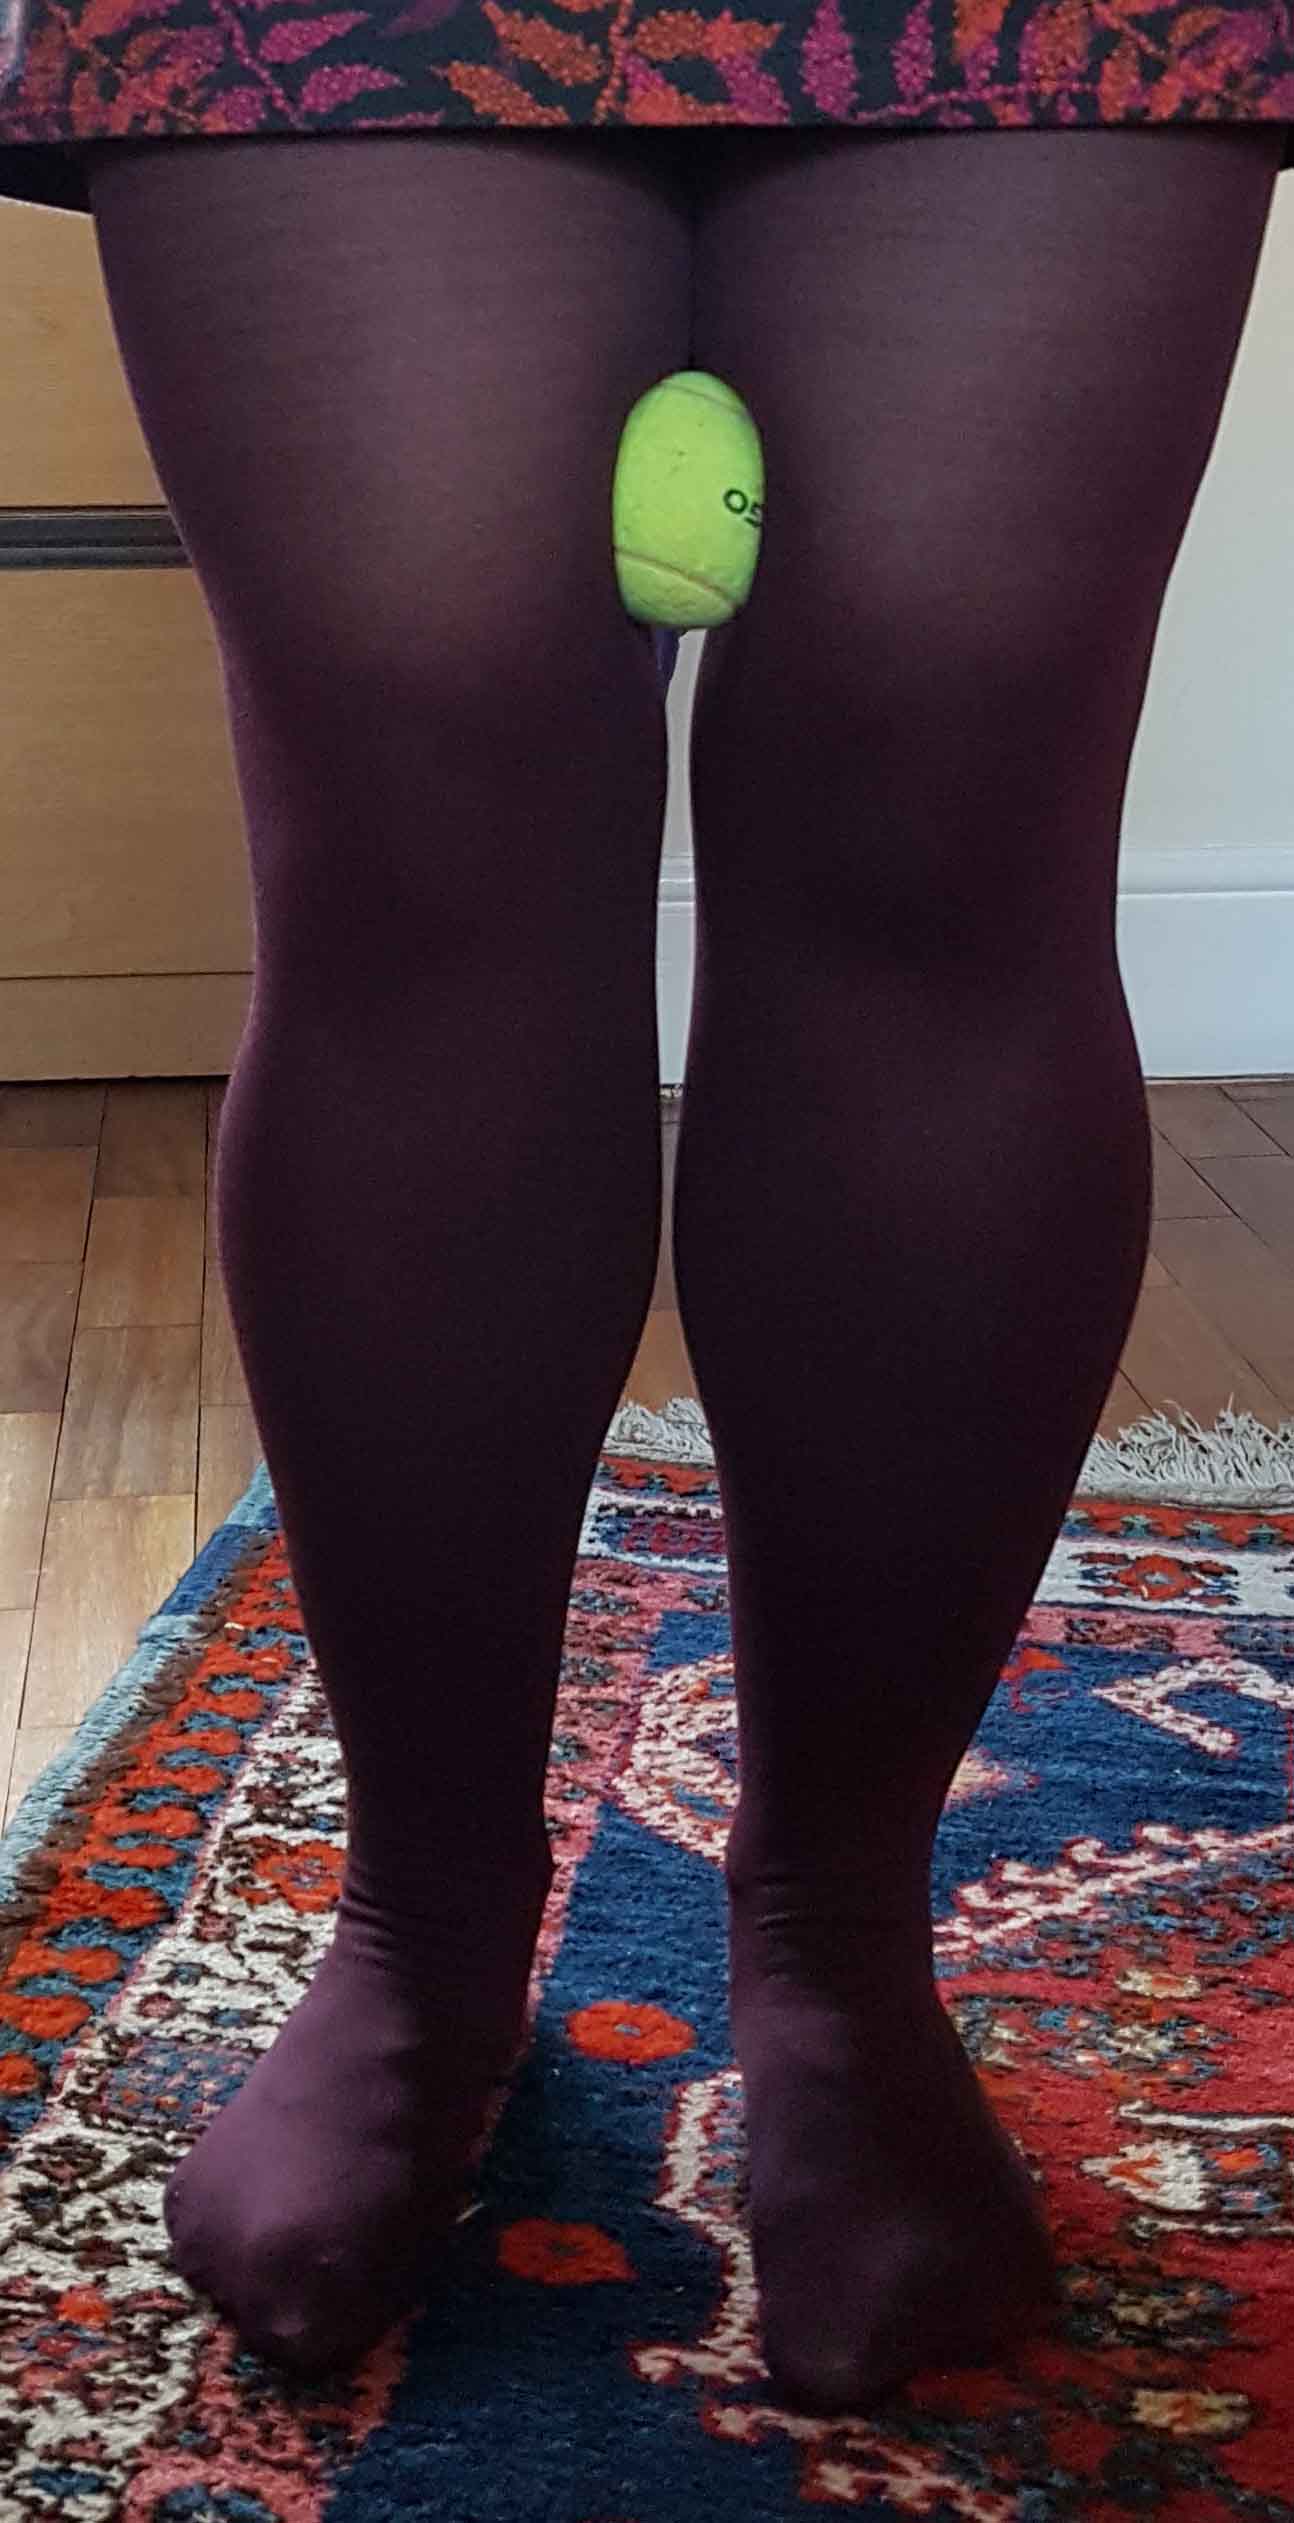
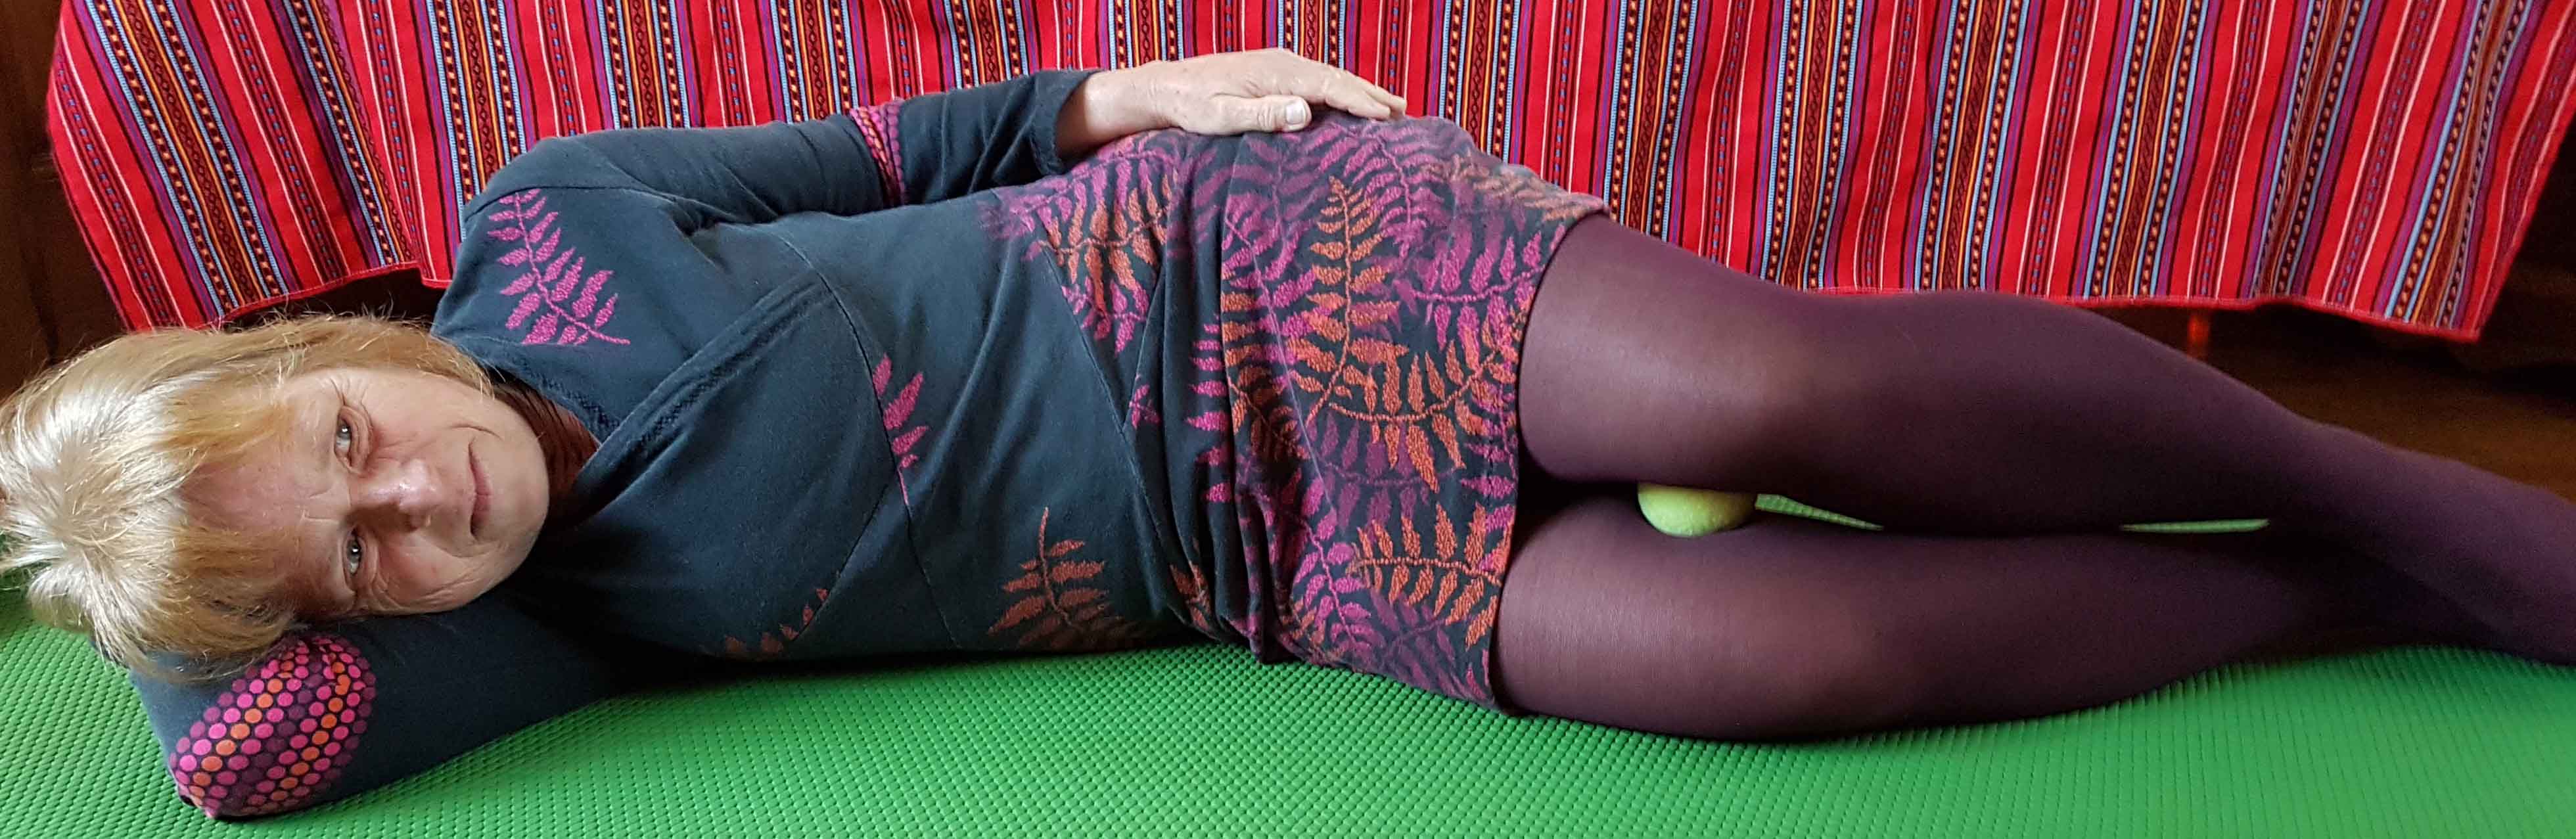
You can use a tennis ball on on your inner thighs for trigger point work. Trigger points are these exquisitely tender and knotted spots in our muscles, sometimes the pain radiates out. When you find a trigger point in a muscle hold it for about 12 seconds with a pain level no more that 6 on a scale from 0 to 10. You can do this anywhere, inner or outer thighs, front and back of your legs by lying or or leaning into the tennis ball. I would recommend using a very soft surface (like your bed) if you use a tennis ball on your thighs or the outside of your legs. Leaning onto a wall works well as you can graduate the pressure, as long as you don't mind damage to the wall from the ball.
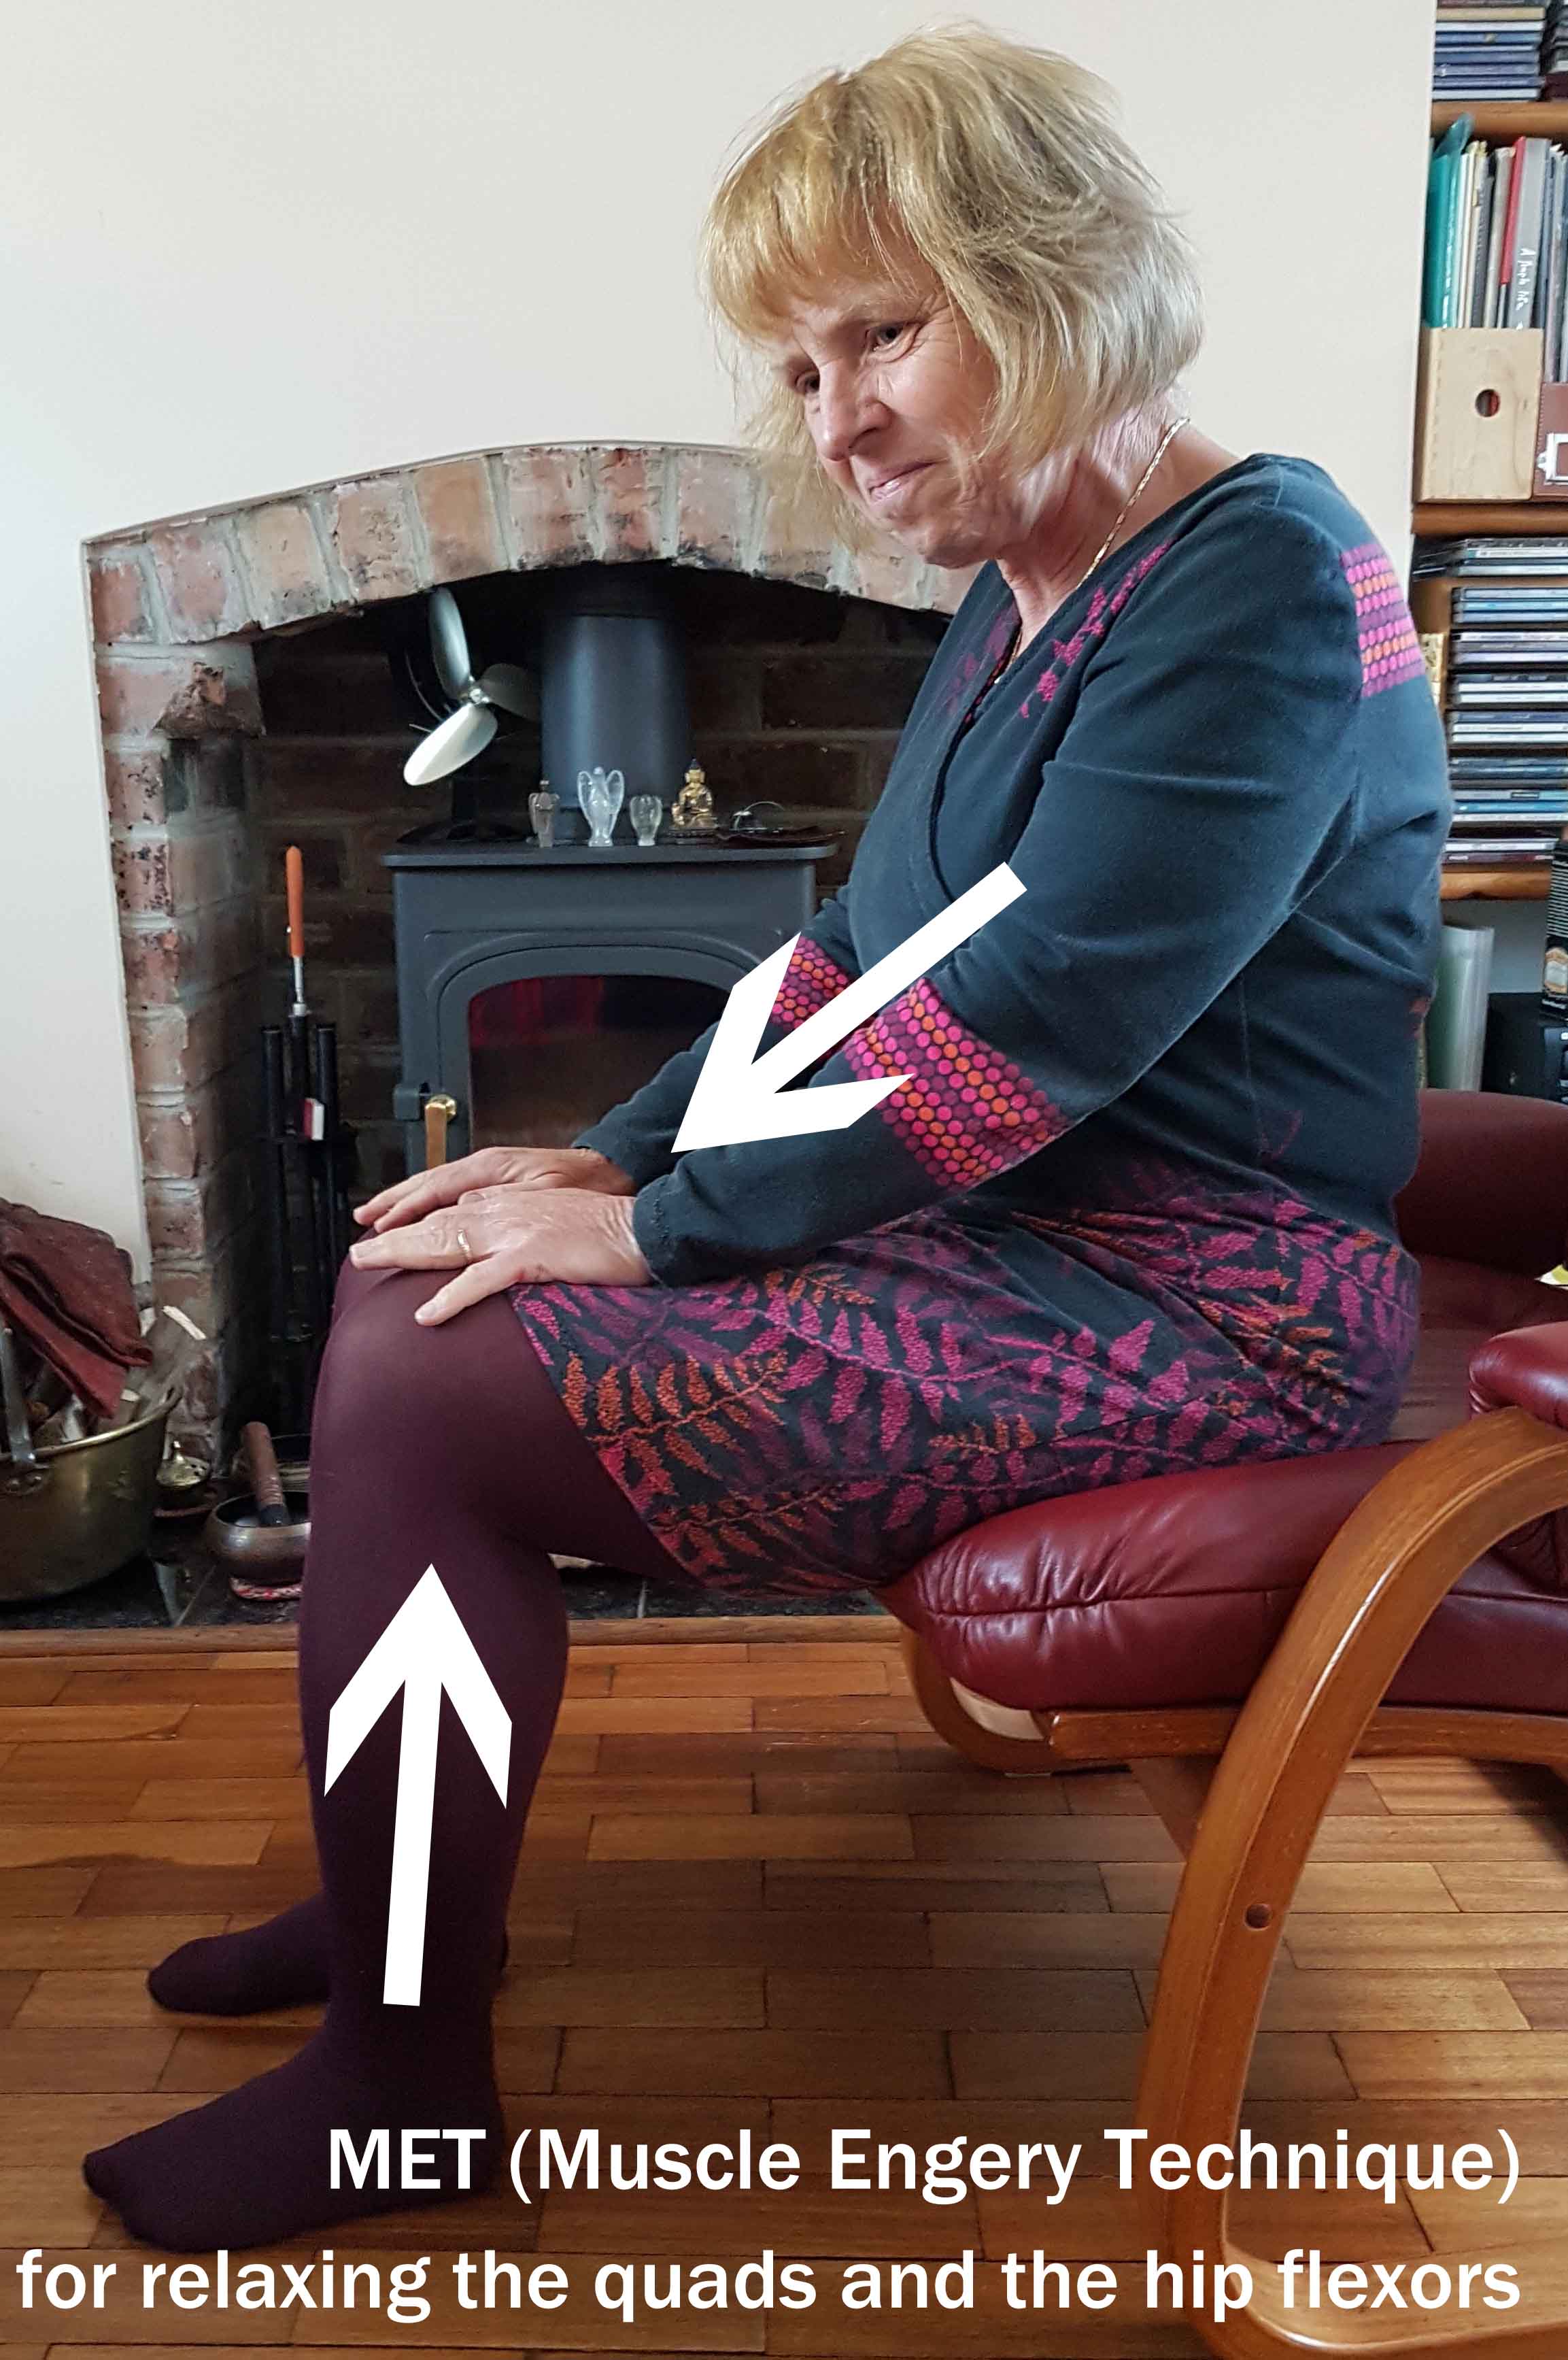
A very effective body work technique is Muscle Energy Technique, or MET. That name does not tell you much. The essence of this technique is that you use (engage) the muscle in question a little, with about 10% of your strength. At the same time you are resisting that movement. You hold for about 10 seconds, rest, and repeat once or twice. The MET in this image is loosening the quads and the hips flexor. In the image I am trying to lift up my thigh which is resisted by my hand. You can be much more relaxed than I am in this picture.
Foot stretches
This week's top tips are getting your feet into tip top shape -
obviously without the help of the nail studio. I have a confession to
make - I don't like massaging my feet with my hands - I can't reach my
right foot comfortably. So here we are, tips without having to reach.
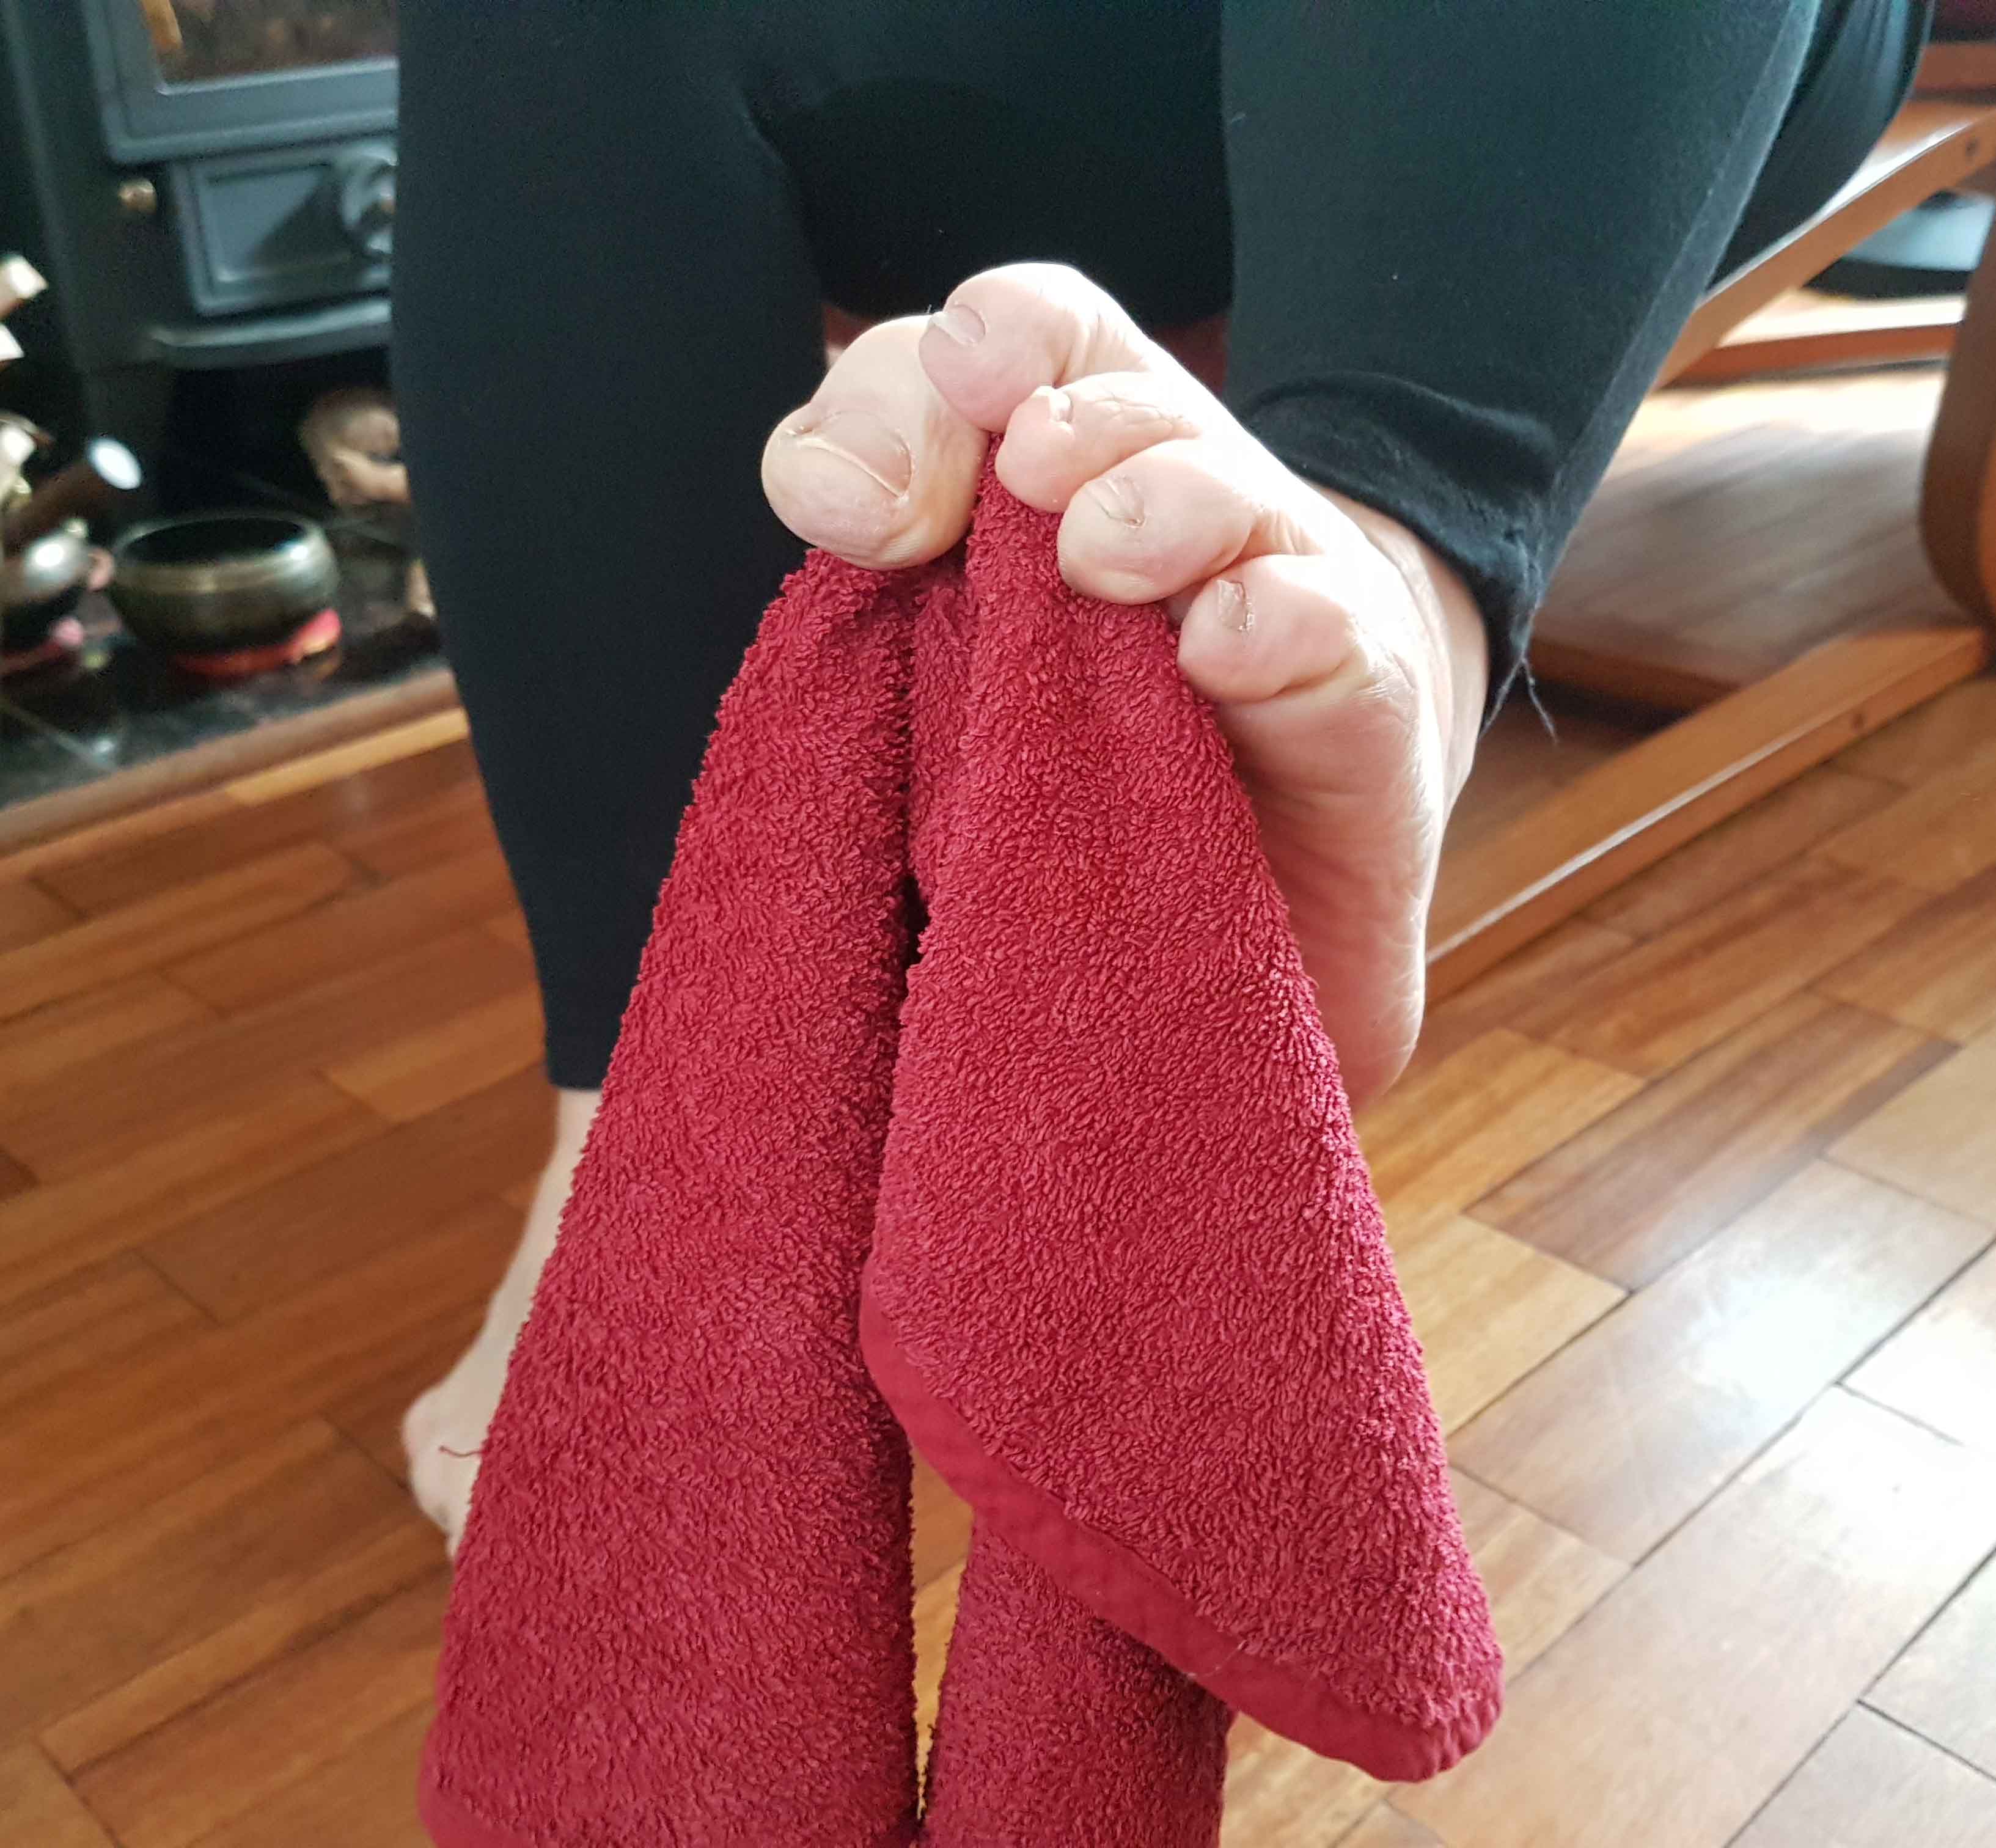
For these stretches you need a tennis ball, a small towel and a step with something to hold on to.
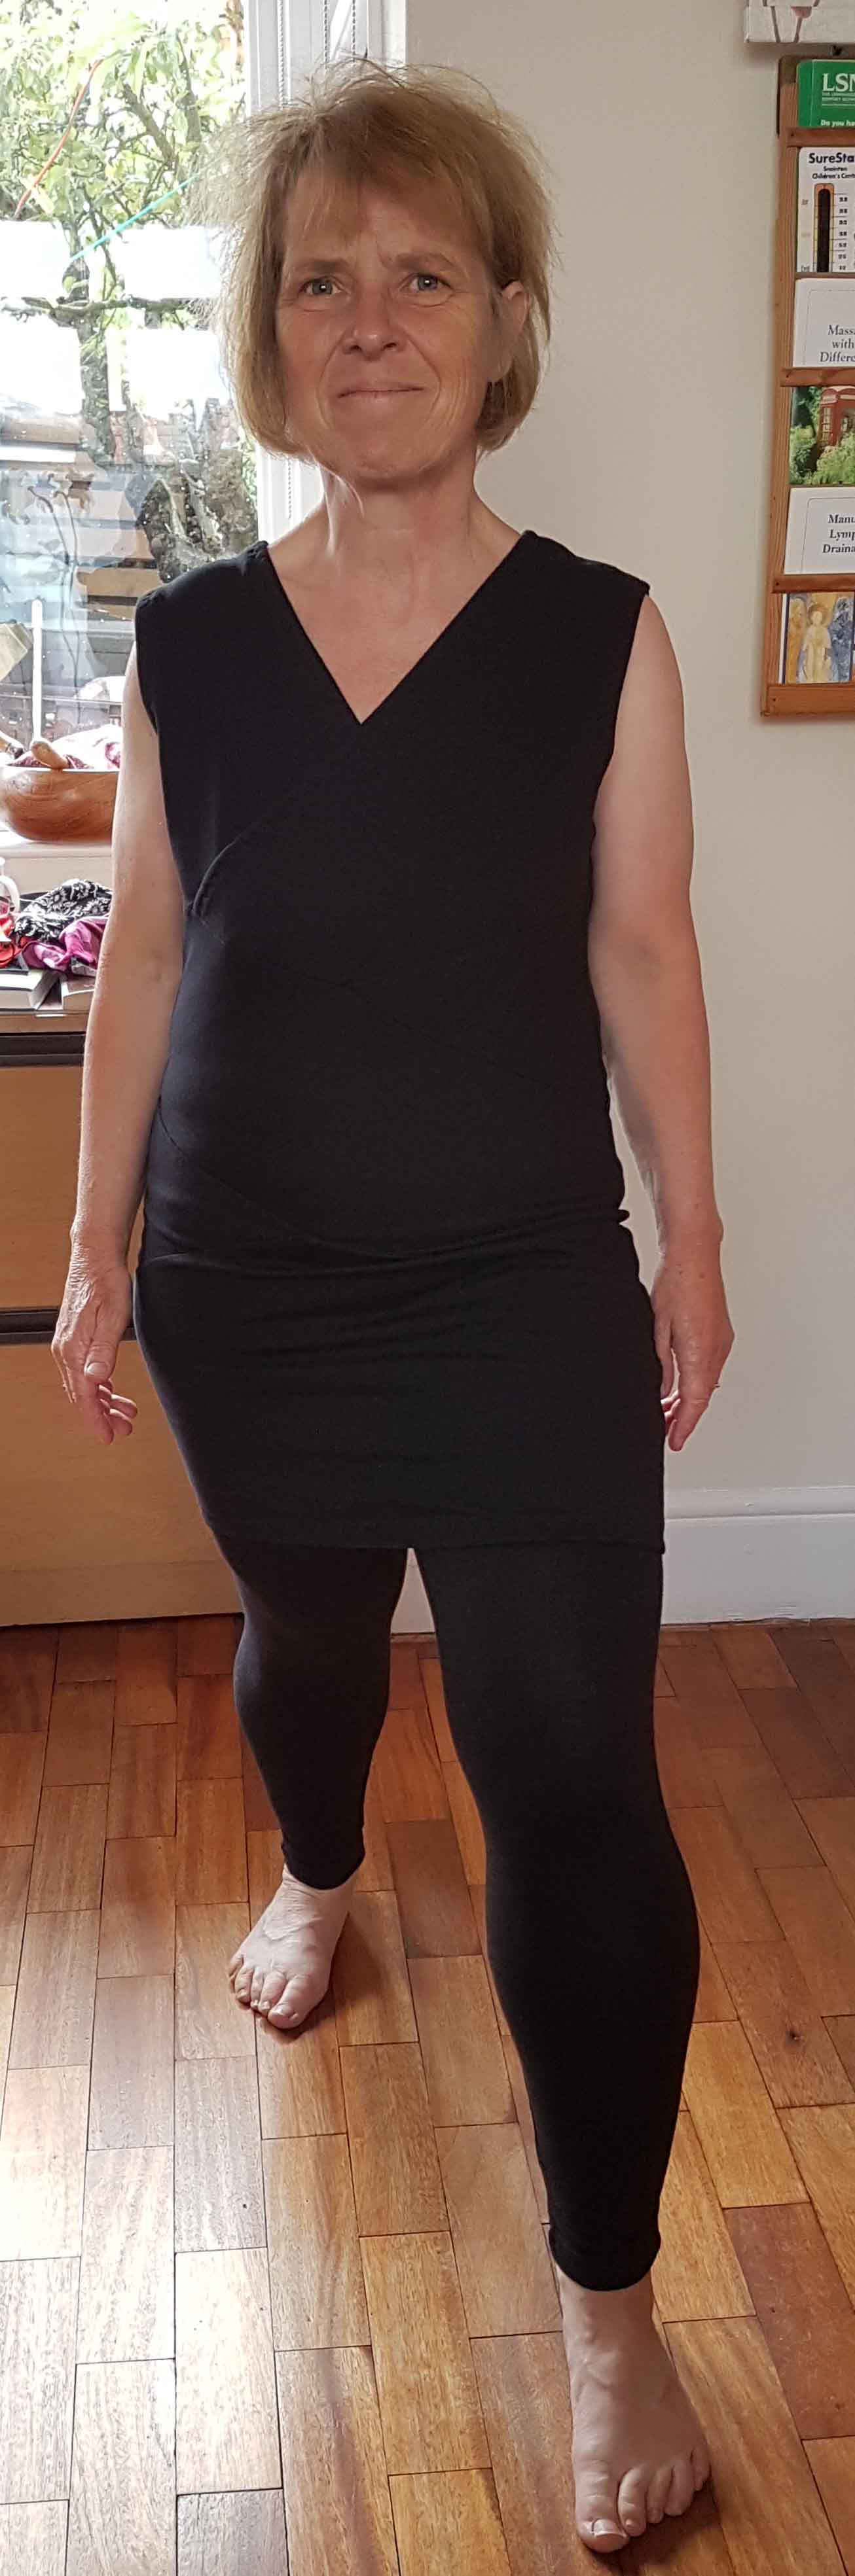
Start with standing, both legs shoulder width apart. Unlock your knees, lift up your chest, and find a comfortable stance. Notice how your feet touch the floor - how is the weight distributed: more on the front or back, both sides evenly; which part of your feet touches the floor, what can you feel, do you feel stable ... Make a mental note.

The first tip involves a tennis ball and a carpet or yoga matt so that the ball does not roll away. As an assessment bend forwards as if your hands want to touch the floor, legs straight but knees unlocked. Make a note how far you can reach. Come back up. Roll a tennis ball under your feet. Spend time on each foot, roll the arches, the heel, the ball of your foot. You can stand, use it as a balance exercise or hold on, or you can sit down. You can vary the pressure, it should be comfortable and feel good. After a couple of minutes on each foot, bend forwards again and notice how far you can go down now. You might be able to reach a little further. The reason for that is that the sole of the foot is part of a chain of muscles at the back of the body. This also works the other way - stretching the back of the body will also help your feet. So will moving your ankles. You might remember the slow pumping action of your feet as thrombosis prophylaxis (prevention) when you have been immobilised. Still good to do when you are spending too much time in front of a screen.
A further stretch for the calf, and thus the sole of the foot, is to stand with your legs a couple of steps apart, lean forward and bend into your front leg while keeping the back leg straight. Experiment with the position of your back foot, you will stretch different parts of the leg depending on how far it is turned out. Do the other leg.
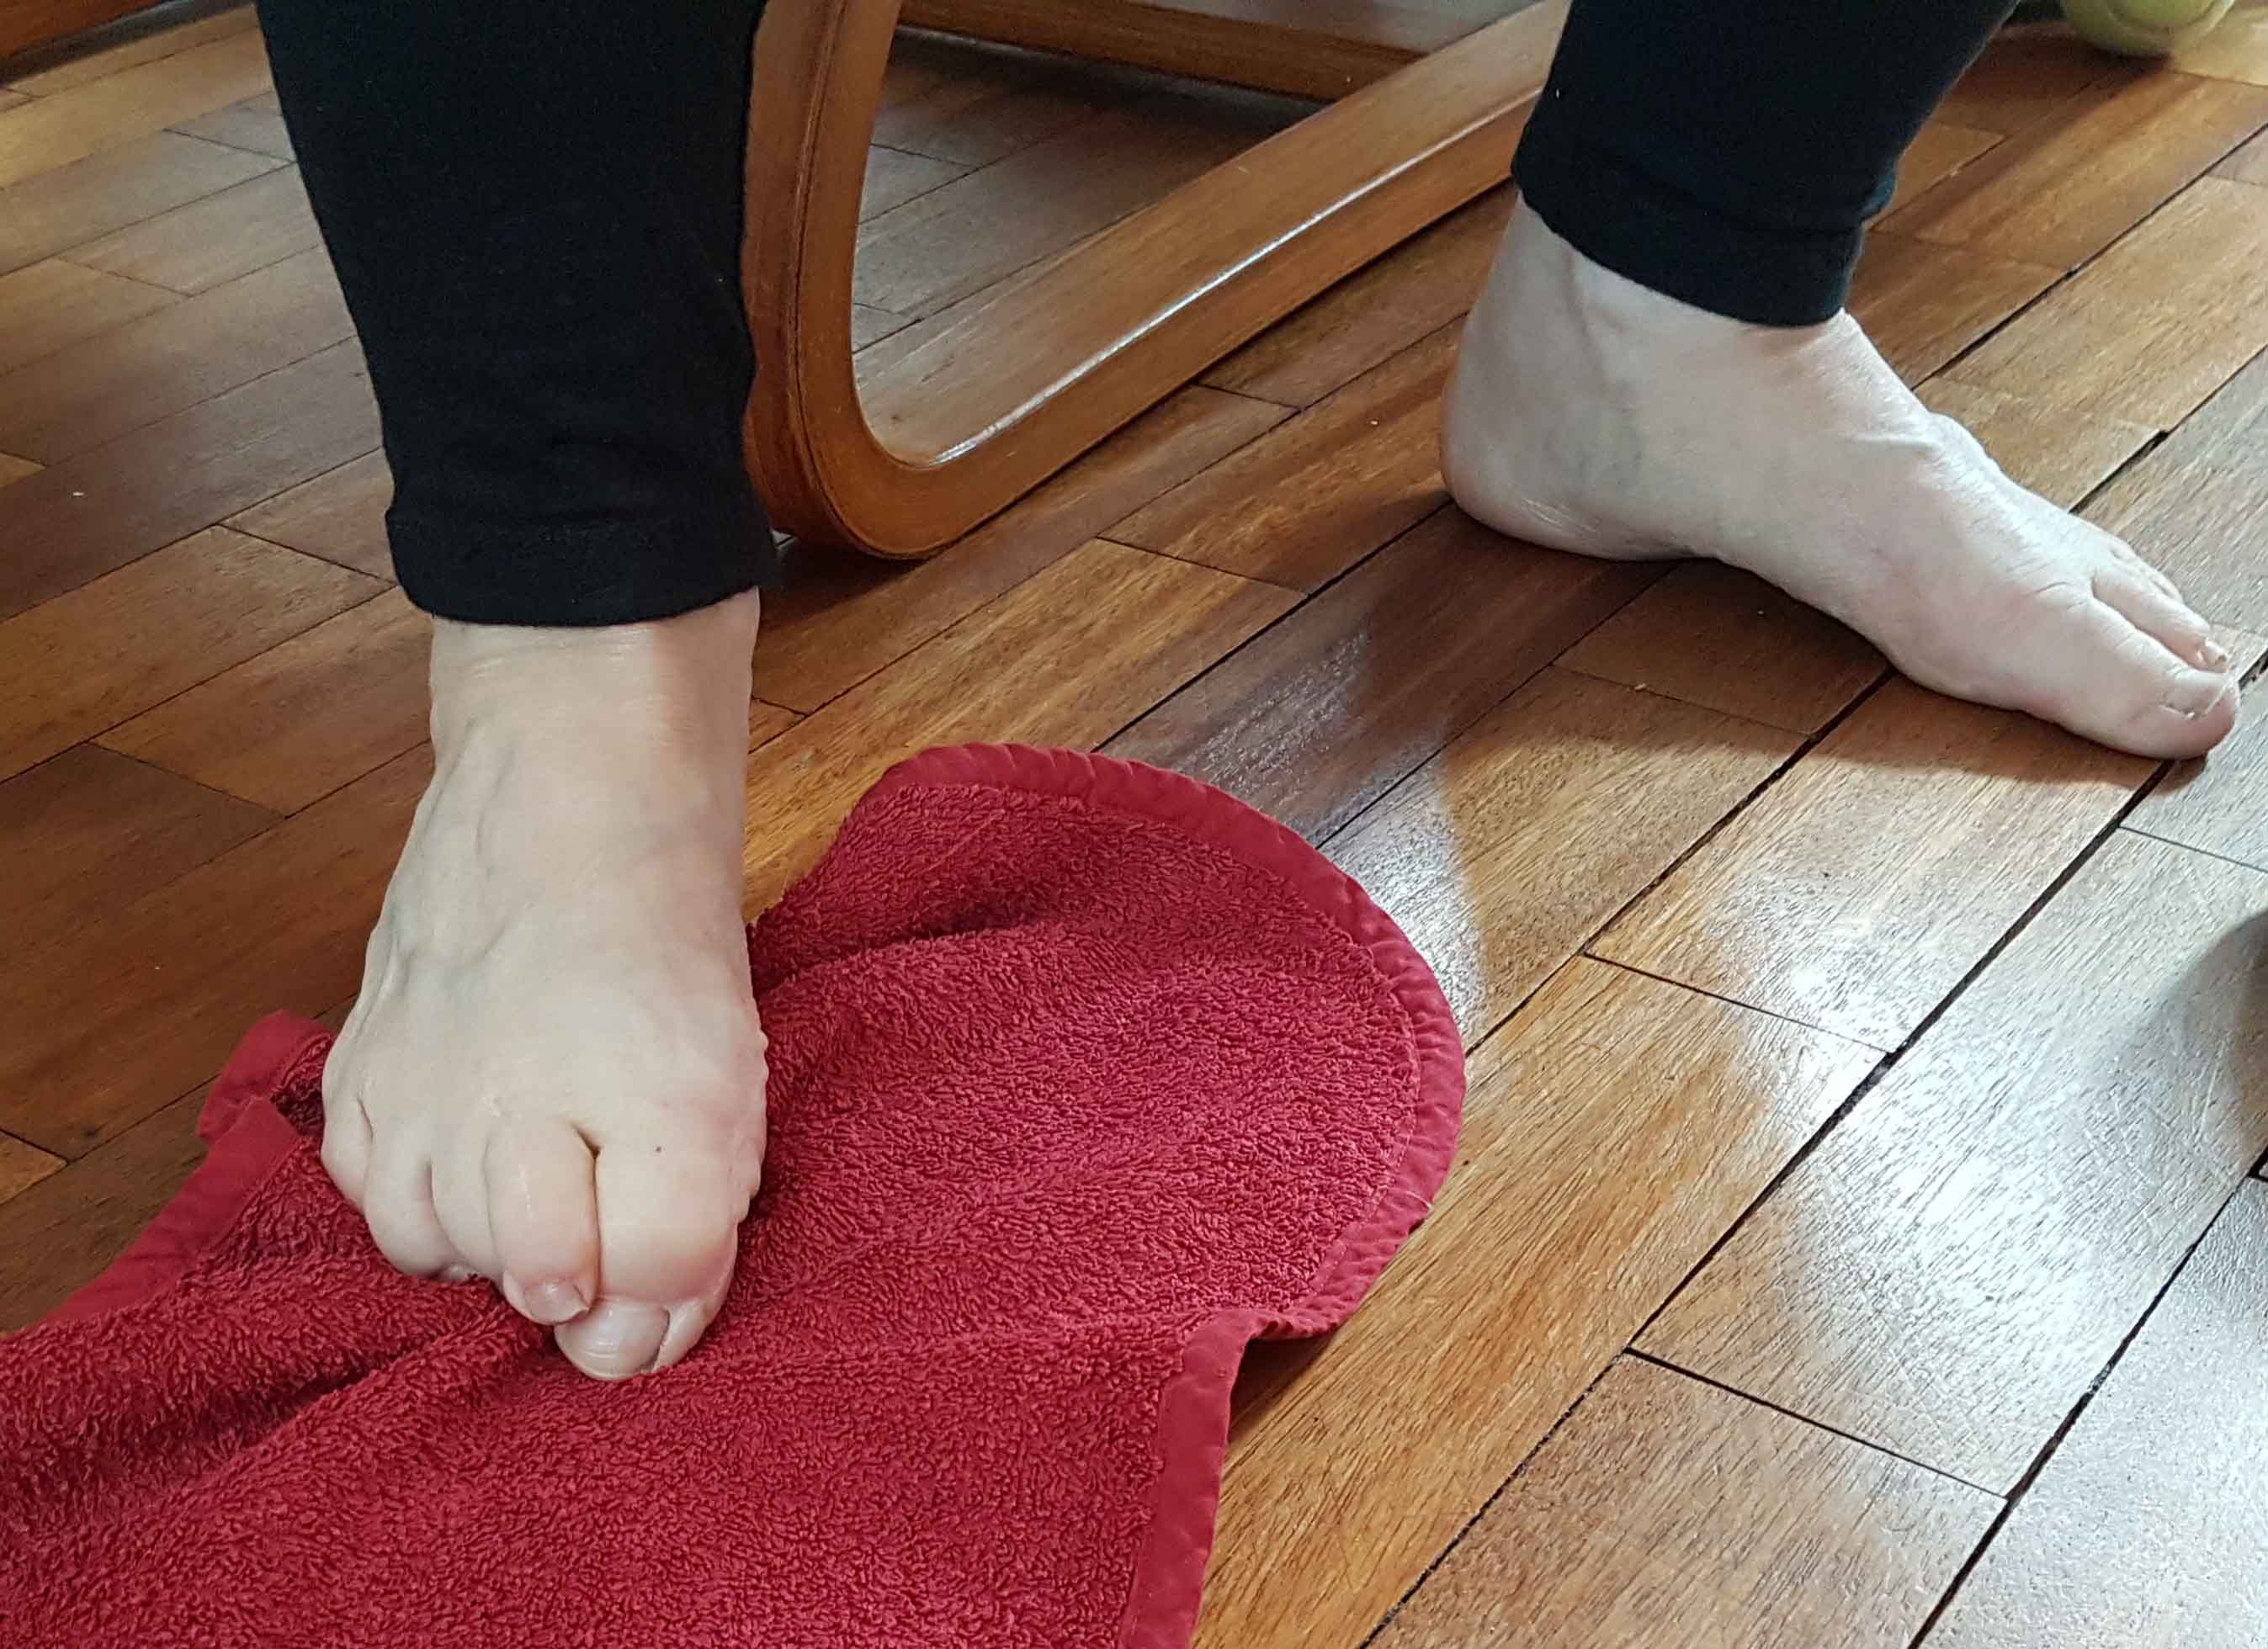
Put your towel on the floor with some creases in it. Grab it with your toes, and move it towards you, bit by bit. You can also lift it up.
A fantastic stretch for (the prevention of) plantar fasciitis (pain
in the heel and/or arch of foot, worse first thing in the morning)
involves the stairs, I would recommend you use the bottom step.

Stand on
it and keep your legs straight but unlocked. Put the ball of one foot
on the edge of the step and let the heel sink down. Hold the stretch for
at least twelve seconds and breathe. For strengthening your feet you
can lift up and go onto your toes, and then back down again. Switch over
to the other foot. You can also stretch both feet at the same time.
To finish, stand with both feet shoulder width apart, and notice how you feel now. Is there any difference? Perhaps conclude this session with a few belly breaths and a thank you to the earth that keeps supporting us.
This week's top tip was going to be "book", and I think it still is, but a truncated version.
I was hoping to go back to working "hands on" at the 6th of July, but
the announcement by the prime minister on Tuesday 23rd July cast some
doubt on that. Basically, I am waiting to hear whether I am categorised
under hairdresser, they are back from the 4th July, or nail bars, not
yet back.
So my top tip is: book your hairdressing appointment, your meal out and your drink in the pub.
This week's top tip is short: breathe!
You might say, of course I am breathing, otherwise I would not be alive. So true, and I am glad you do and are alive.
There are many reasons why we might not breathe as easily as we could do, fear, stress, anxiety, recovery from Covid-19, asthma or screen time are a few that spring to mind. You can use previous top tips to free up the ribs and the back.
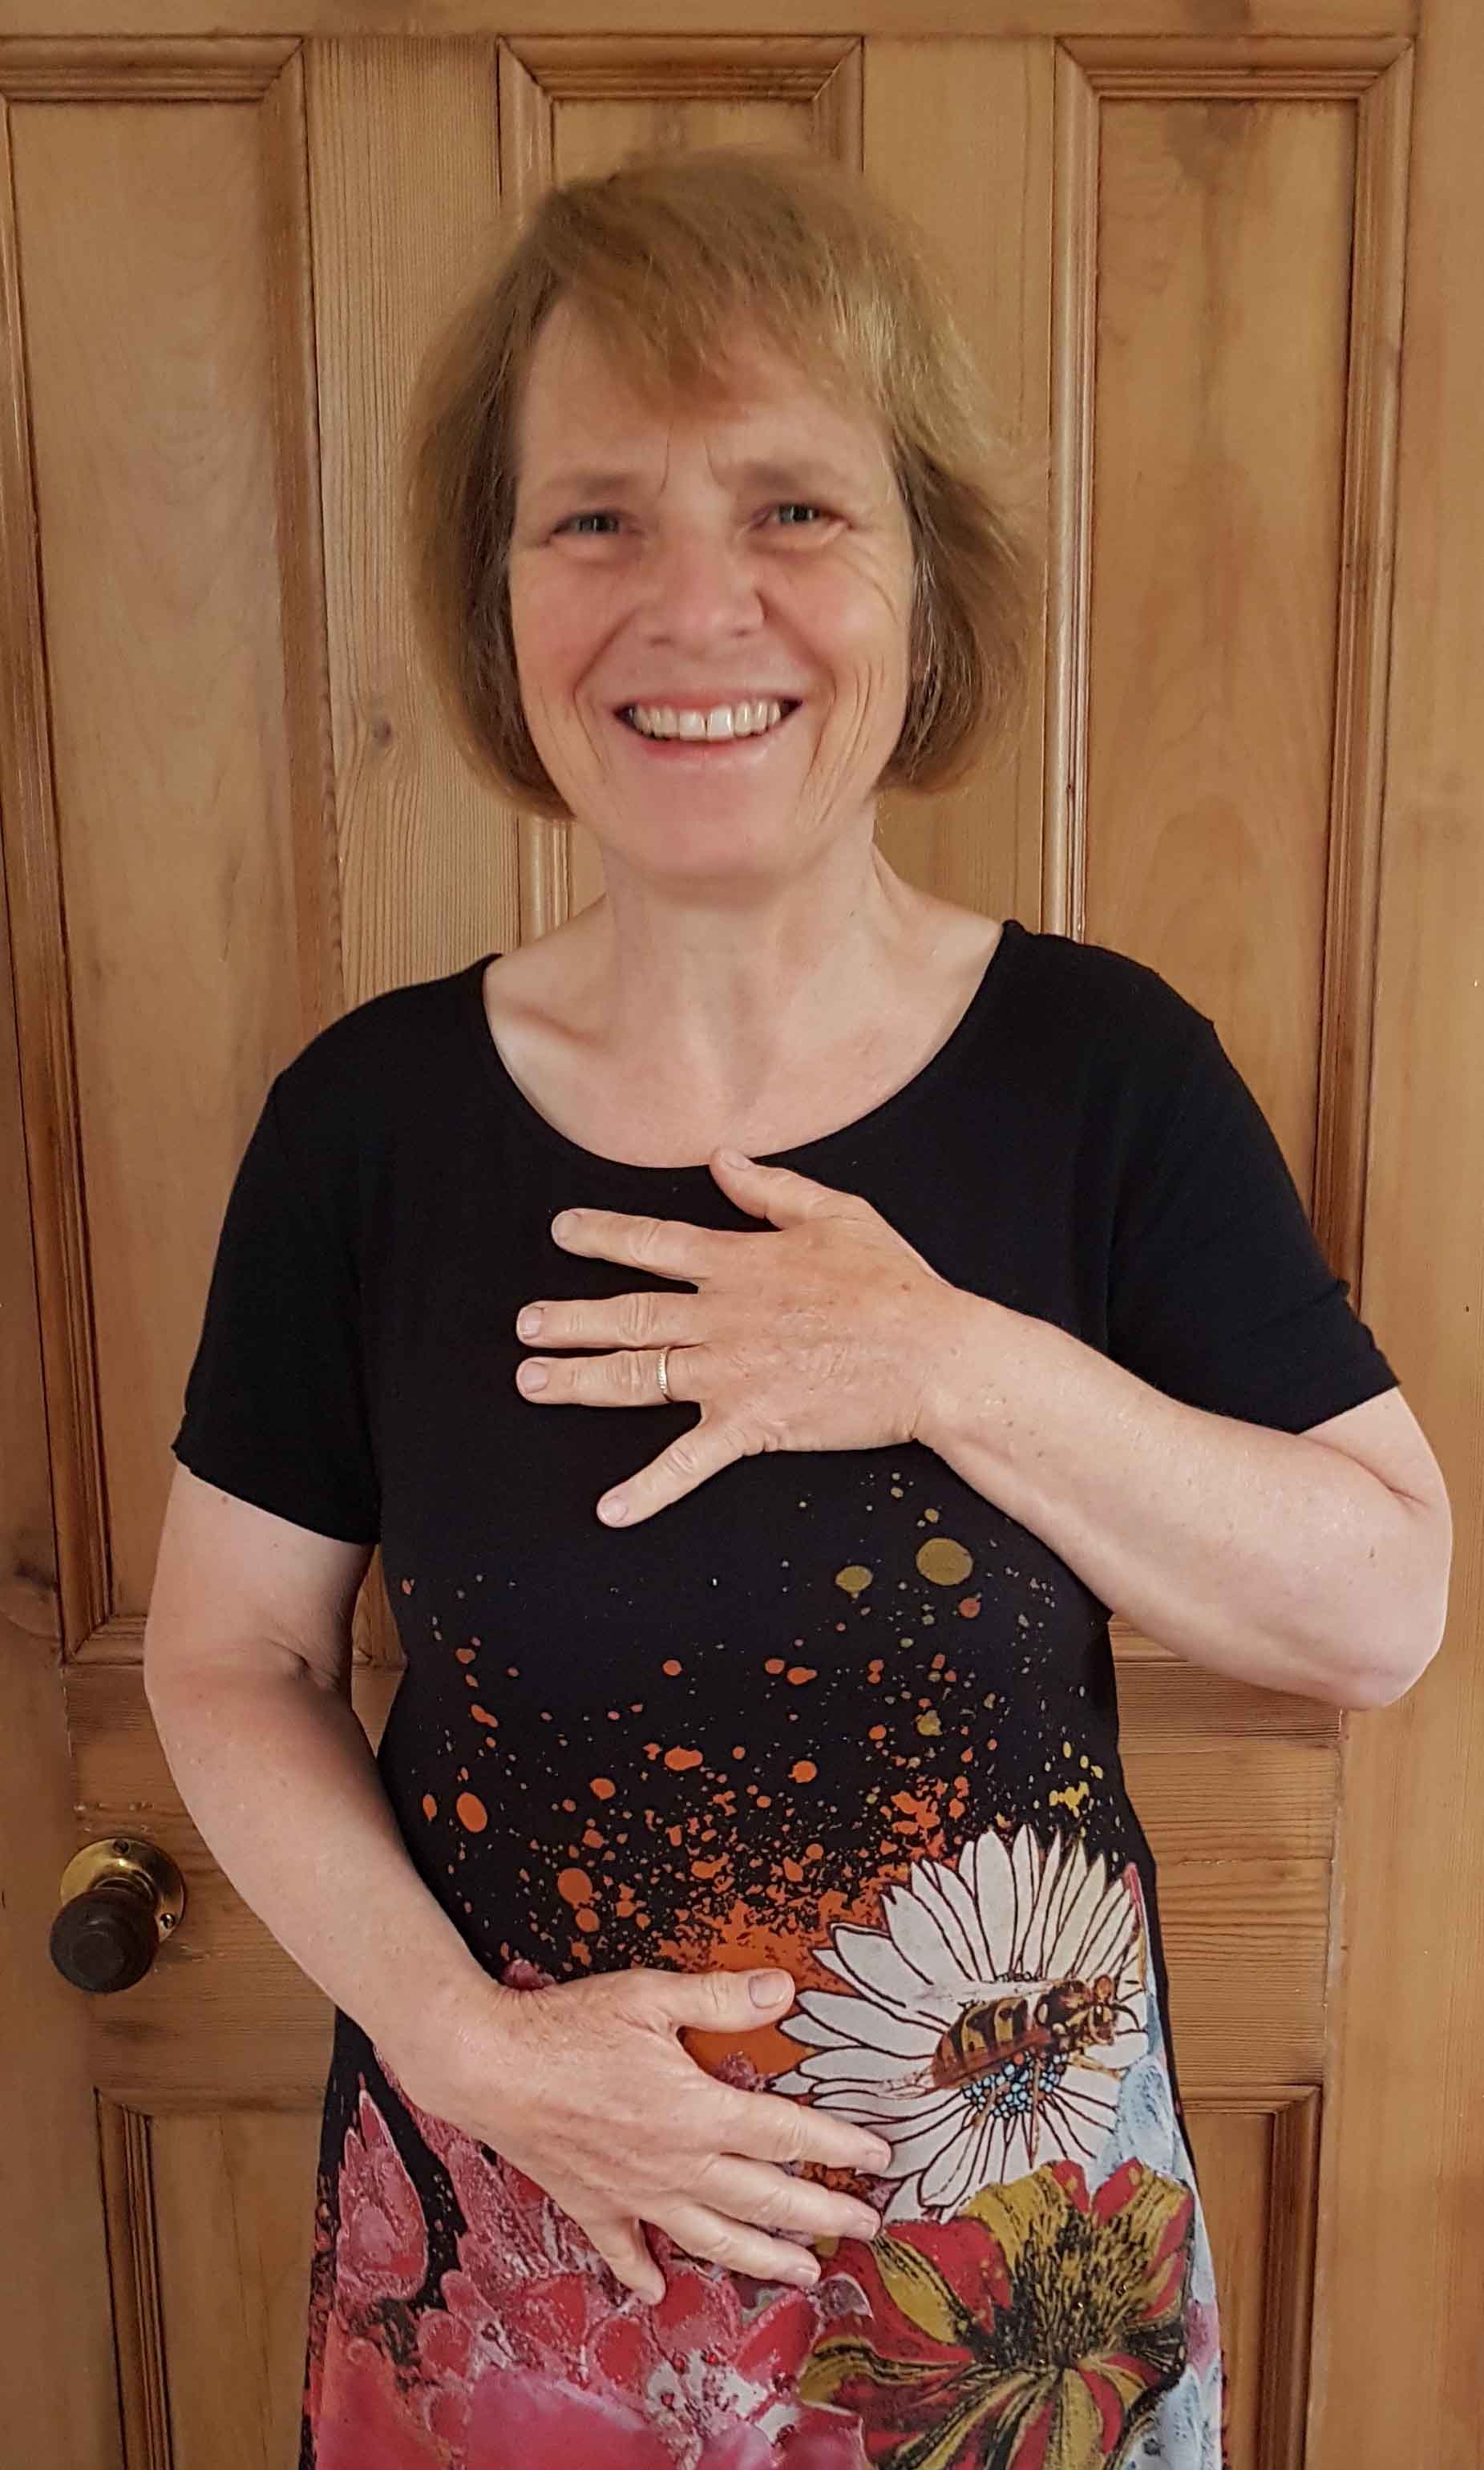
Start with putting one hand on your belly and the other on your chest and notice how your hands move with your breath. Do they both move about the same, or one more than the other? Play around with your breath, encourage one hand to have more movement, then the other, then both the same. How does that feel?
Now put one hand on your belly and the other on your back. Do you feel the movement, how the hands move apart and together? Now follow the movement of your breath with your hands by providing a little bit of resistance. If you can reach, you can do the same on your chest.
Next put your hands on the side of your ribs and notice how they
move with each breath. Is the movement even on both sides? Again,
provide a little bit of resistance with your hands.
Out of curiosity, put one hand just above your breast bone and
one on your pubic bone. Is there any movement in your hands as you
breathe in and out? Imagine that your hands are moving apart, that
your torso lengthens with each in-breath.
Now go back to your starting position, one hand on belly, one on your chest. Notice the movement. Pay attention to the end of your out-breath, perhaps extend it a little. Rest there, wait until your body starts the in-breath, let the air flow in. Feel your breath like a wave, with a pause between each one of them, going on and on and on, let's hope for a long, long time.
Hand massage
Start by rubbing your hands together as if you are washing your hands for the recommenced twenty seconds. You could actually wash your hands or do the actions in a comfortable position. Notice the sensations in your hands. What is their temperature? What does the skin feel like? How do they move?
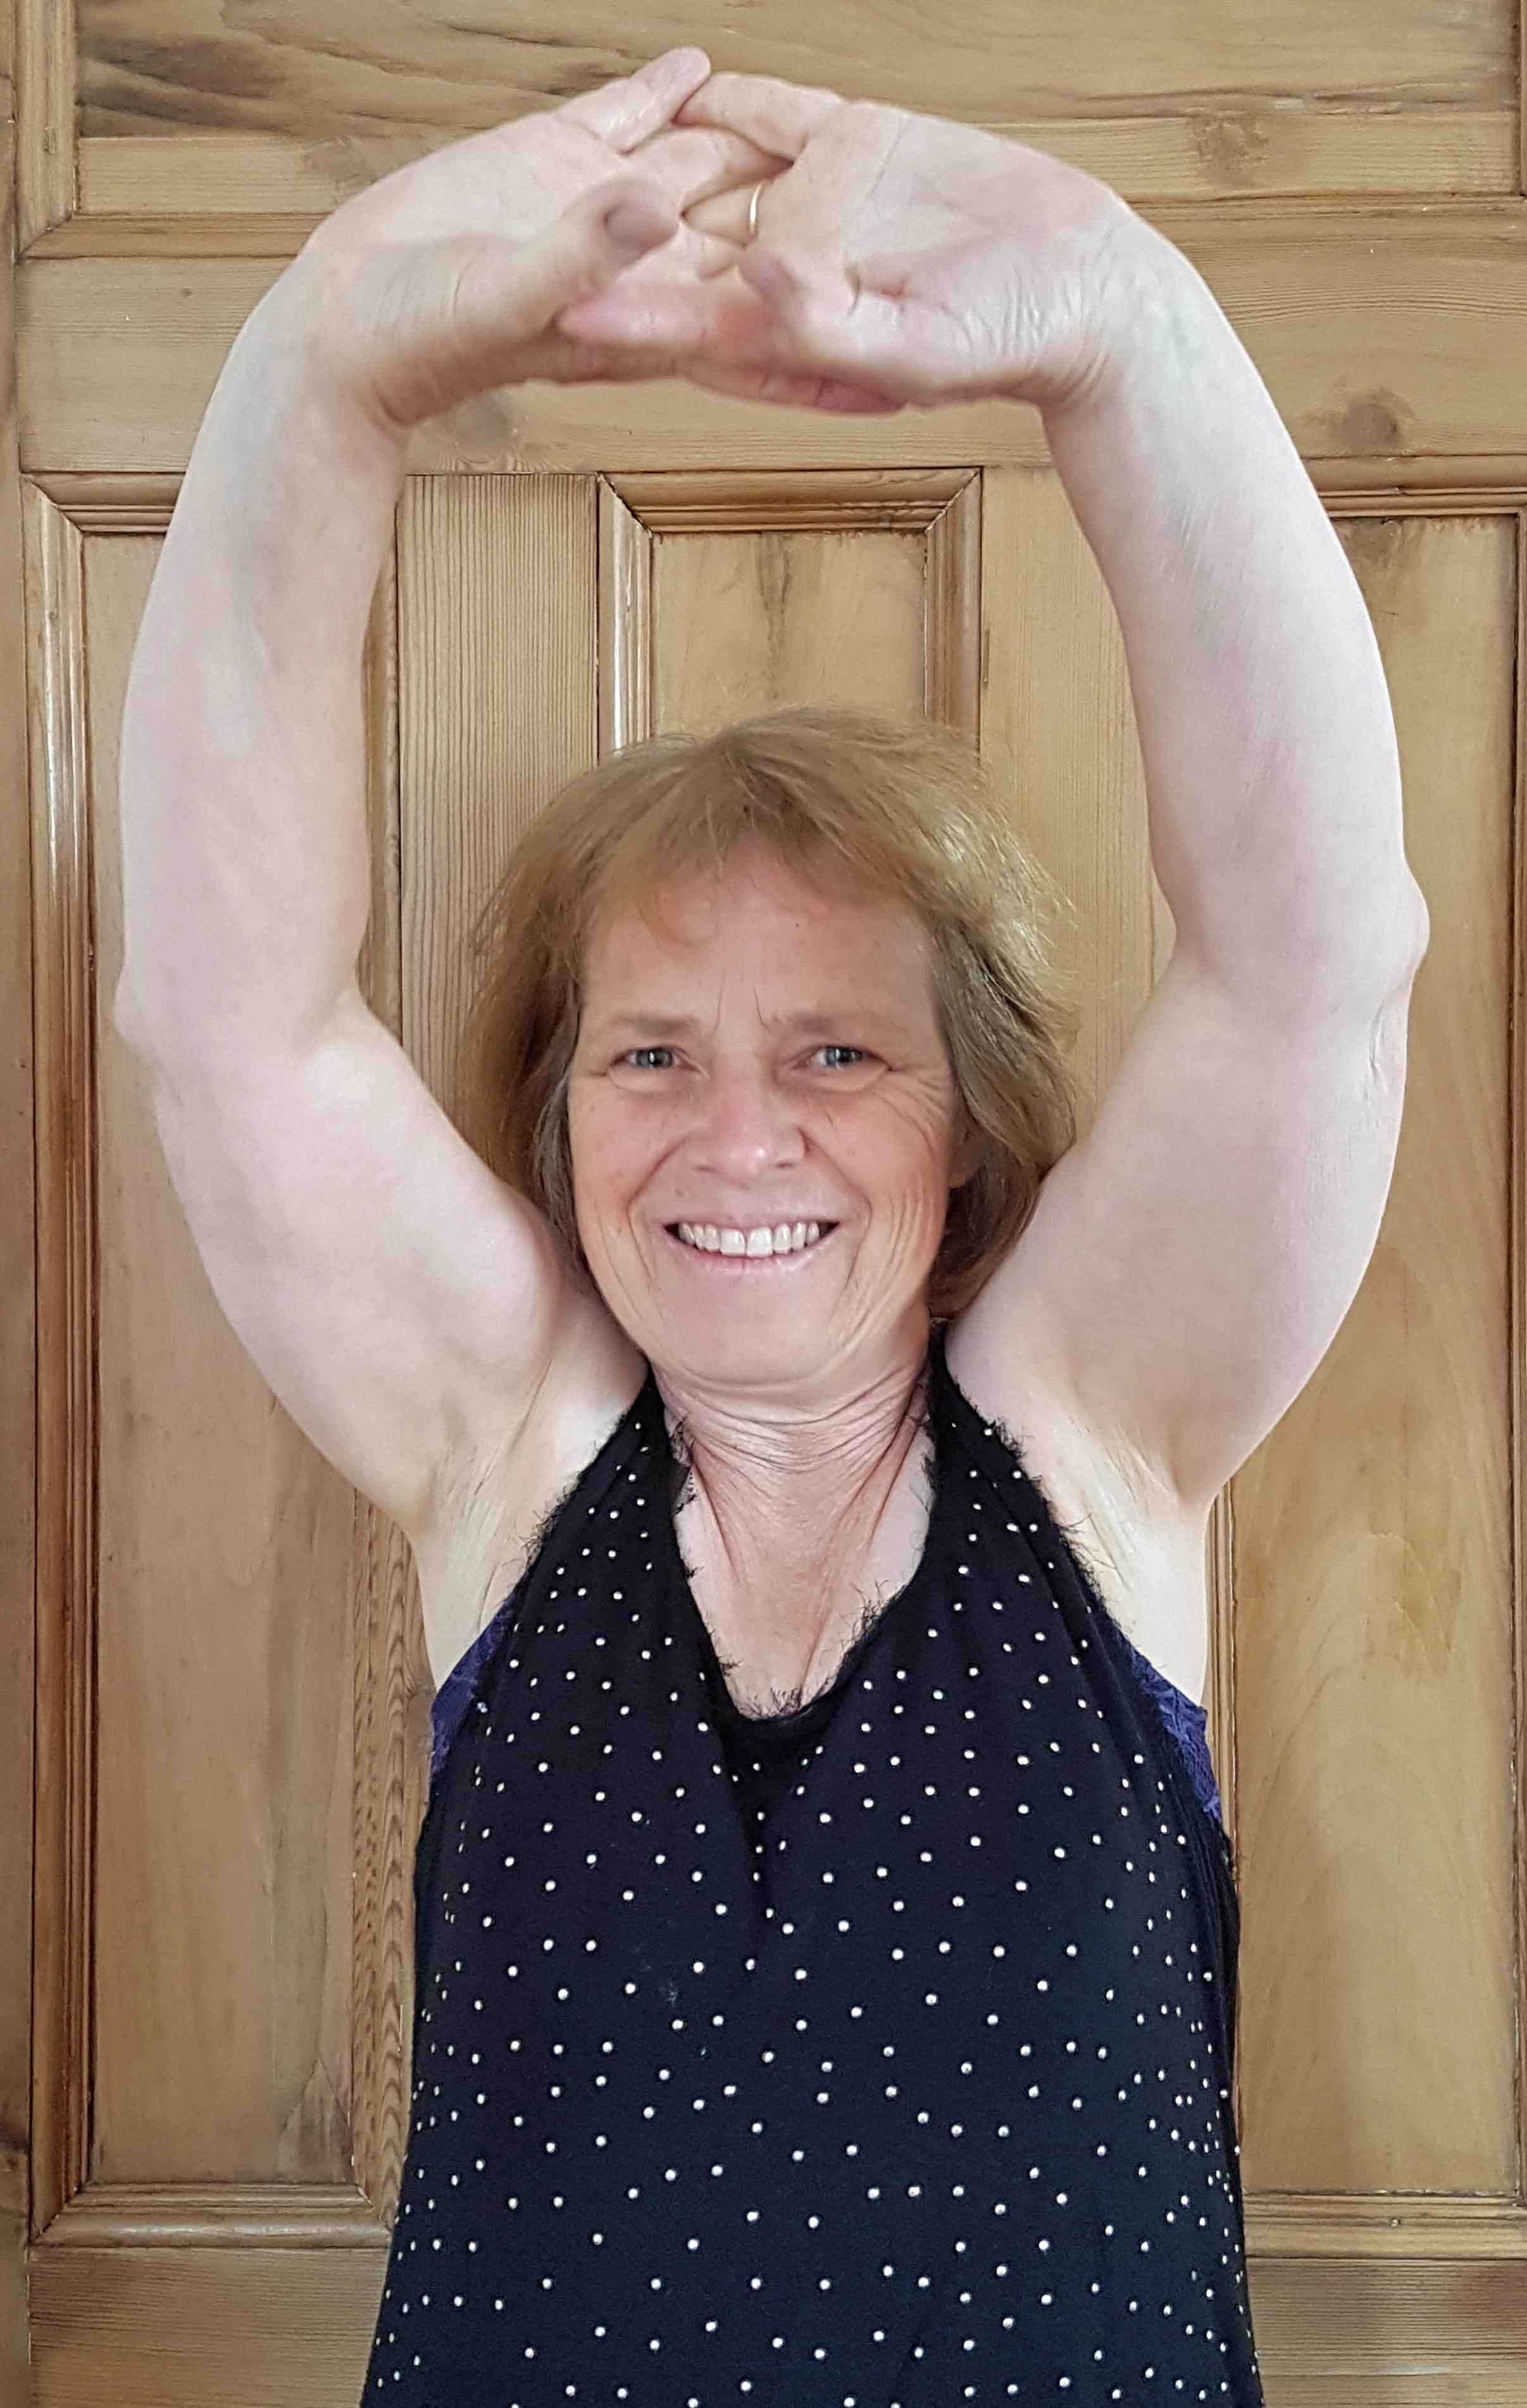
Interlace your fingers, turn your palms away from you and stretch up in a big arch, keeping your arms extended and your palms facing outwards. Interlace your fingers and stretch behind you, see how far you can move your outstretched arms away from your back. Stay tall, don't bend forward. You may even be able to turn your palms away from you with interlaced fingers (I can't).
Make big movements with your hands and wrists, make a fist and extend your fingers as far as you can. Circle your wrists, move them up and down and sideways. Nice and slow and deliberate. Make your movements as smooth as possible.
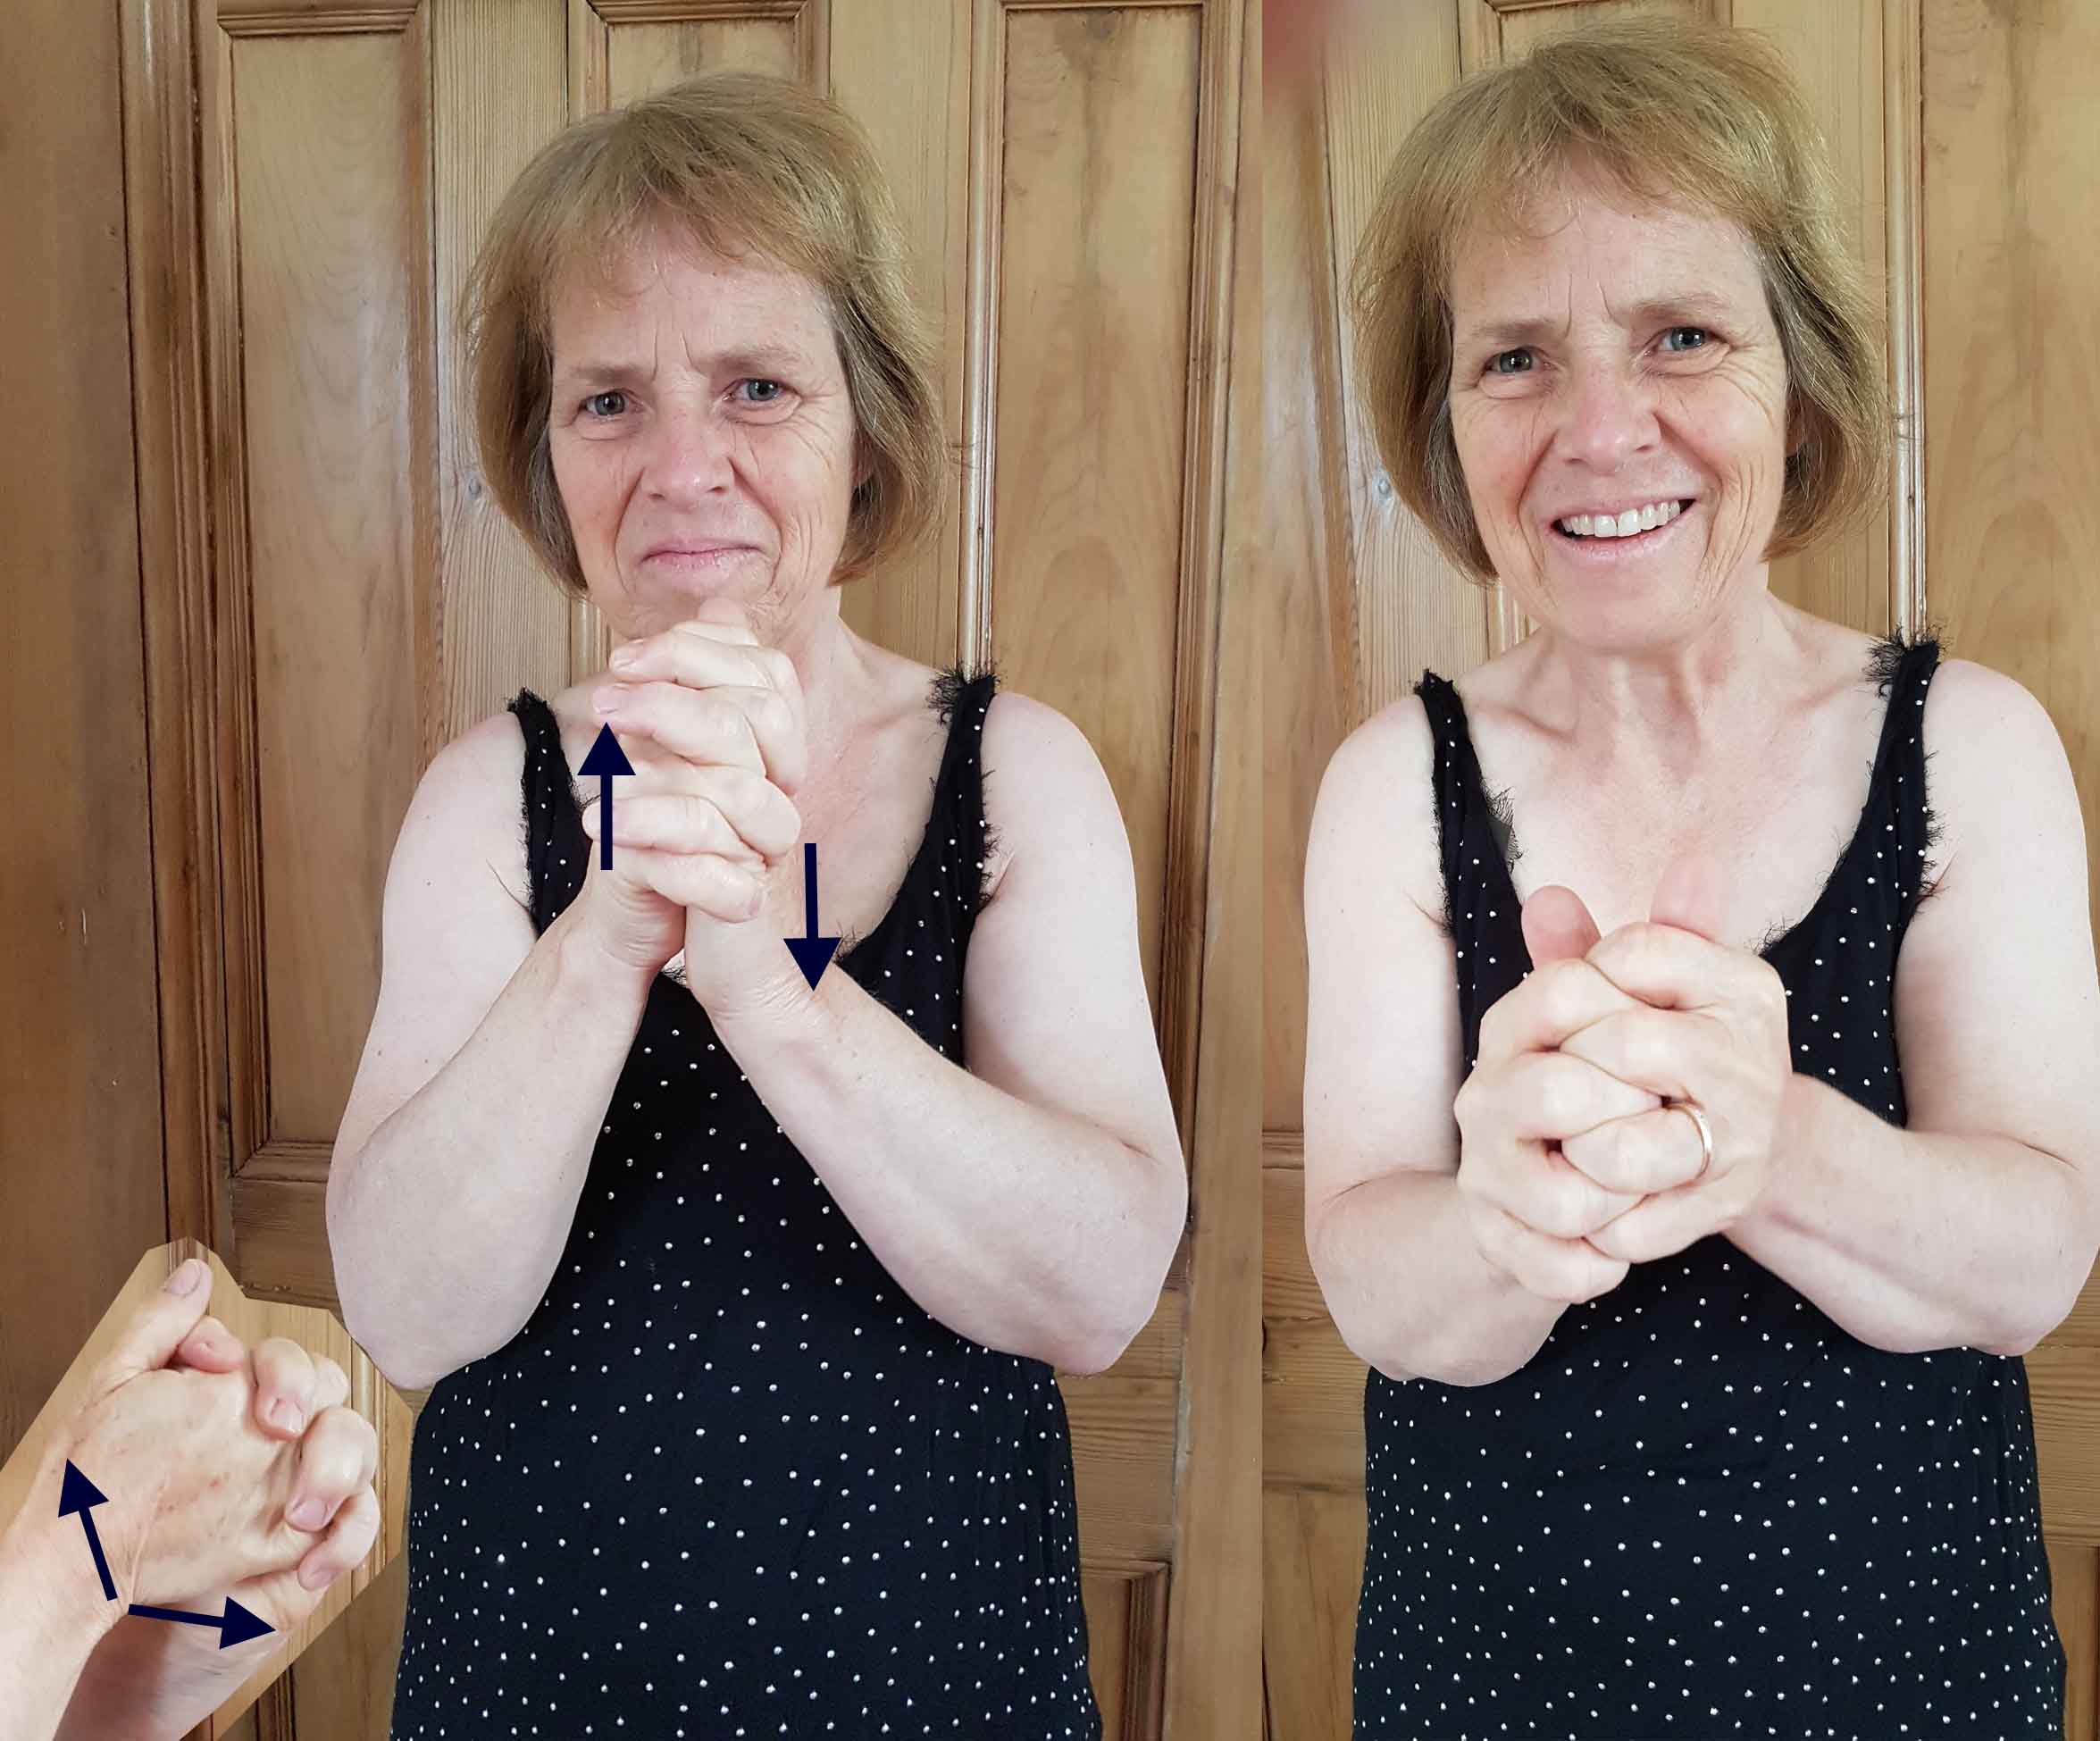
Now interlace your fingers again. Move your palms against each
other as if you want to draw a smile on the heels of your hands.
Now move the palms of your hands backwards and forwards, moving
your wrists and covering the heel and the middle of your palm. Now
gently squeeze the fingers of one hand together and move that hand
slightly so that the fingers of the other hand get a massage. Now
squeeze the fingers of the other hand. Bend your fingers and
interlace your fingers further out and squeeze.
Interlace your fingers the other way and repeat.
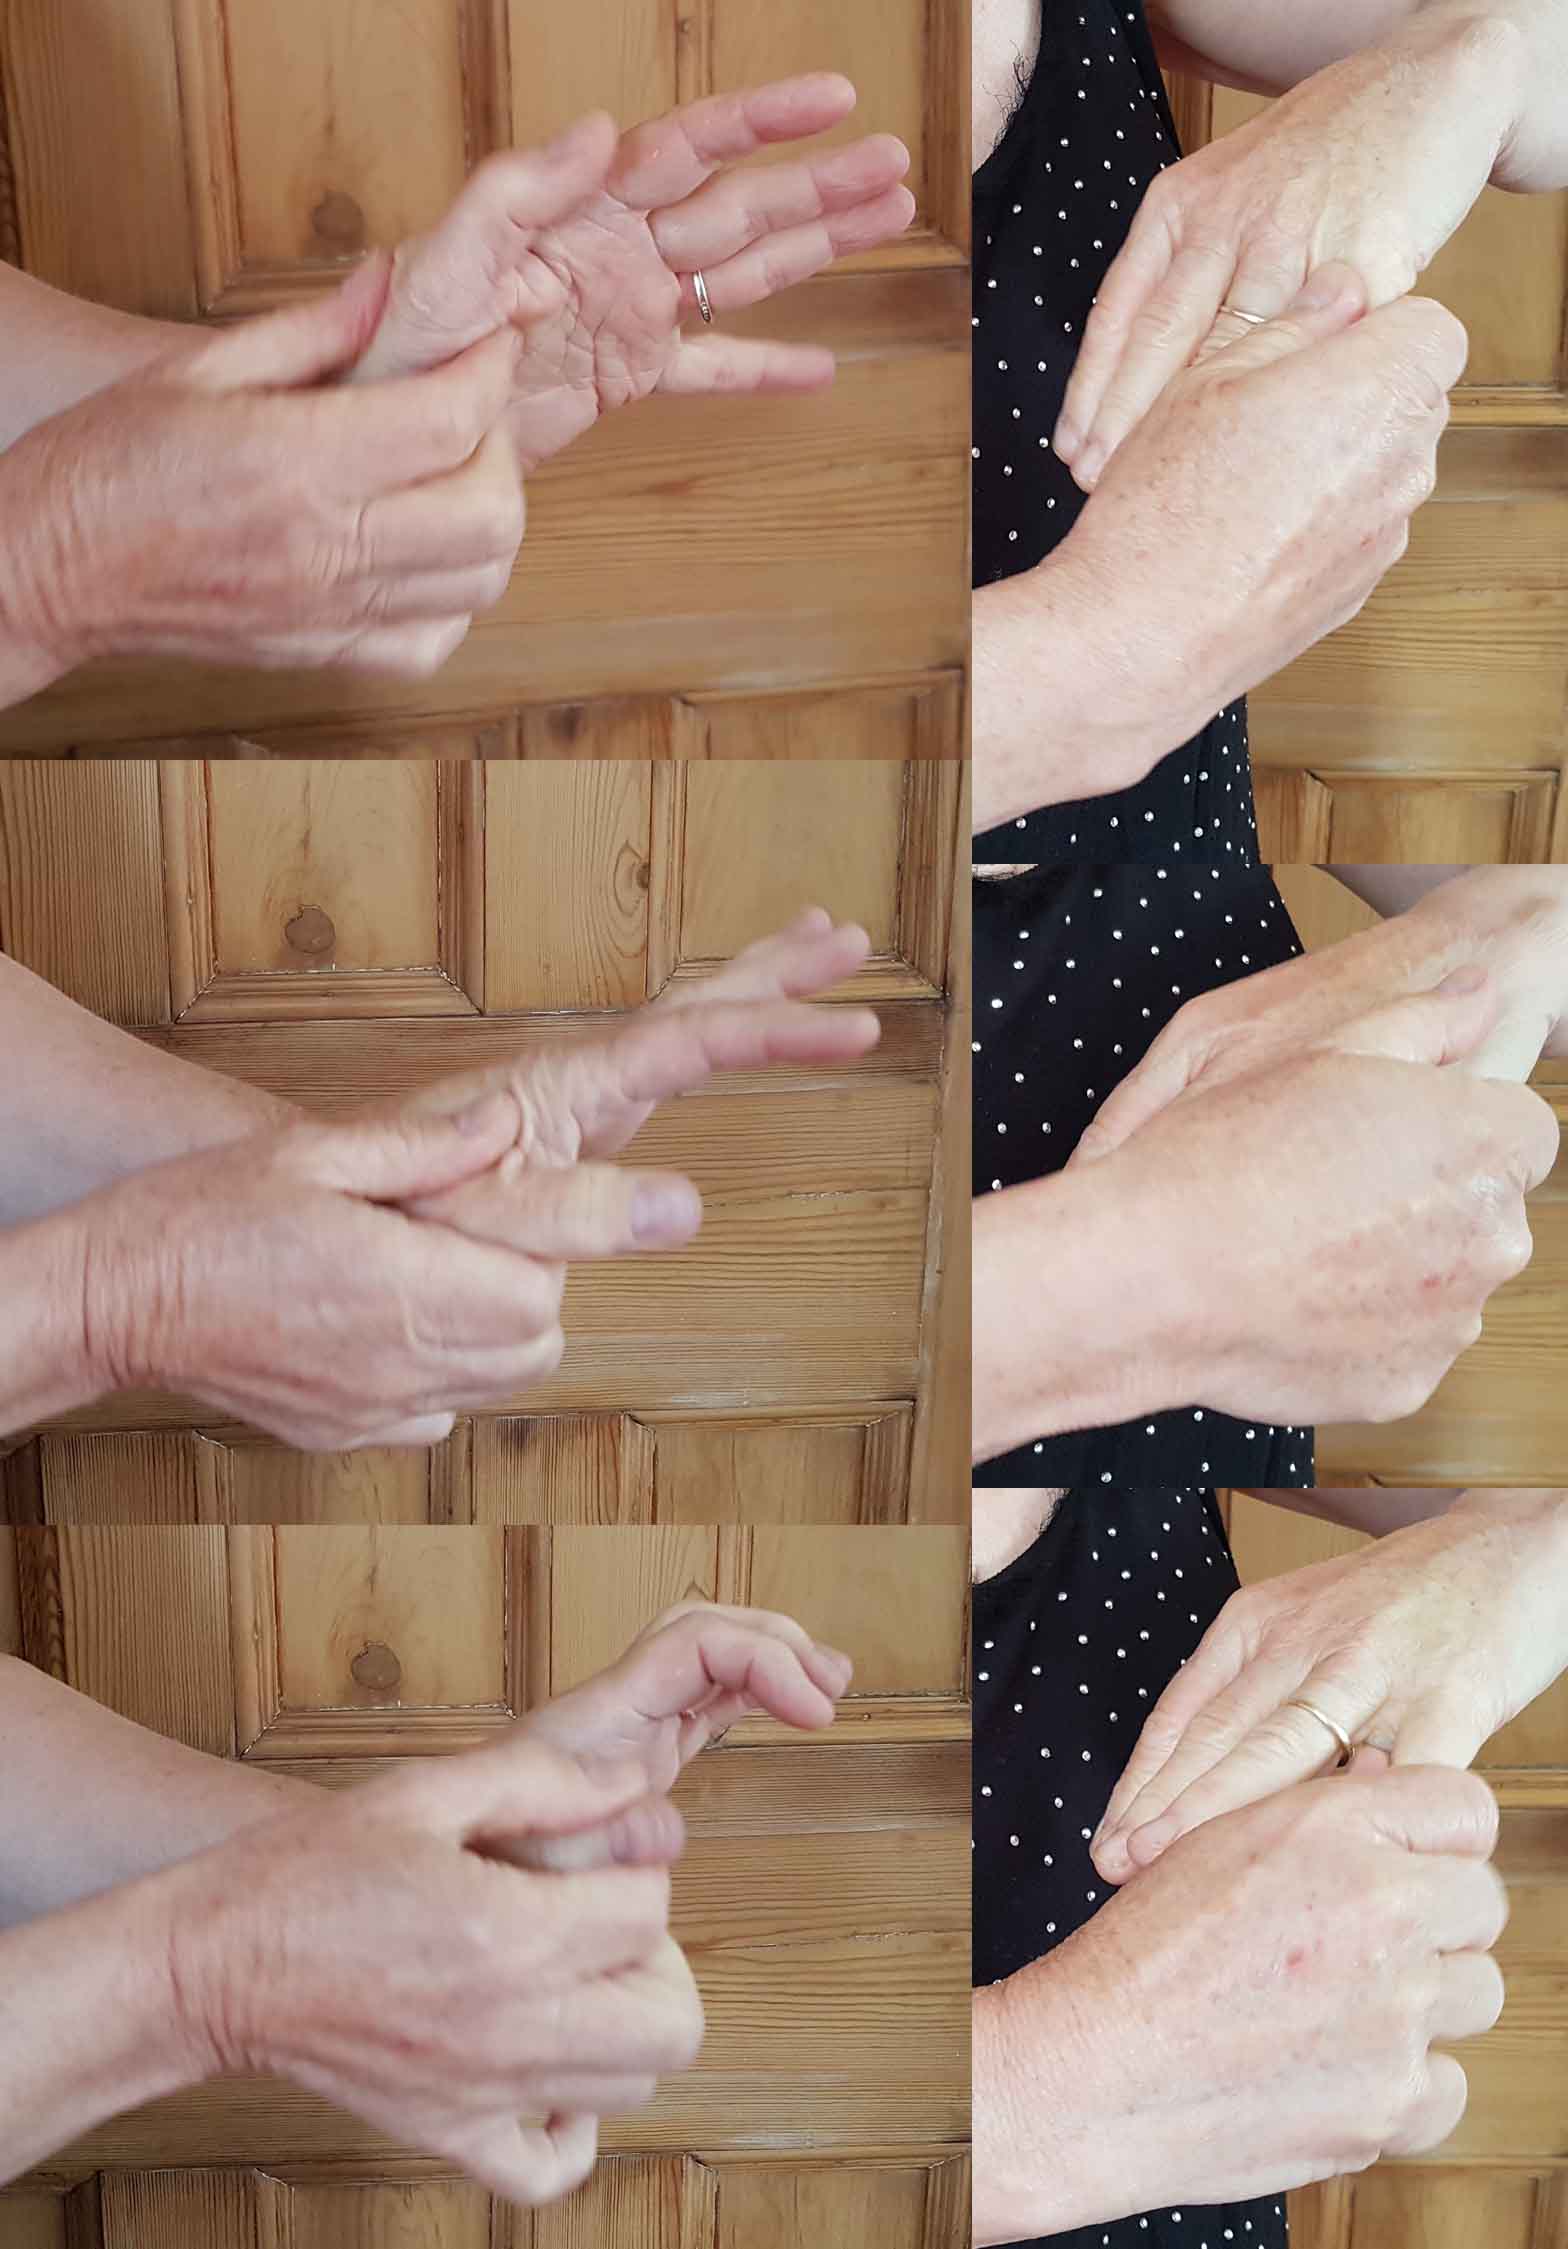
Now give your fingers a massage. You can use cream or oil for this. With each finger start at the wrist, moving to the metacarpal bone towards the knuckle, and then along the digits towards the tip of the finger. Gently mobilise each part, moving up and down, sideways, roll between your fingers. You can give the thumb pad a bit of a squeeze and gently work towards the bone. There is lots of interest to be had. You can spend a lot of time on this.
Finish vigorously stroking your hands from your wrists or even
forearm towards your fingers and beyond.
PS you can also integrate the hand massage from a previous top tip.
Face and scalp massage
Before you start, wash your hands, as you will be touching your
face.
This session is for stretching and relaxation, so you might want to put on some music. You will want to be able to sit comfortably, probably at a table, so that you can rest your elbows while touching your face.
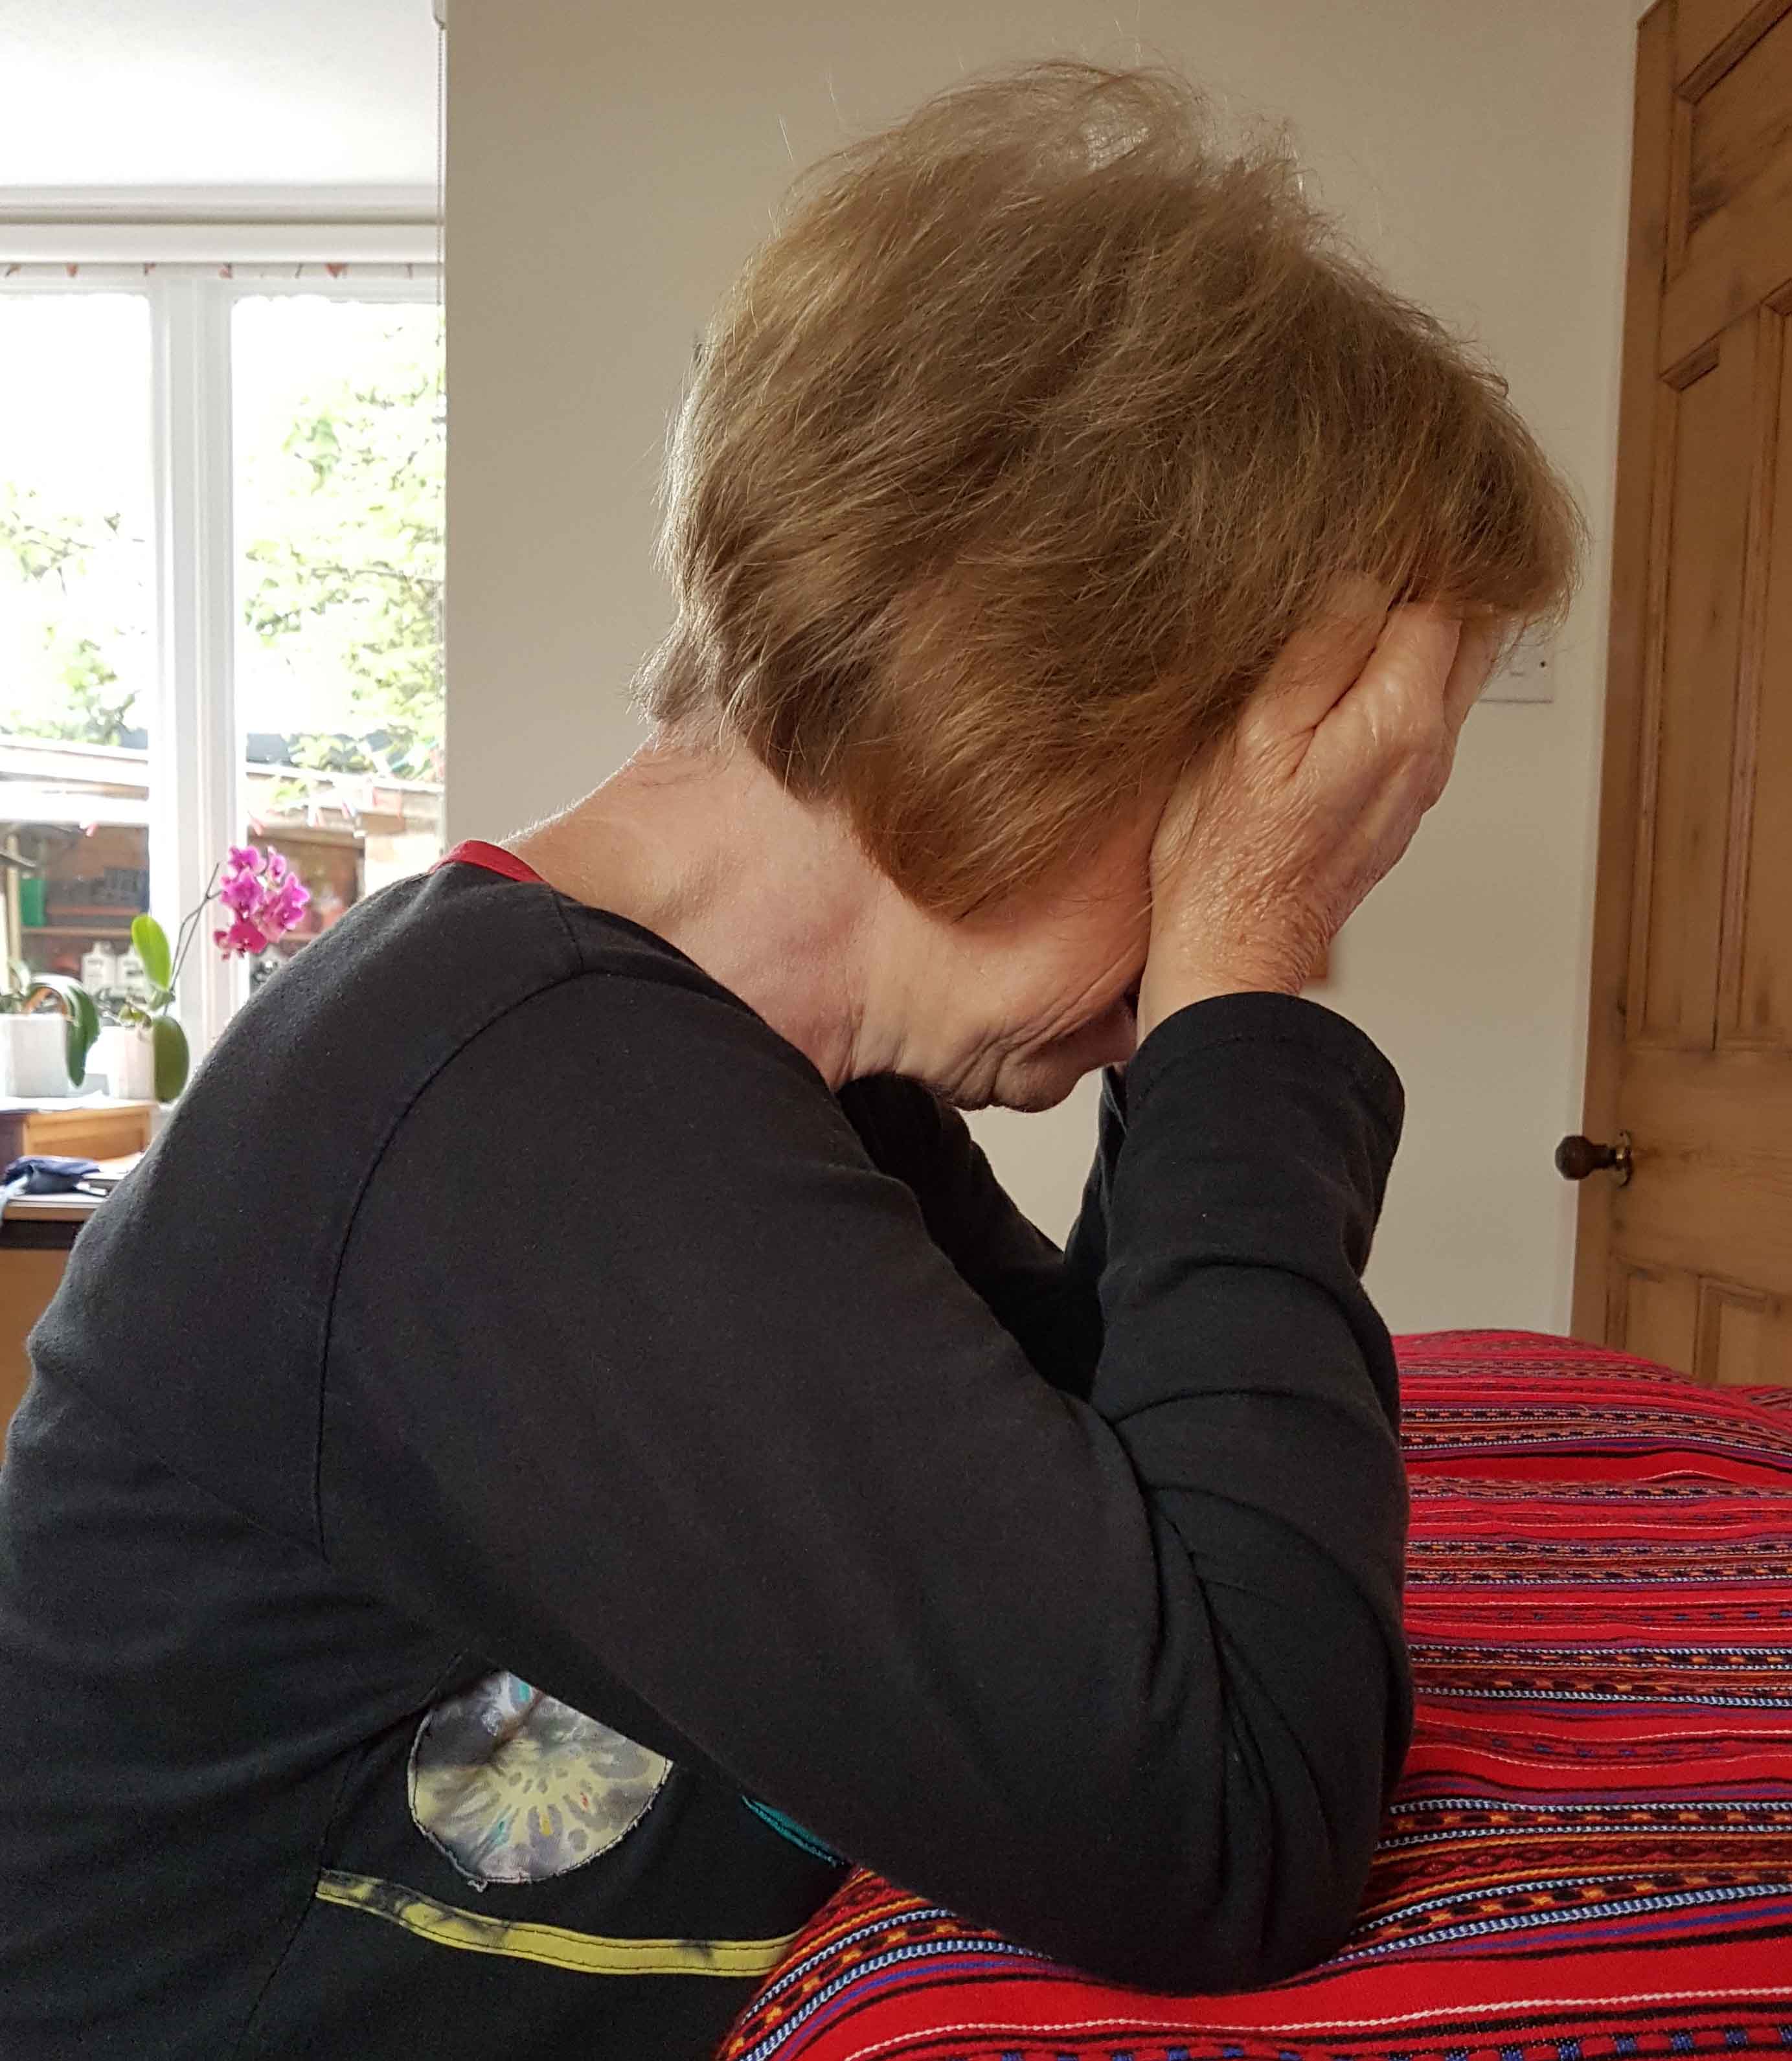
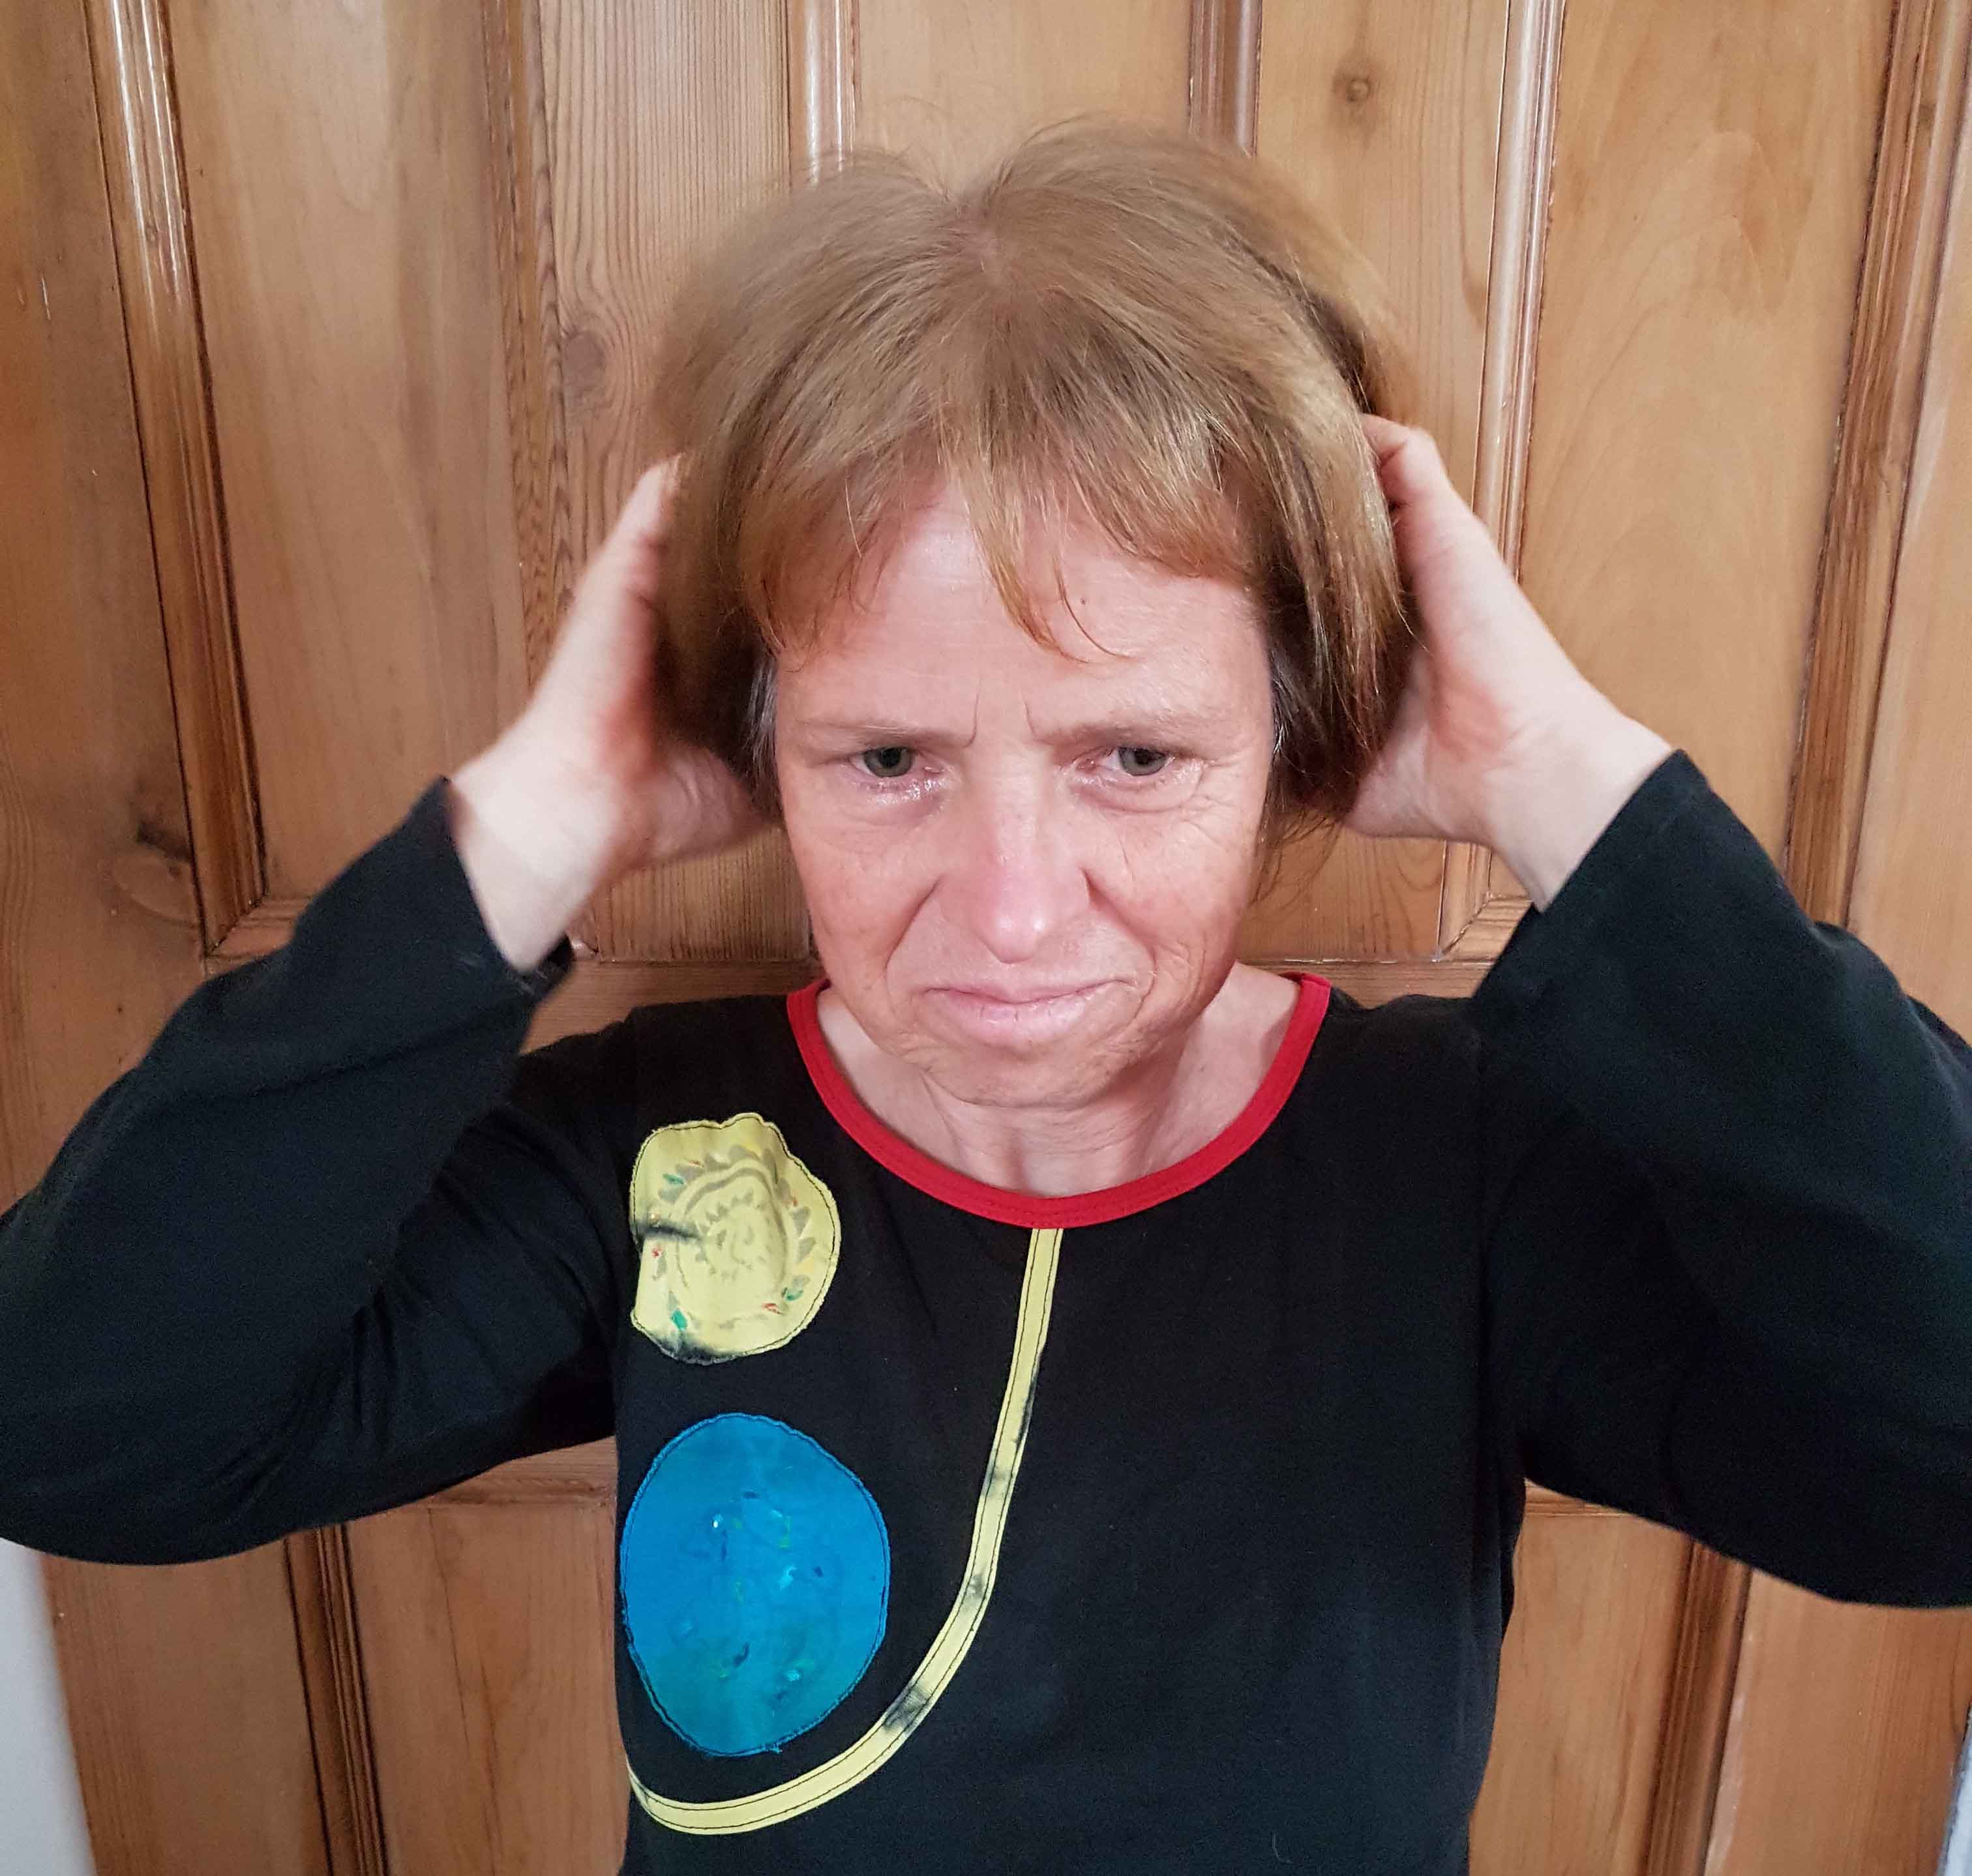
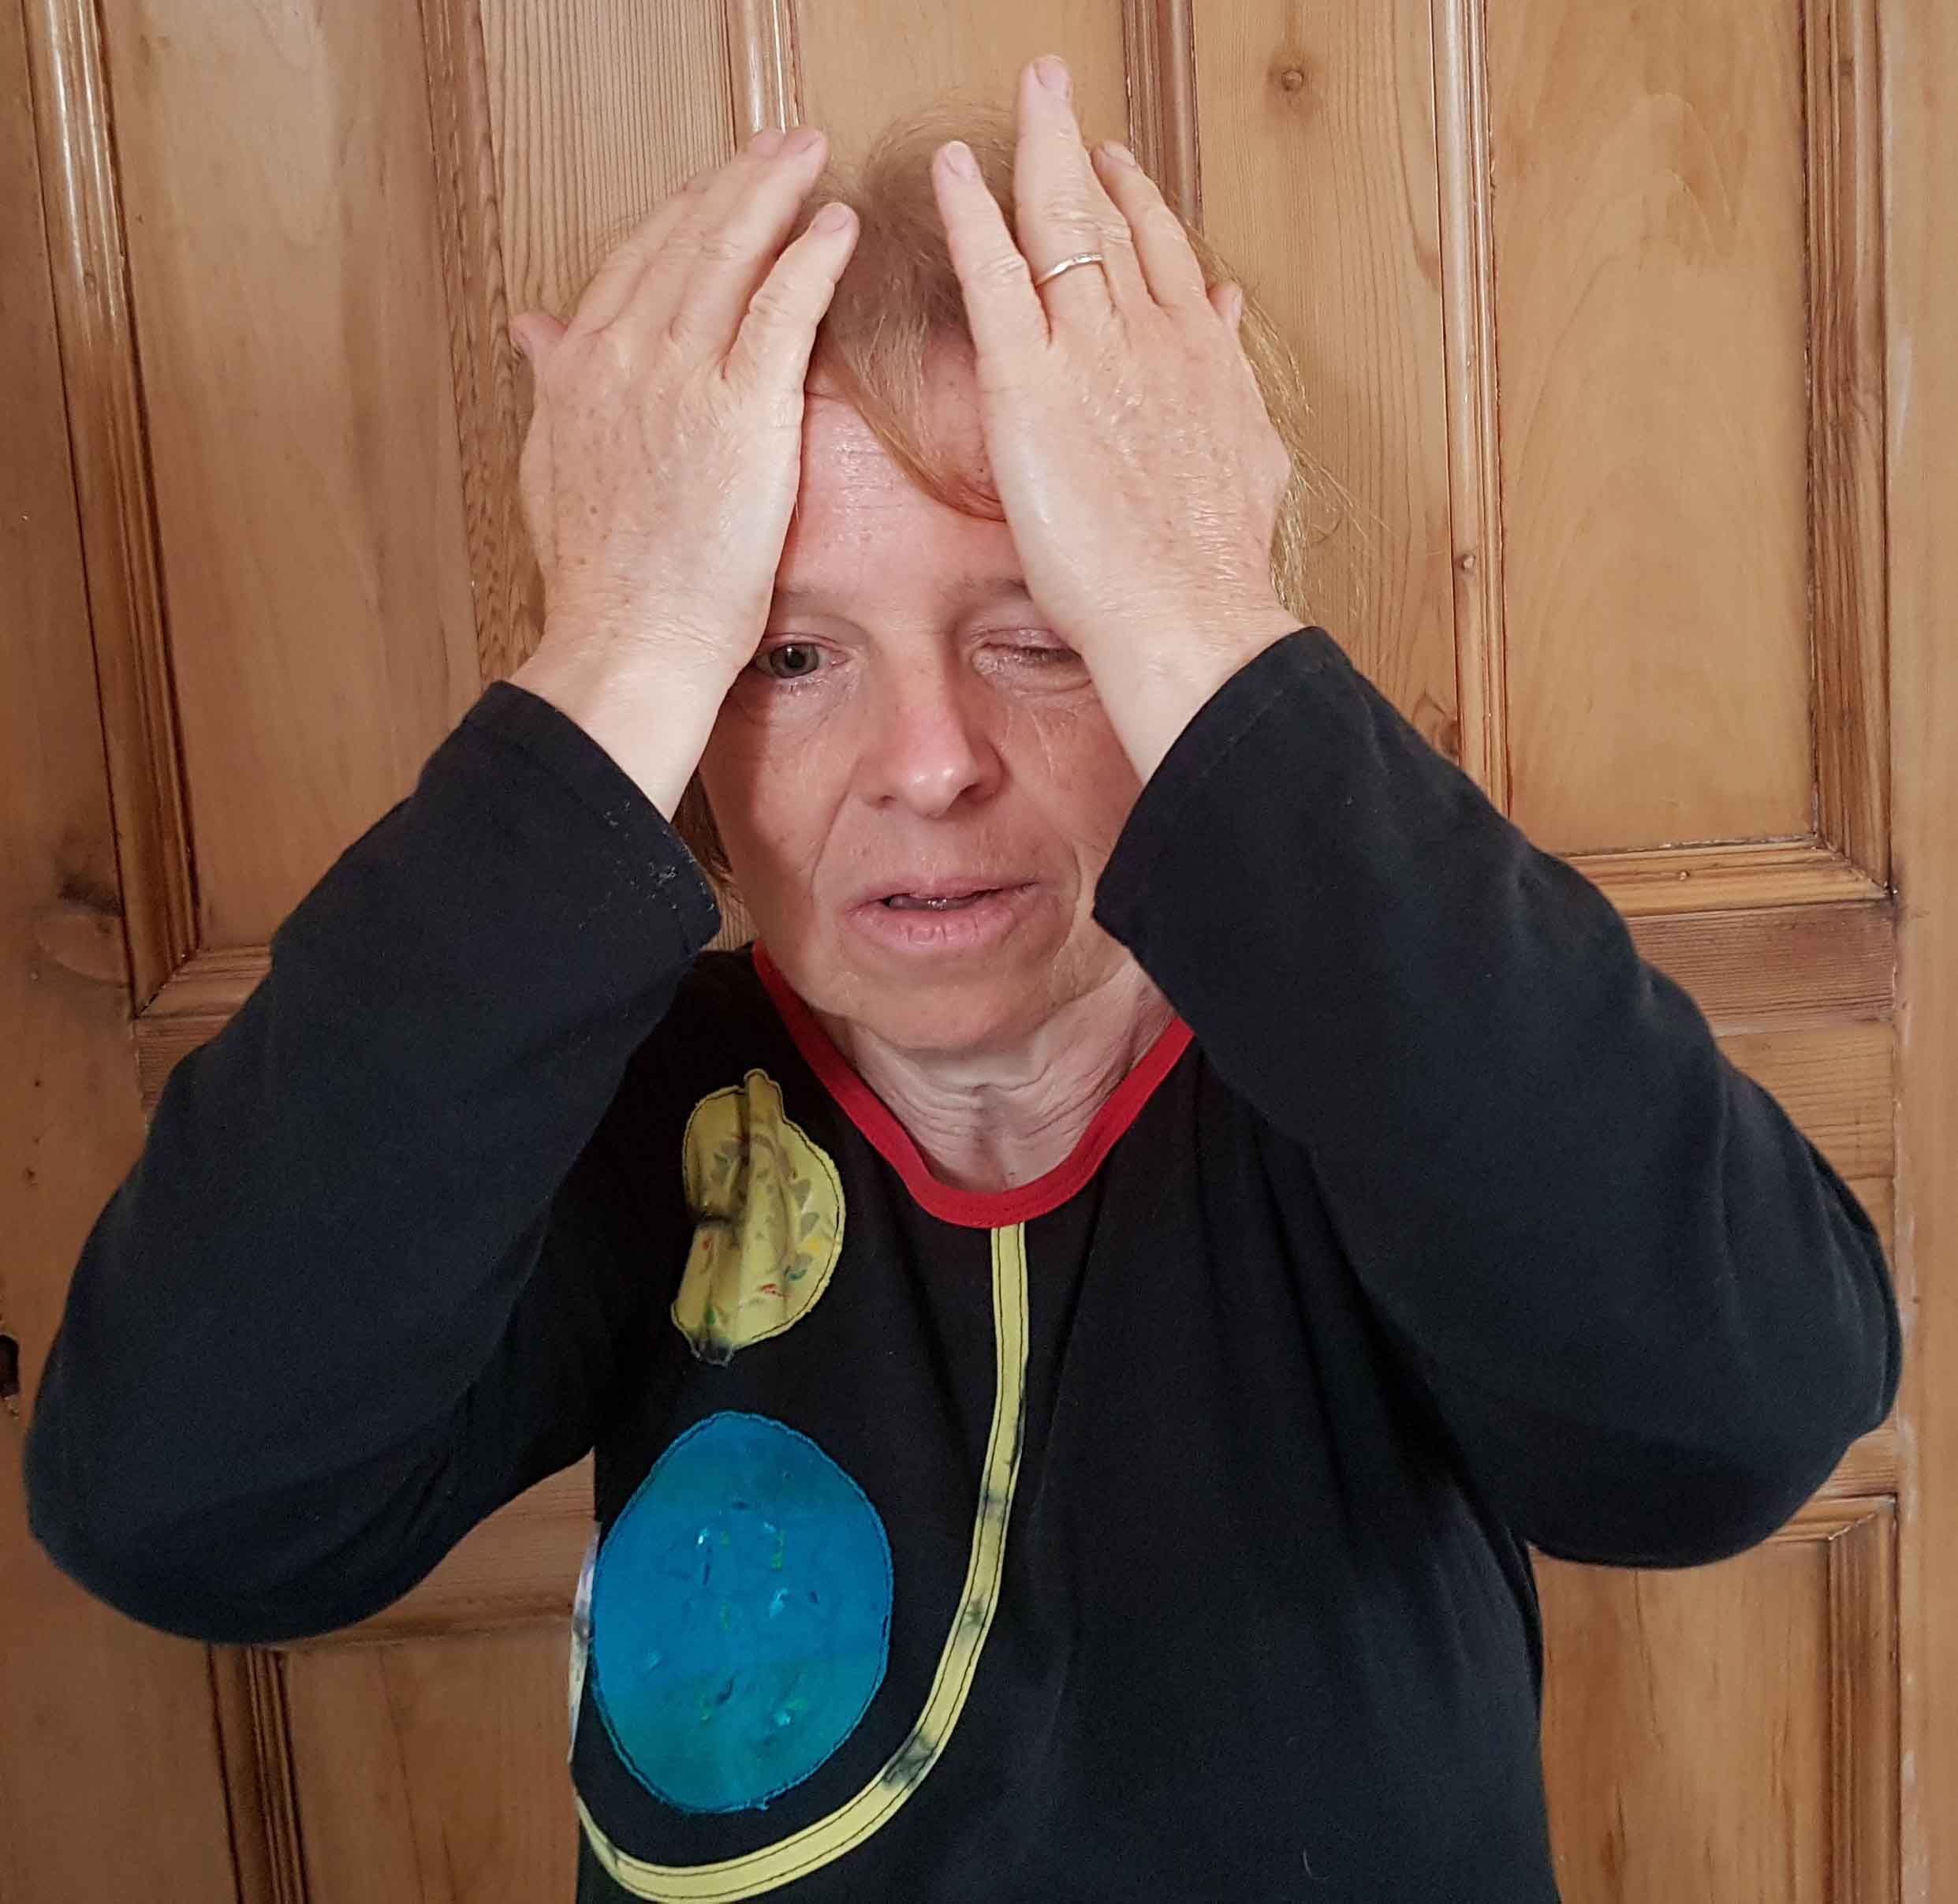
Now, rub your hands together generating friction. Place your
warm palms over your eyes. Close your eyes or keep them open, it
does not matter, drop your shoulders, observe your thoughts or
your breathing, whatever helps you to take be calm. This is great
for headaches and eye strain.
Move your face. Move your your jaw, see if you can involve your neck and chest muscles. Write your name with your tongue in the air, make big letters. As a challenge, write it in mirror image. Do the same with your eyes, again big letters. Can you keep the rest of your face still?
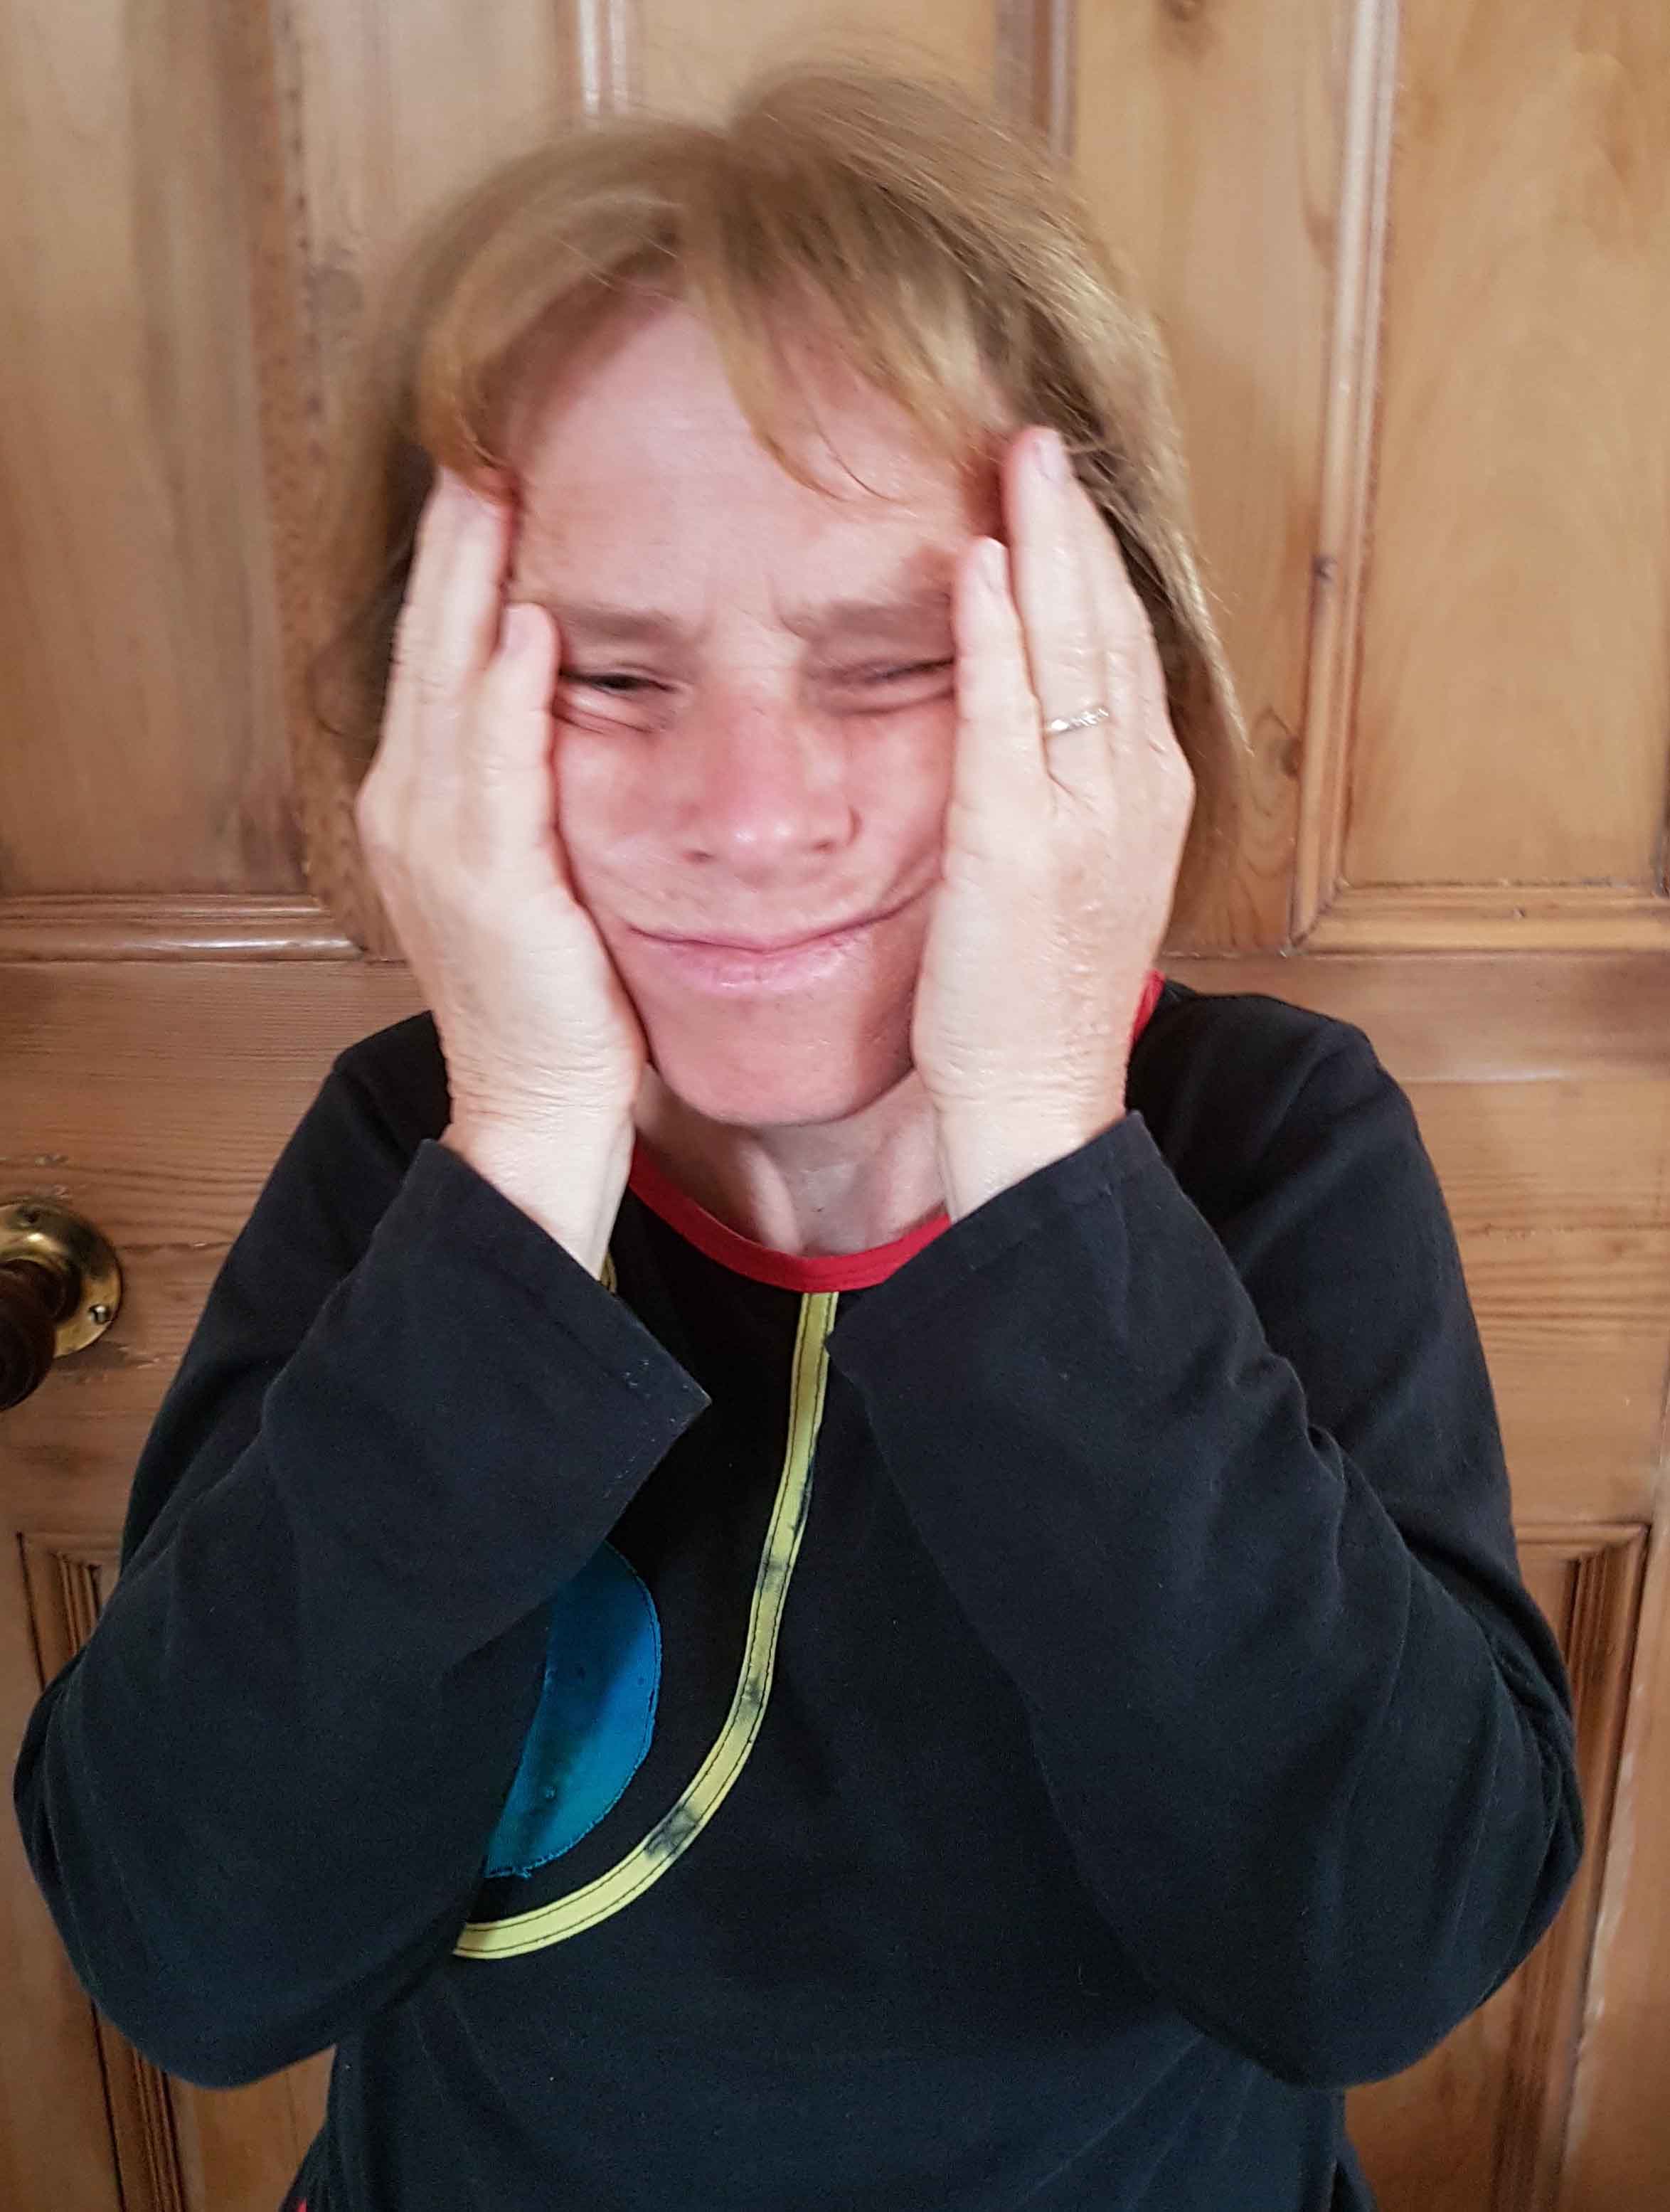
Put your flat hands over your jaw and move them about without
sliding over your skin. Put your hands at the side of your face
and move the tissue. Where and how does the tissue move? Is there
a difference between the left and right side? Place your hands
slightly further back over your ears. Rest them first, then move
them. What do you hear?
Massage your ears thoroughly. Pull your ears. Where do you feel the pull?
Shampoo your scalp. Experiment with different movements: slow and fast, firmer and lighter, moving the tissue and gliding over the scalp, short and long movements. In Indian Head Massage there are at least seven different ways of massaging the scalp. Make sure you pay attention to the nape of your neck just above the hair line. Finish with fast windscreen wipers around your ears, this should wake you up.
Last, stroke your forehead from the midline towards the temples. Do that a few times, nice and slow. Finish with a mouth exercise: how far you can move the corners of your mouth towards your ears?
Touch
This week's top tip is: (drum-roll) Touch.
We are tactile creatures, our nervous system needs stimulation. One way is to move (last week's top tip) and an other is to touch. This trains our proprioception, our sense of self movement and body position. It lets our brain know where we are and how we are. We move and feel better if this sense is in tip top shape. Many pain conditions are associated with an impairment in proprioception, such as chronic lower back pain or whiplash.
Feel your body, touch your skin, feel the tissue underneath, distinguish between what you feel in your hand and what you feel under your hand. Move your tissues, what does that feel like? Walk barefoot. Feel the surface. Try different surfaces. Touch your surroundings, trees, different surfaces, notice what you feel. Light stroking is very calming (best 3 to 10 cm per second), it also works when you stroke your own skin.
Move
This week's Top Tip is brief: Move!
I have been on an on-line conference about fascia for the last few
days, hence my late tip. The simple take home message is: MOVE. Fascia
gets sticky when it is not gliding, and that is not good for us.
It was an exciting conference with lots of interesting information.
Did you know that we are not really stretching when we are stretching?
We are telescoping and thus changing the shape of our fascia. There is
only one fascia, this net that holds and connects everything in us.
Wishing you dancing, walking, stretching, and fun with movement.
Upper Crossed Syndrome (UCS)
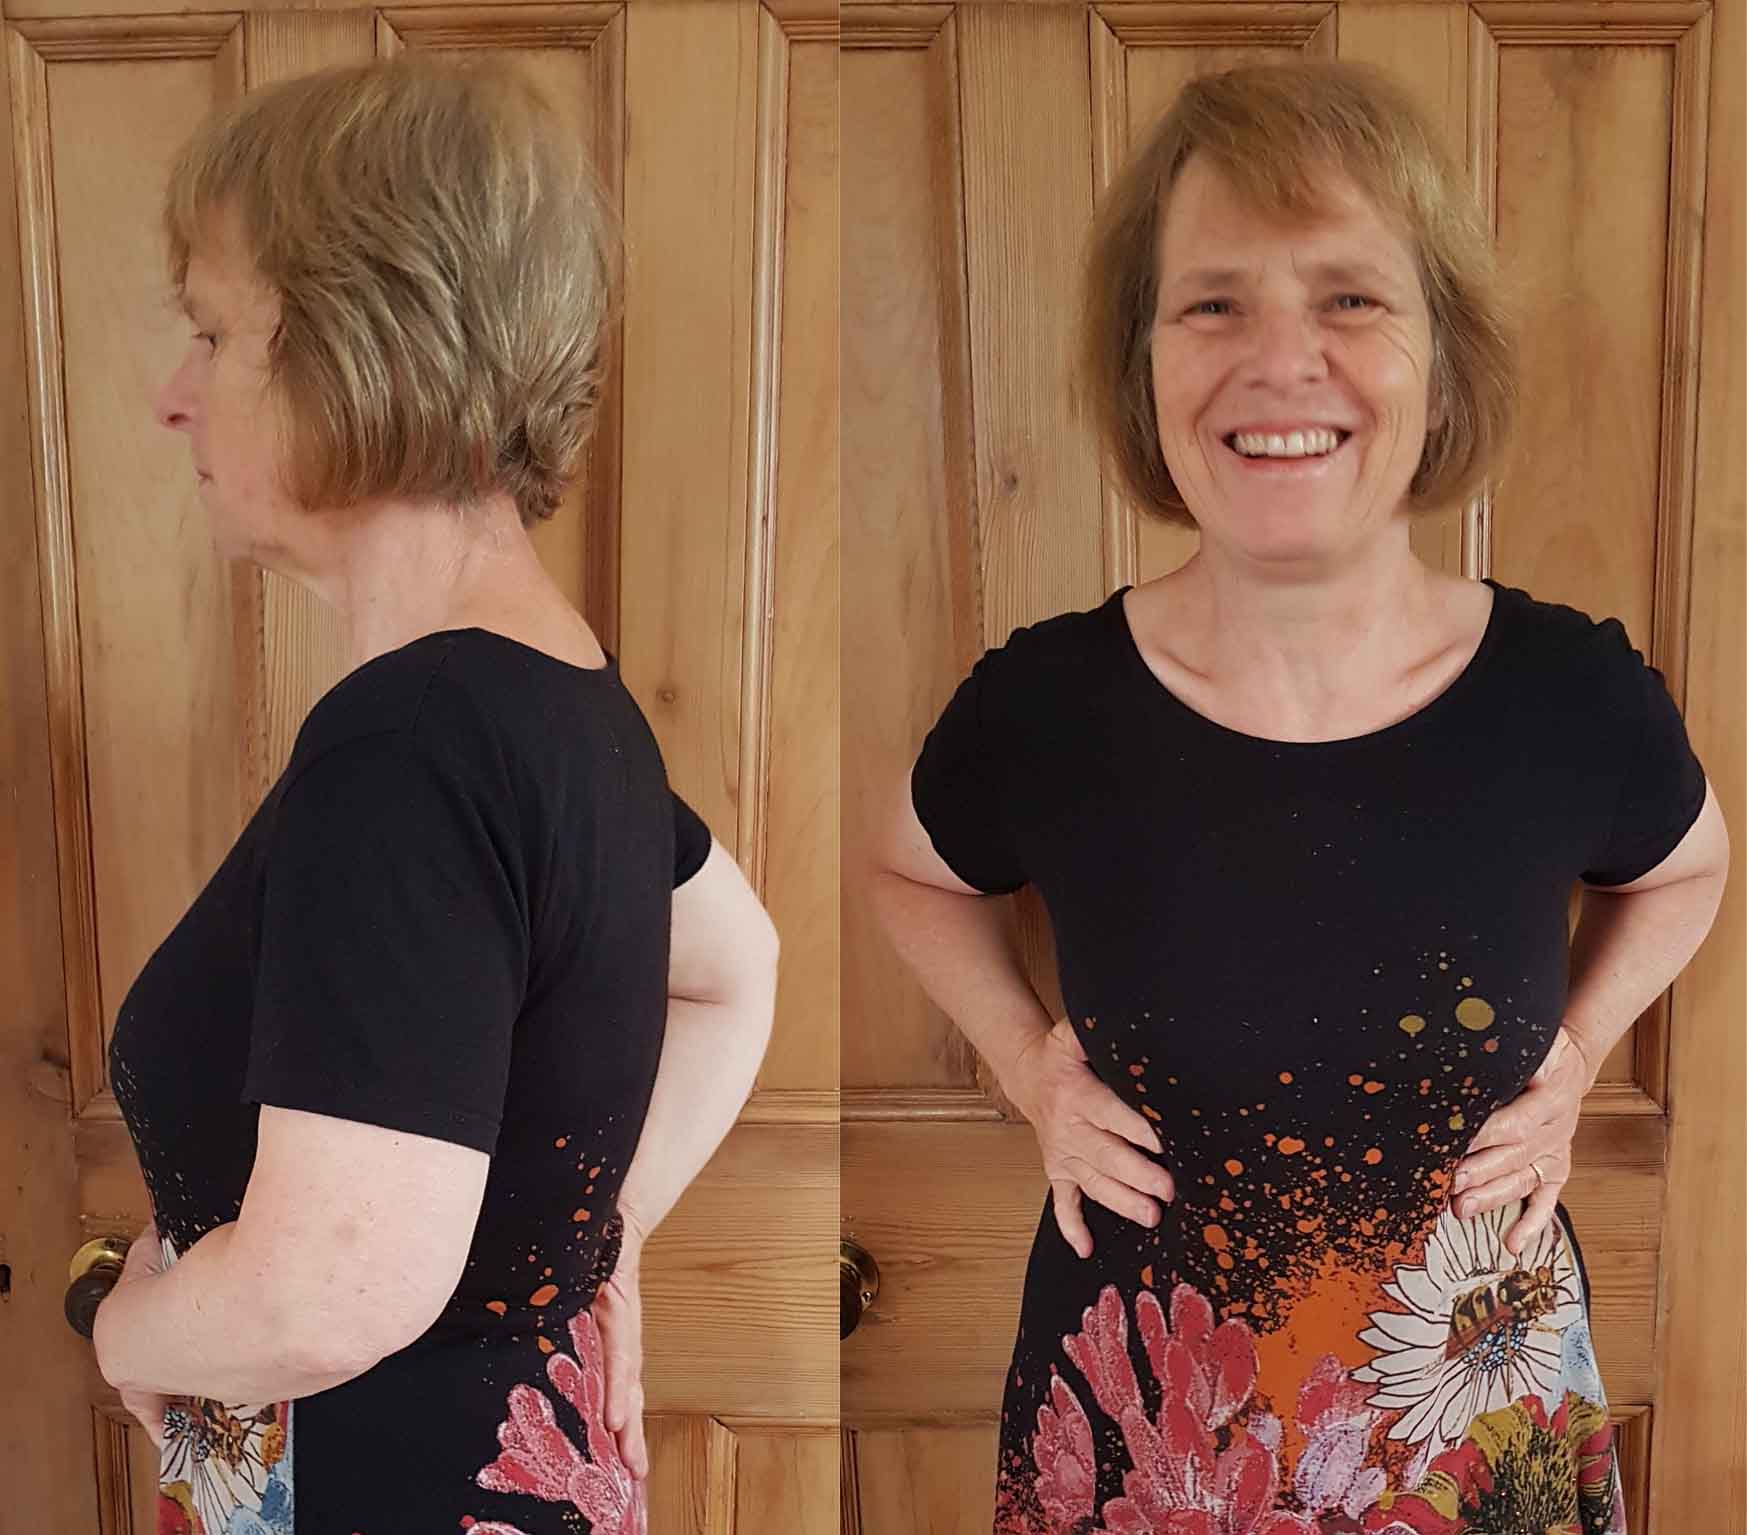
Today I would like to post about a postural imbalance that I see a lot in my clients, in myself, in many of us. It is a postural pattern that involves having our head forward. Many of us spend to much time marvelling (or otherwise) over a screen. As time goes on our head moves further and further forward, your shoulders become rounded and our upper back's curve is not changing in the right direction. An Czech Medic and Physio called Vladimir Janda noticed this as a muscle imbalance pattern (well before screens as we know them) and called it the Upper Crossed Syndrome (UCS). As an aside, isn't it amazing that he noticed that one can see from the position of the eyes when the pelvis is tilted.
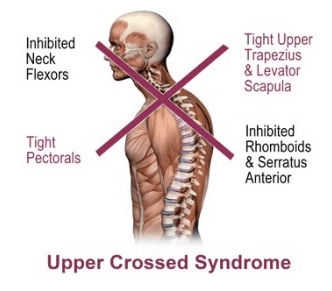
The pectoralis muscles become tight when we are sitting forward for a long time. These tight chest muscles pull the shoulders into an internally rotated position and cause them to round forward. The muscles which run from your shoulder blade up to the back of your head become tight (upper trapezius and levator scapula) as your shoulders move up closer to the back of your head. This means that the chest muscles at the front and the neck muscles at the back become tight and over-active, forming the first cross of UCS.
When some muscles become tight, their partners (antagonists)
become weak and lengthen. Therefore, the front of the neck
weakens, so much so, that it is unable to push the head back so
that it sits directly above the spine. Ideally, the middle of the
ear should be lined up with the middle of the shoulder. The
upper back muscles that pull she shoulder blades down and towards
the spine (rhomboids and lower traps) and stabilise it (serratus
anterior) become long and weak.
Needless to say, that this can cause a myriad of issues, from jaw pain to neck strain, lower back pain, pins and needles in arms, hands and fingers, and much more.
In my opinion (and personal experience) it is very difficult to
"fix" a postural pattern, even though I read and watched
countless content claiming just that. I don't like the idea of
"fixing" our ourselves anyway, but that discussion is for another
time. We can help ourself by bringing a tad of awareness to our
posture, strengthen weak muscles and ease tight ones. Obviously we
can also prevent things getting out of hand by setting up our work
station correctly, having breaks, moving about, and so on,
you have heard it all before.
Now here are a few exercises to address UCS. Generally, the tight muscles need to loosen and the weak muscles to strengthen. This is easier said than done; it can feel weird to have our head, neck and shoulders in the aligned position due to the force of habit. I am not there to check due to physical distancing (we can do Skype or Zoom though if you like). For all these exercises have your shoulders rolled out away from your ears, i.e. when you let your arms hang by your side, your palms are facing forward. In order to do this you need to lift your chest and engage your core.
Often with tight muscles it can help to relax them a bit before you stretch. An effective way to do this yourself is by finding trigger points and releasing them. Trigger points are these exquisitely tender and knotted spots in our muscles, sometimes the pain radiates out. When you find a trigger point in a muscle hold it for about 12 seconds with a pain level no more that 6 on a scale from 1 to 10. Trigger point work can be tiring for your hands, so tennis or spiky balls come in useful. An easy way of doing this is lying on two spiky (or tennis balls) against the ridge of your skull and relax. You can loosen your pecs using a tennis ball. Place it underneath your collar bone and roll it about. You can also try to put your weight on the ball.
The double chin exercise. This is exactly what my name says:
stand tall and do your "best" double/triple/quadruple chin. Hold
for 12 seconds, repeat often.
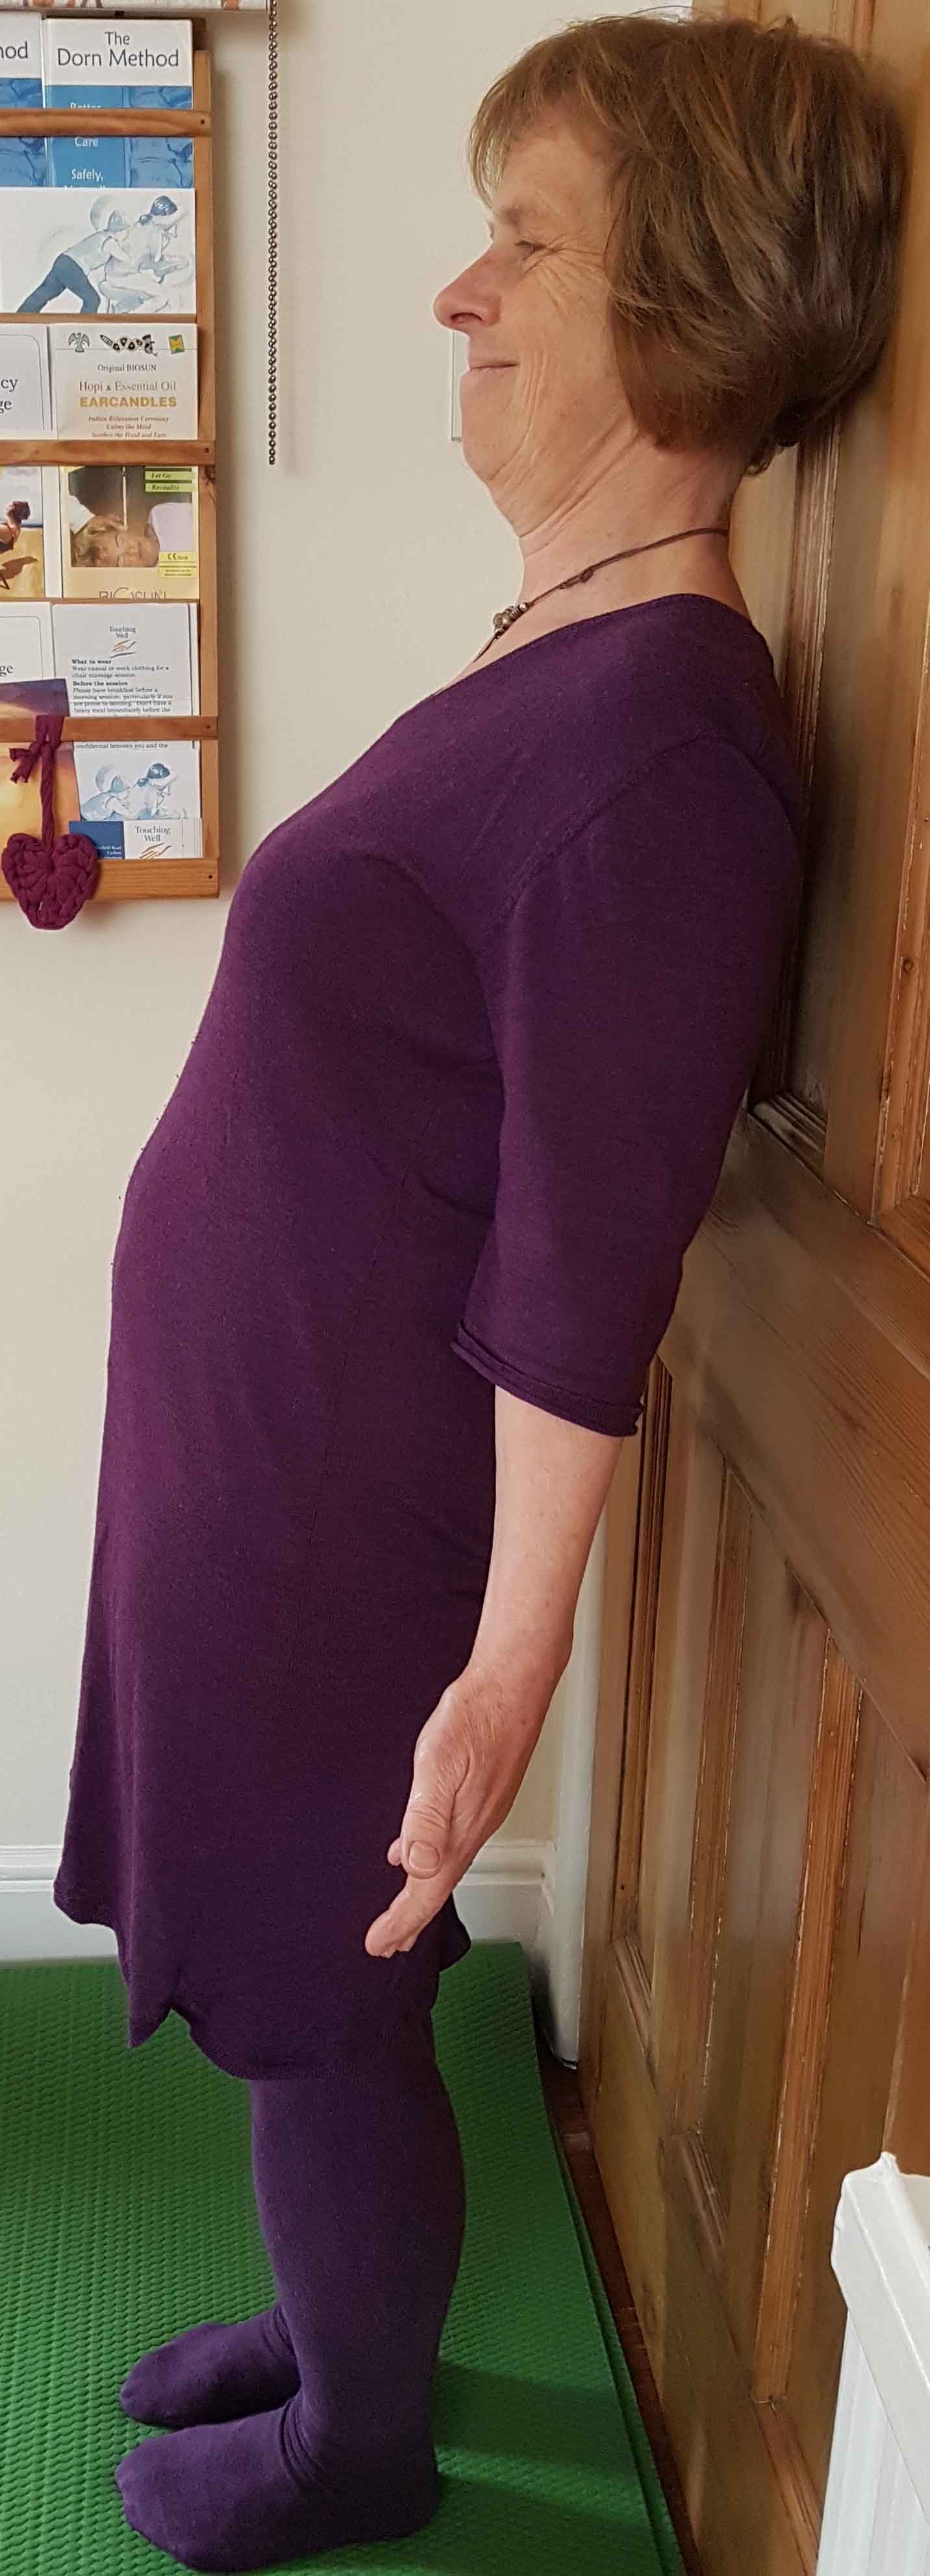
Alternatively, stand with your back against a wall. Roll out the shoulders so that your chest is open and the palms of your hands face to the front. Bring the back of your head against the wall while keeping your chin tucked in - so far the same as the previous exercise. Then take a small step away from the wall, pivoting on your head. Keep your neck and shoulders in the same position. Don't lean on the head, use the wall for a nice neck stretch, push your shoulders away from your ears. Hold for a long time, if you can manage for a few minutes.
For stretching the chest muscles you can use the door frame stretch.
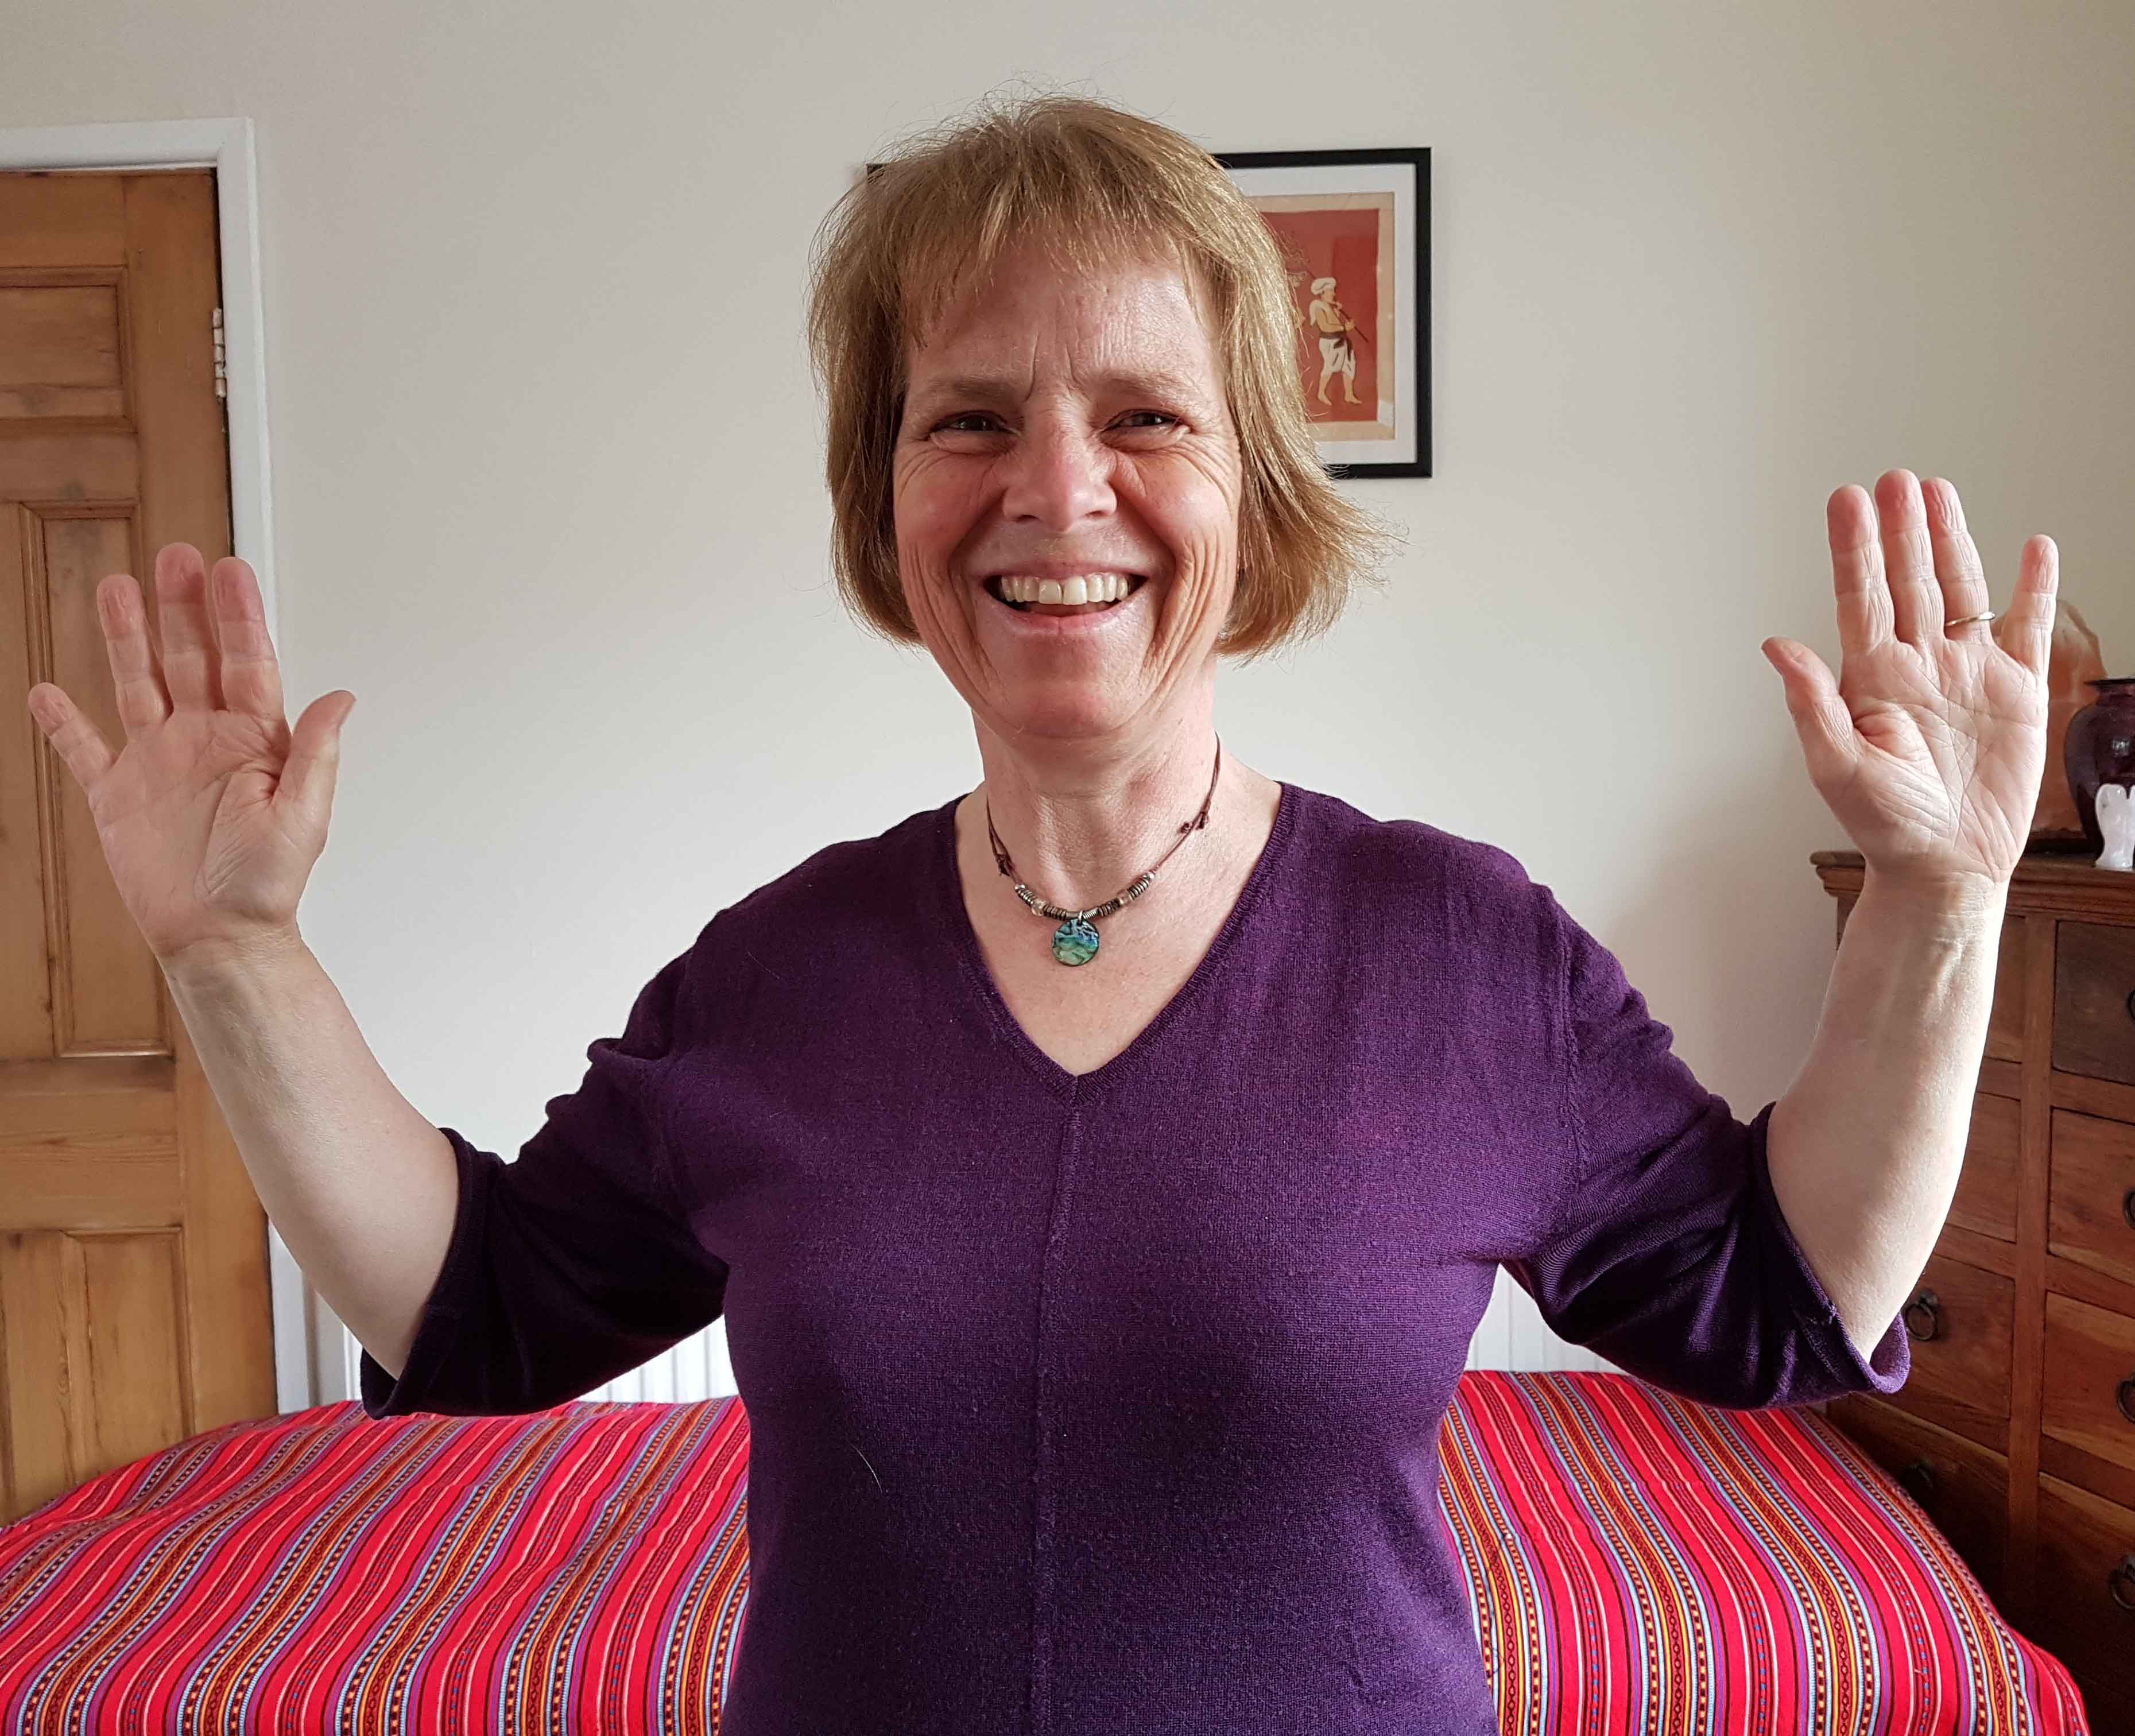
You can strengthen you upper back and shoulder blade muscles with the W exercise. Make a W shape with your arms, palms facing forwards. Keep your chin tucked in, remember, ears aligned with shoulders. Pull your shoulder blades down and in. This is a small movement, if you move from the right place. Hold for 5 seconds and repeat often.
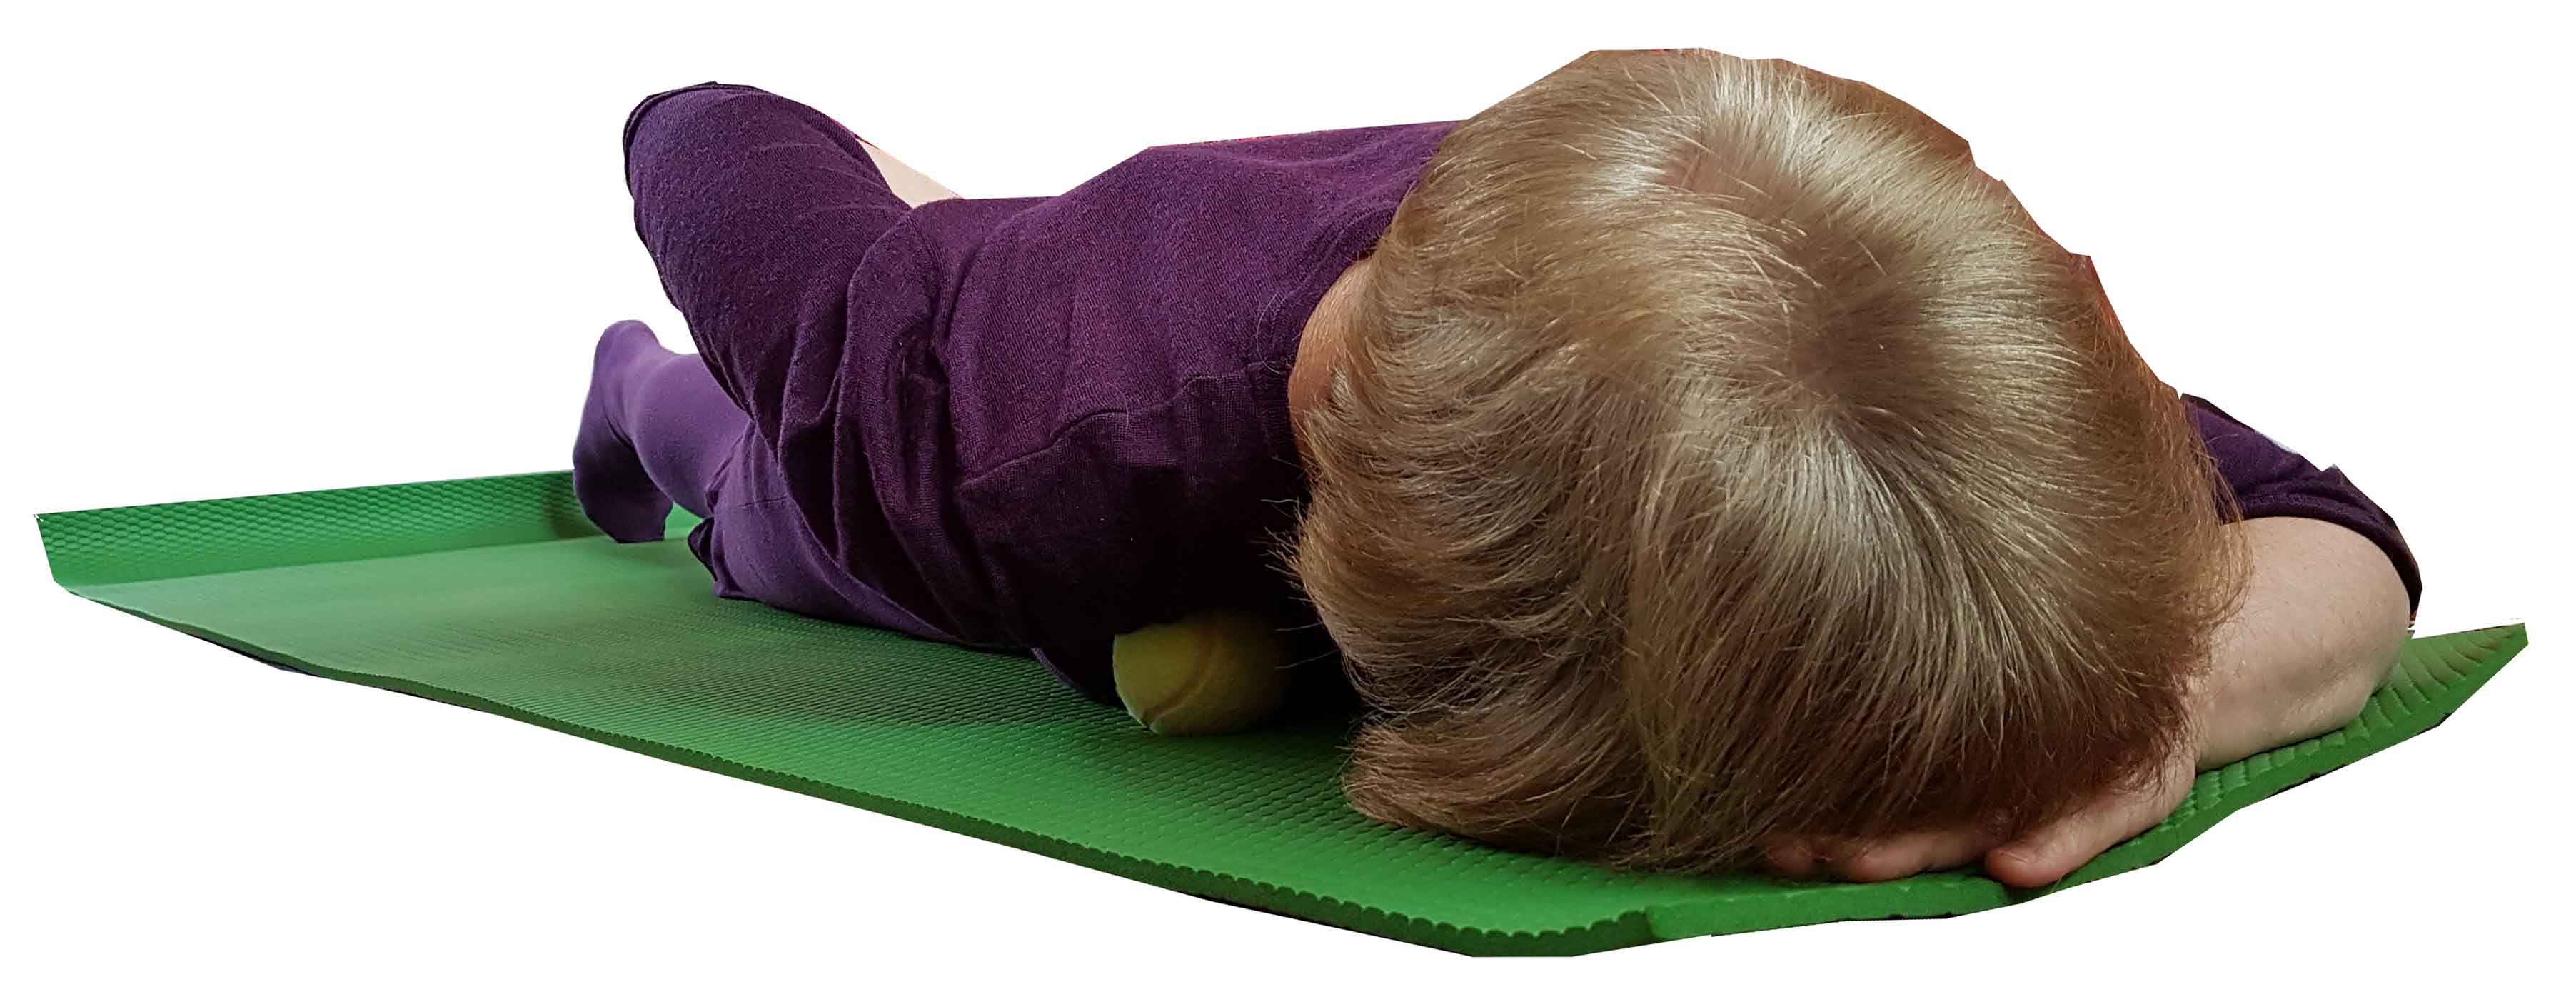
For the rounded back lying on the rolled up towel is good. This is a nice way of tuning in before continuing with the rest of your day.
Stretching the front and the side of our body
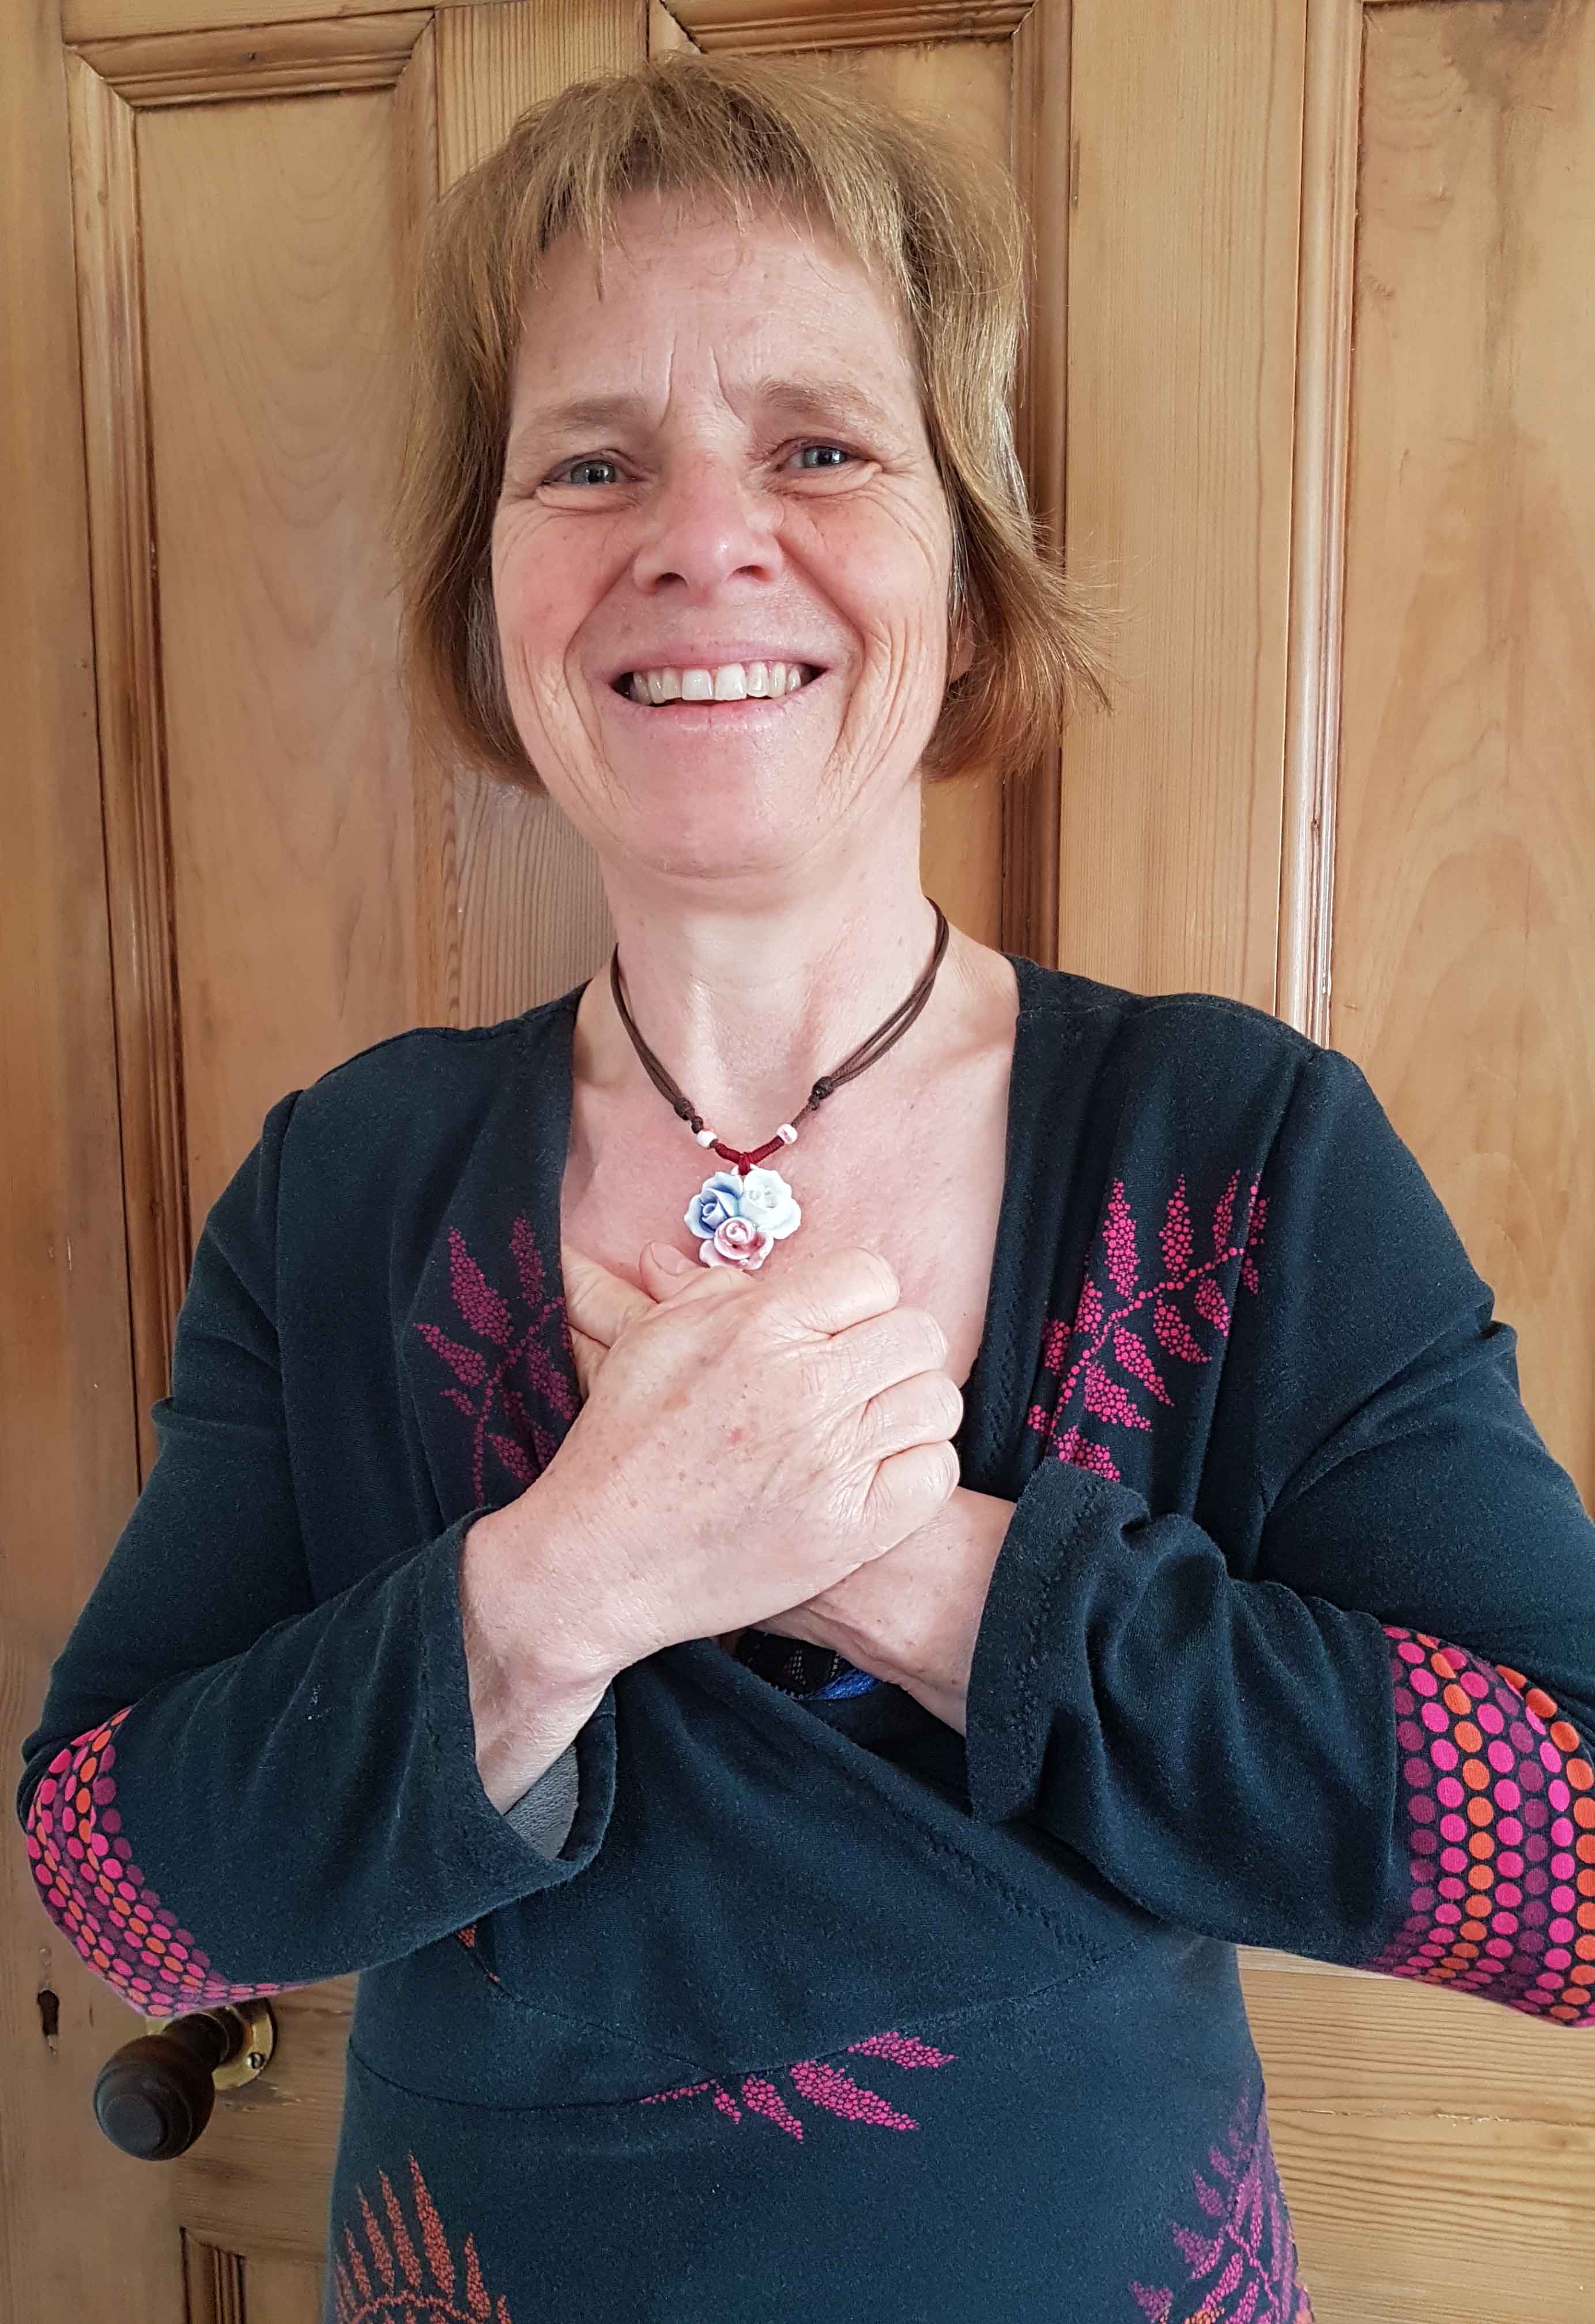
Sit or stand upright, lift your chest, tuck your chin in slightly, or alternatively, imagine being gently pulled up by a golden thread from the crown of your head. Now place the palm of one hand on the skin of the top of your breast bone and stretch it down towards your belly. Place the other hand on top. While you stretch down push your chin in until you feel a stretch between you collar bone and neck. If you want to have a bit of fun grimace with your mouth, push the corners of the mouth down a lot, feel this in your chest muscles.
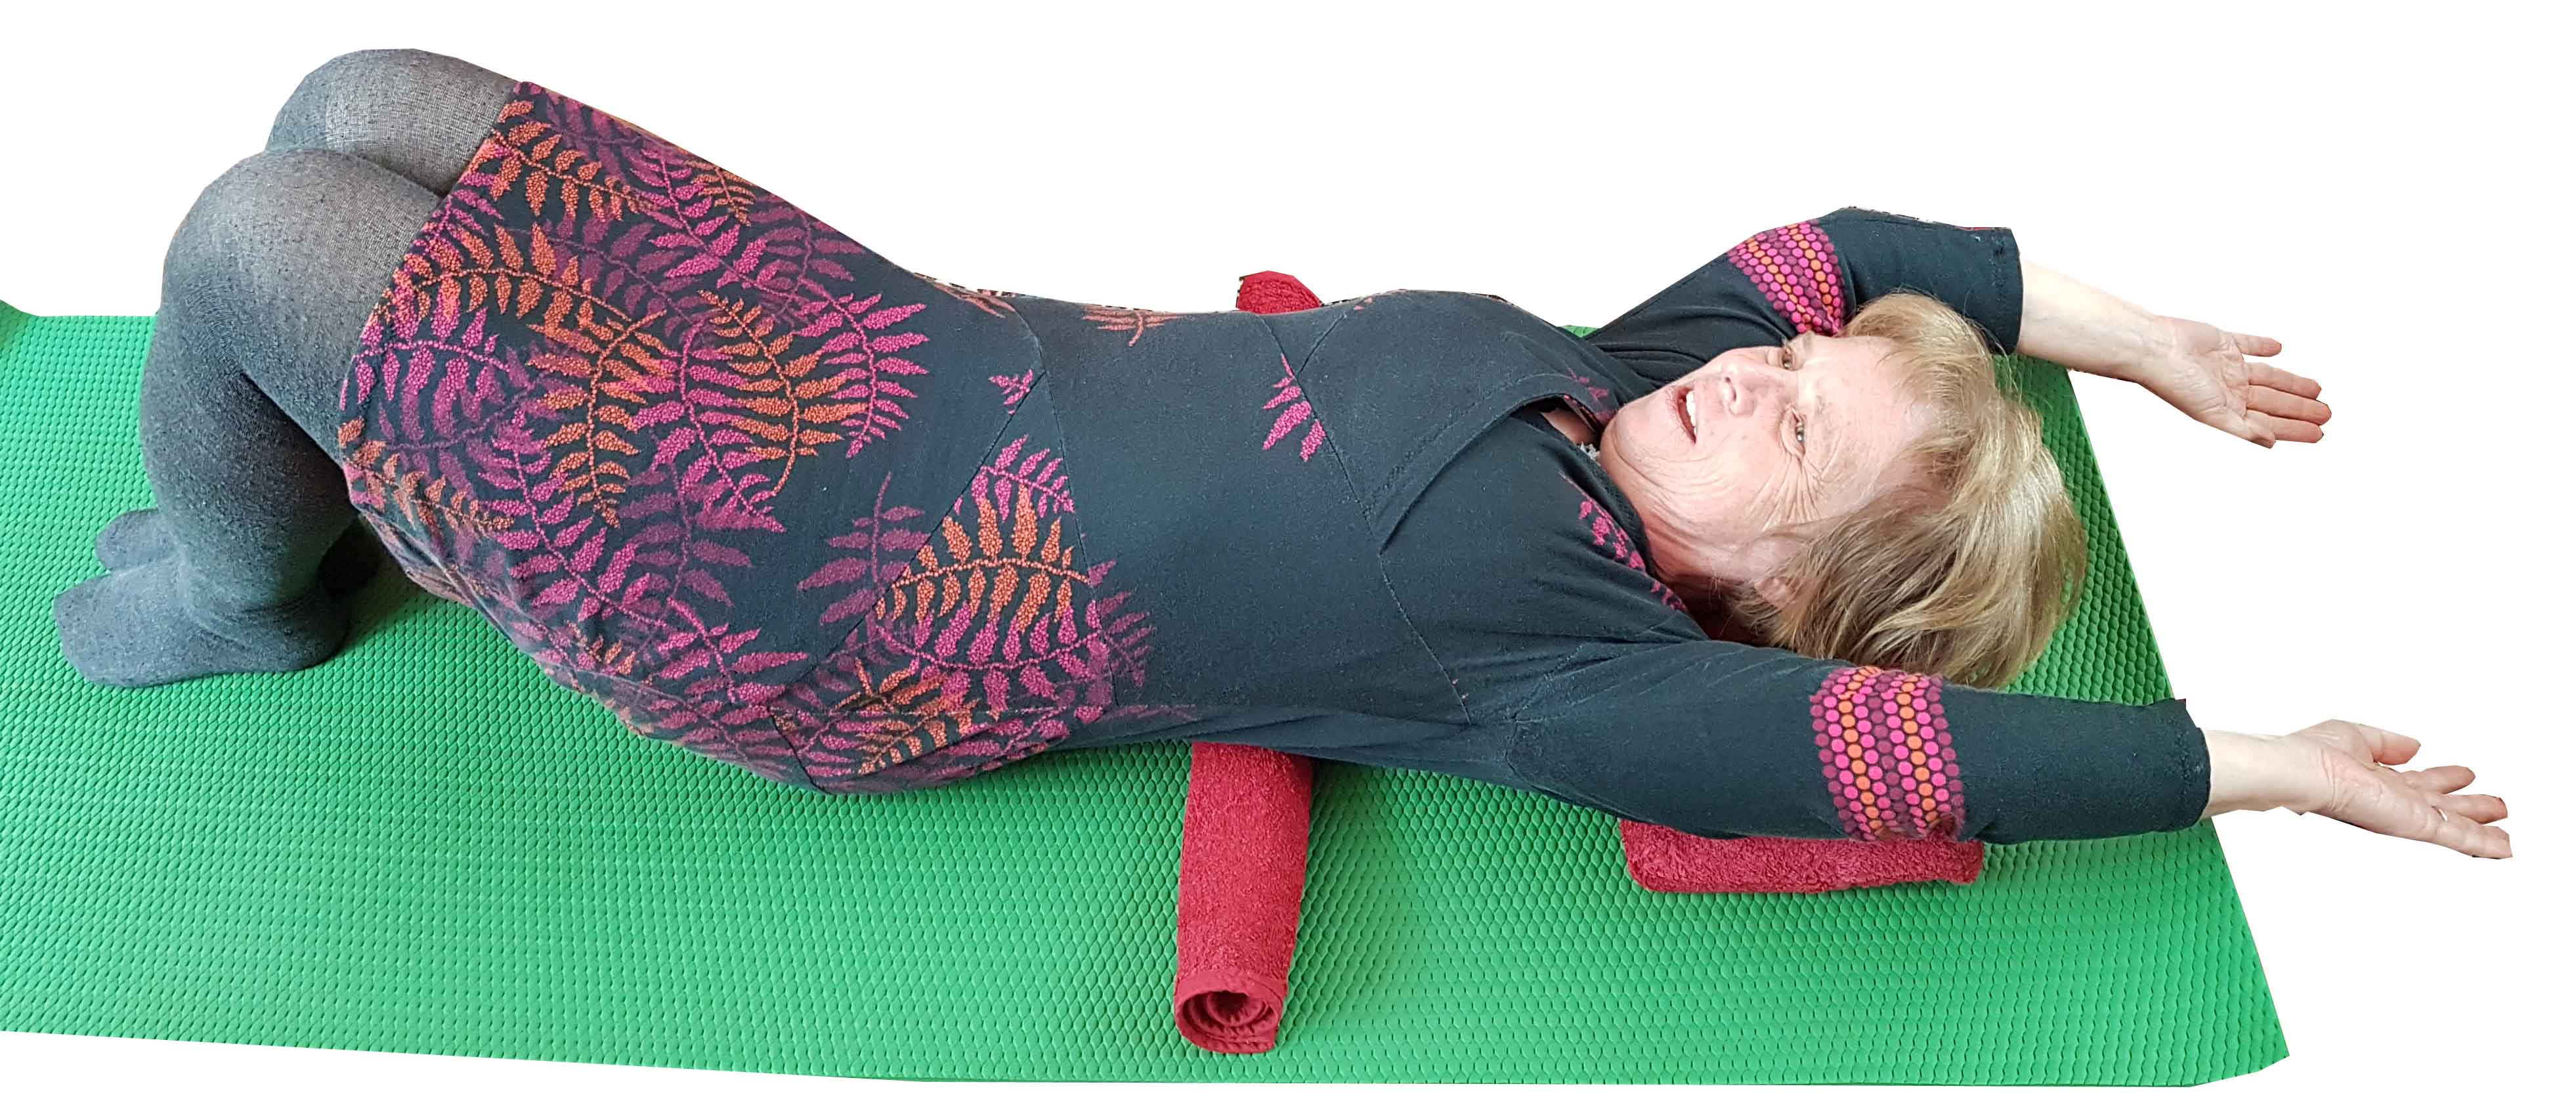
Lie on your back on a firm surface, for example a yoga matt or a carpet. Bend your legs, put your lower back in "neutral", find a pillow for your head if required. Relax for a few moments, take a deep breath. Now slowly lift your straight arms over your head. Keep your lower back where it is. Feel the stretch at the front of the chest and belly. Rest your arms over your head and take a few breaths. Bring your arms back. Roll up a towel and place under your ribcage at the back. Again lift your arms over your head and you will feel a stronger stretch. Experiment with the thickness of the towel roll. Enjoy the opening of your chest and upper belly.
There are lots of ways of stretching your quads.
Here are a few. Stand tall with your lower back in "neutral".
Throughout, don't arch your lower back, even though it might be
tempting. Do both sides.
Stand on one foot, with your leg unlocked. Have something to hold onto for balance. Get hold of the ankle of the leg to be stretched. Pull your heel towards your bottom until you feel a strong stretch in the front of your thigh. Keep your pelvis straight. Hold. To increase the stretch, rotate your pelvis forward. You can do this stretch lying on your side, stretch the upper leg. You can use a rolled up towel or band if you can't reach.
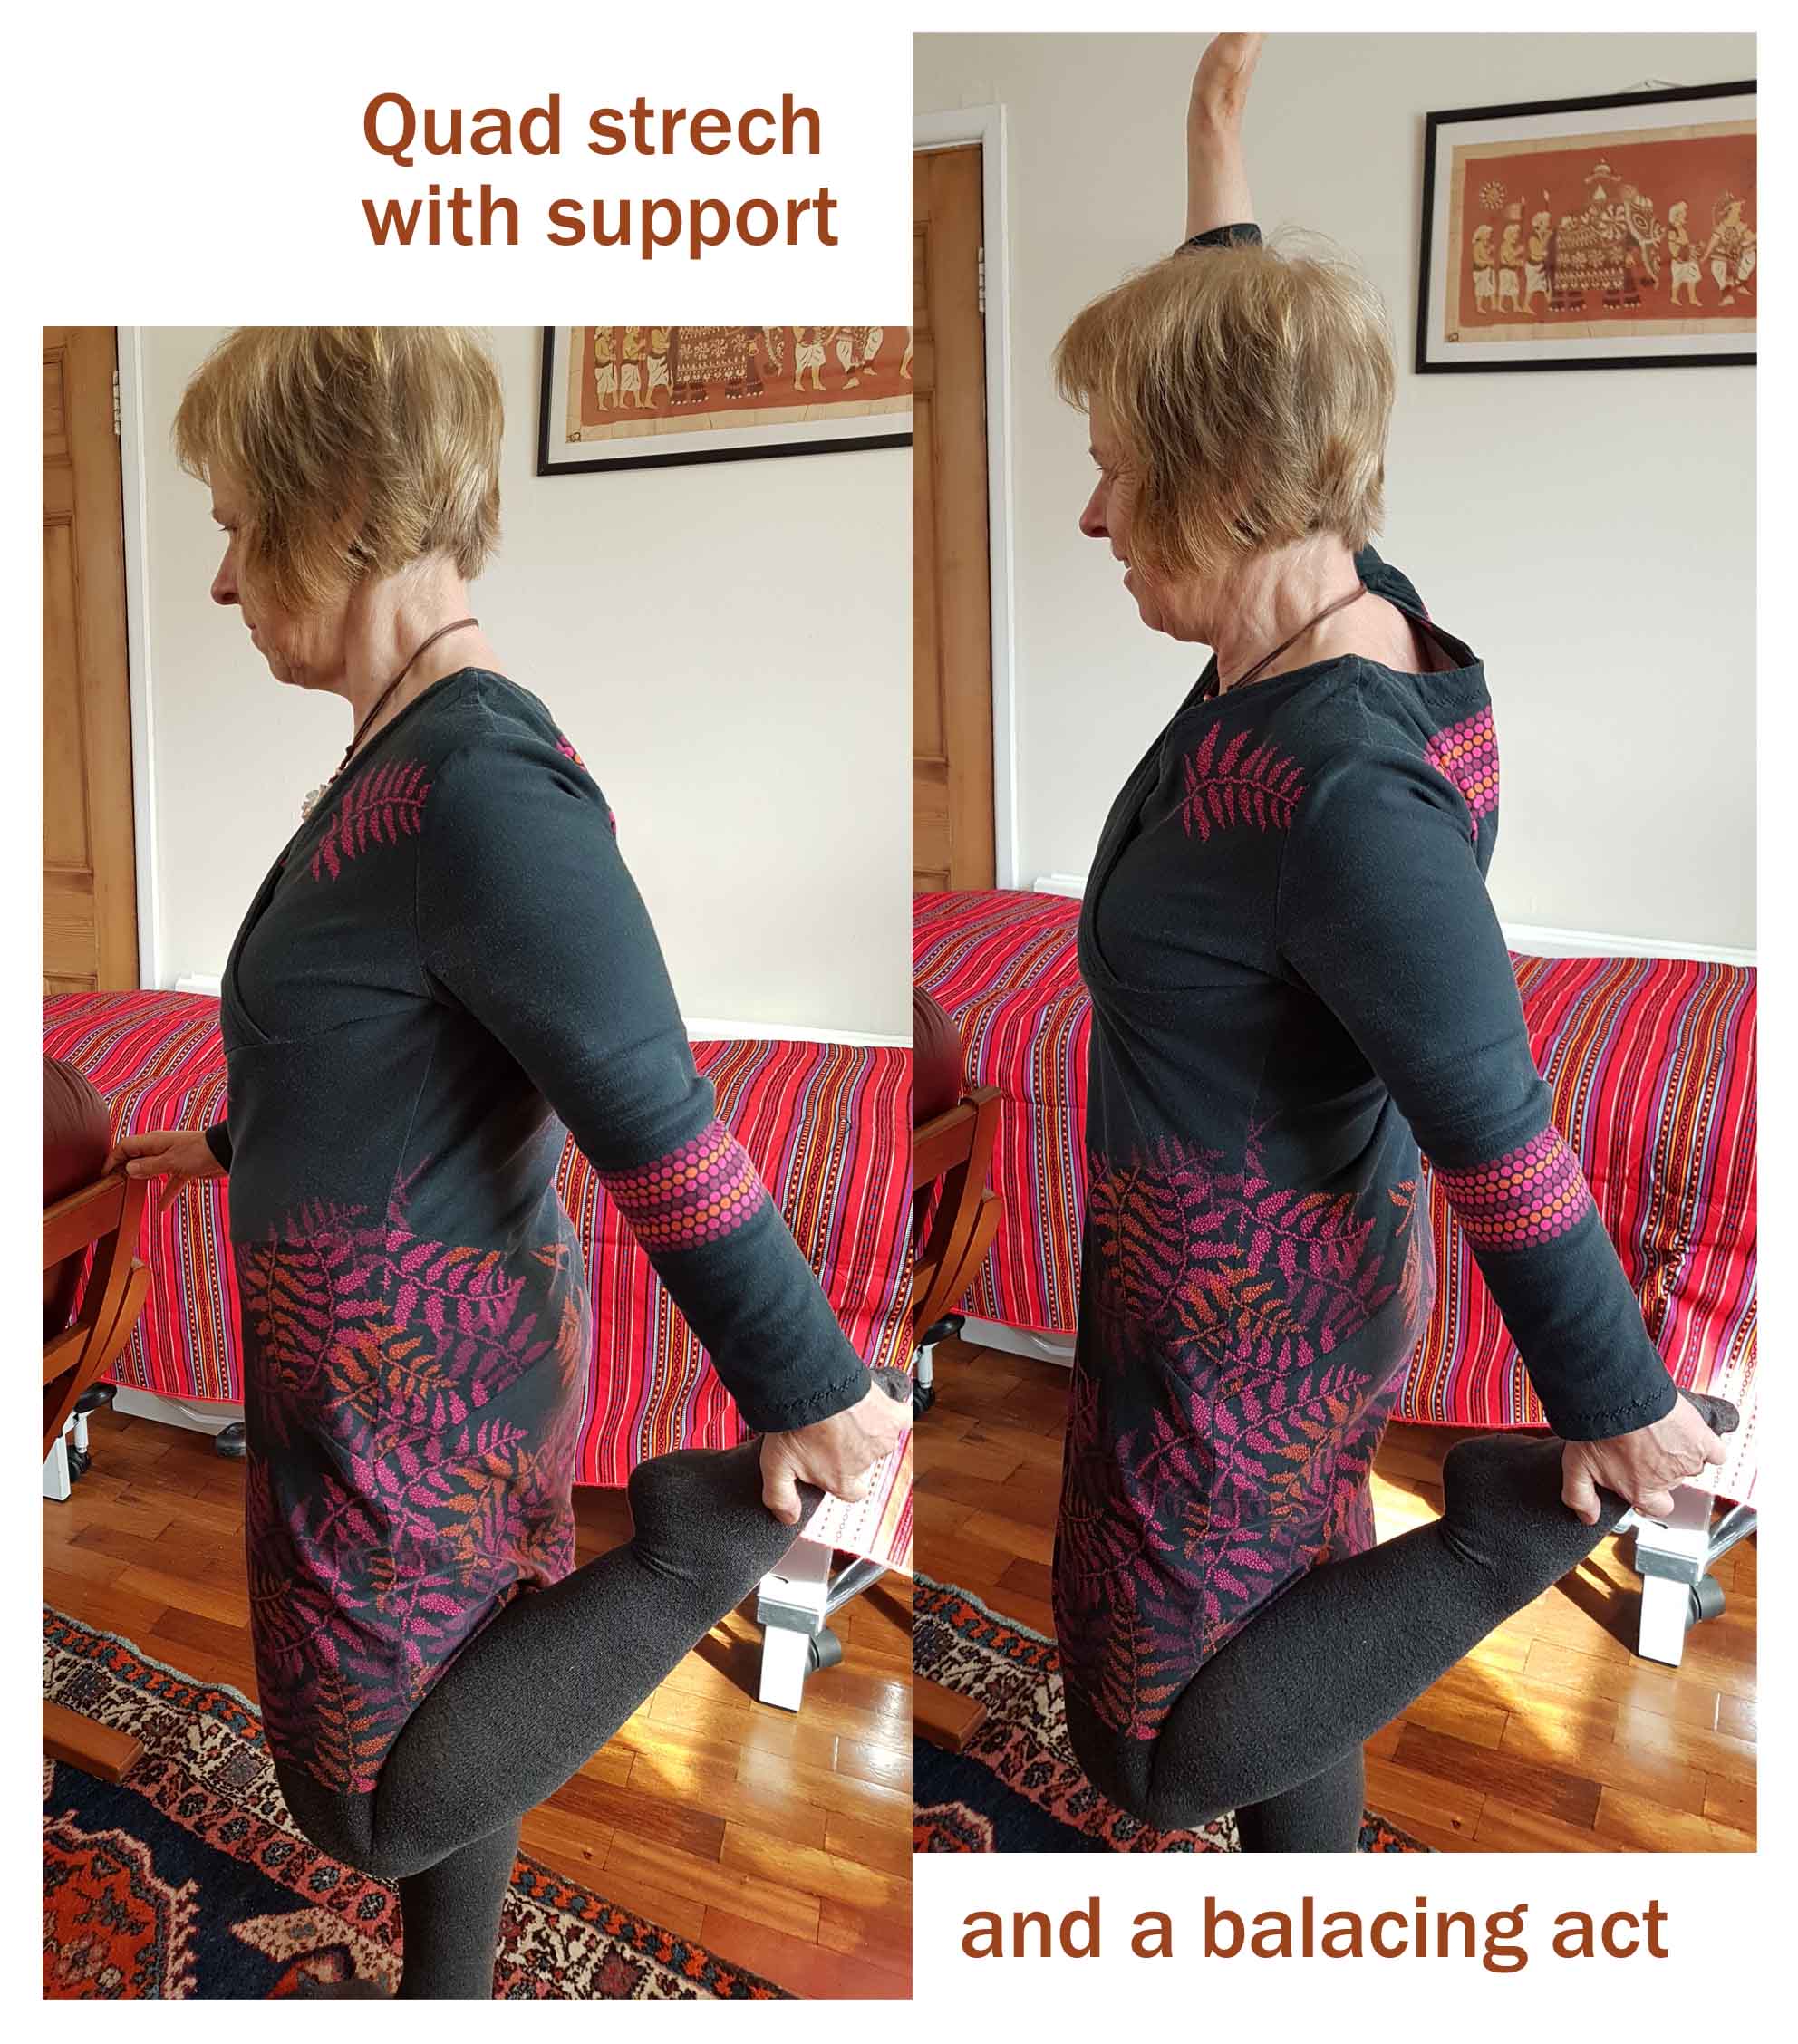
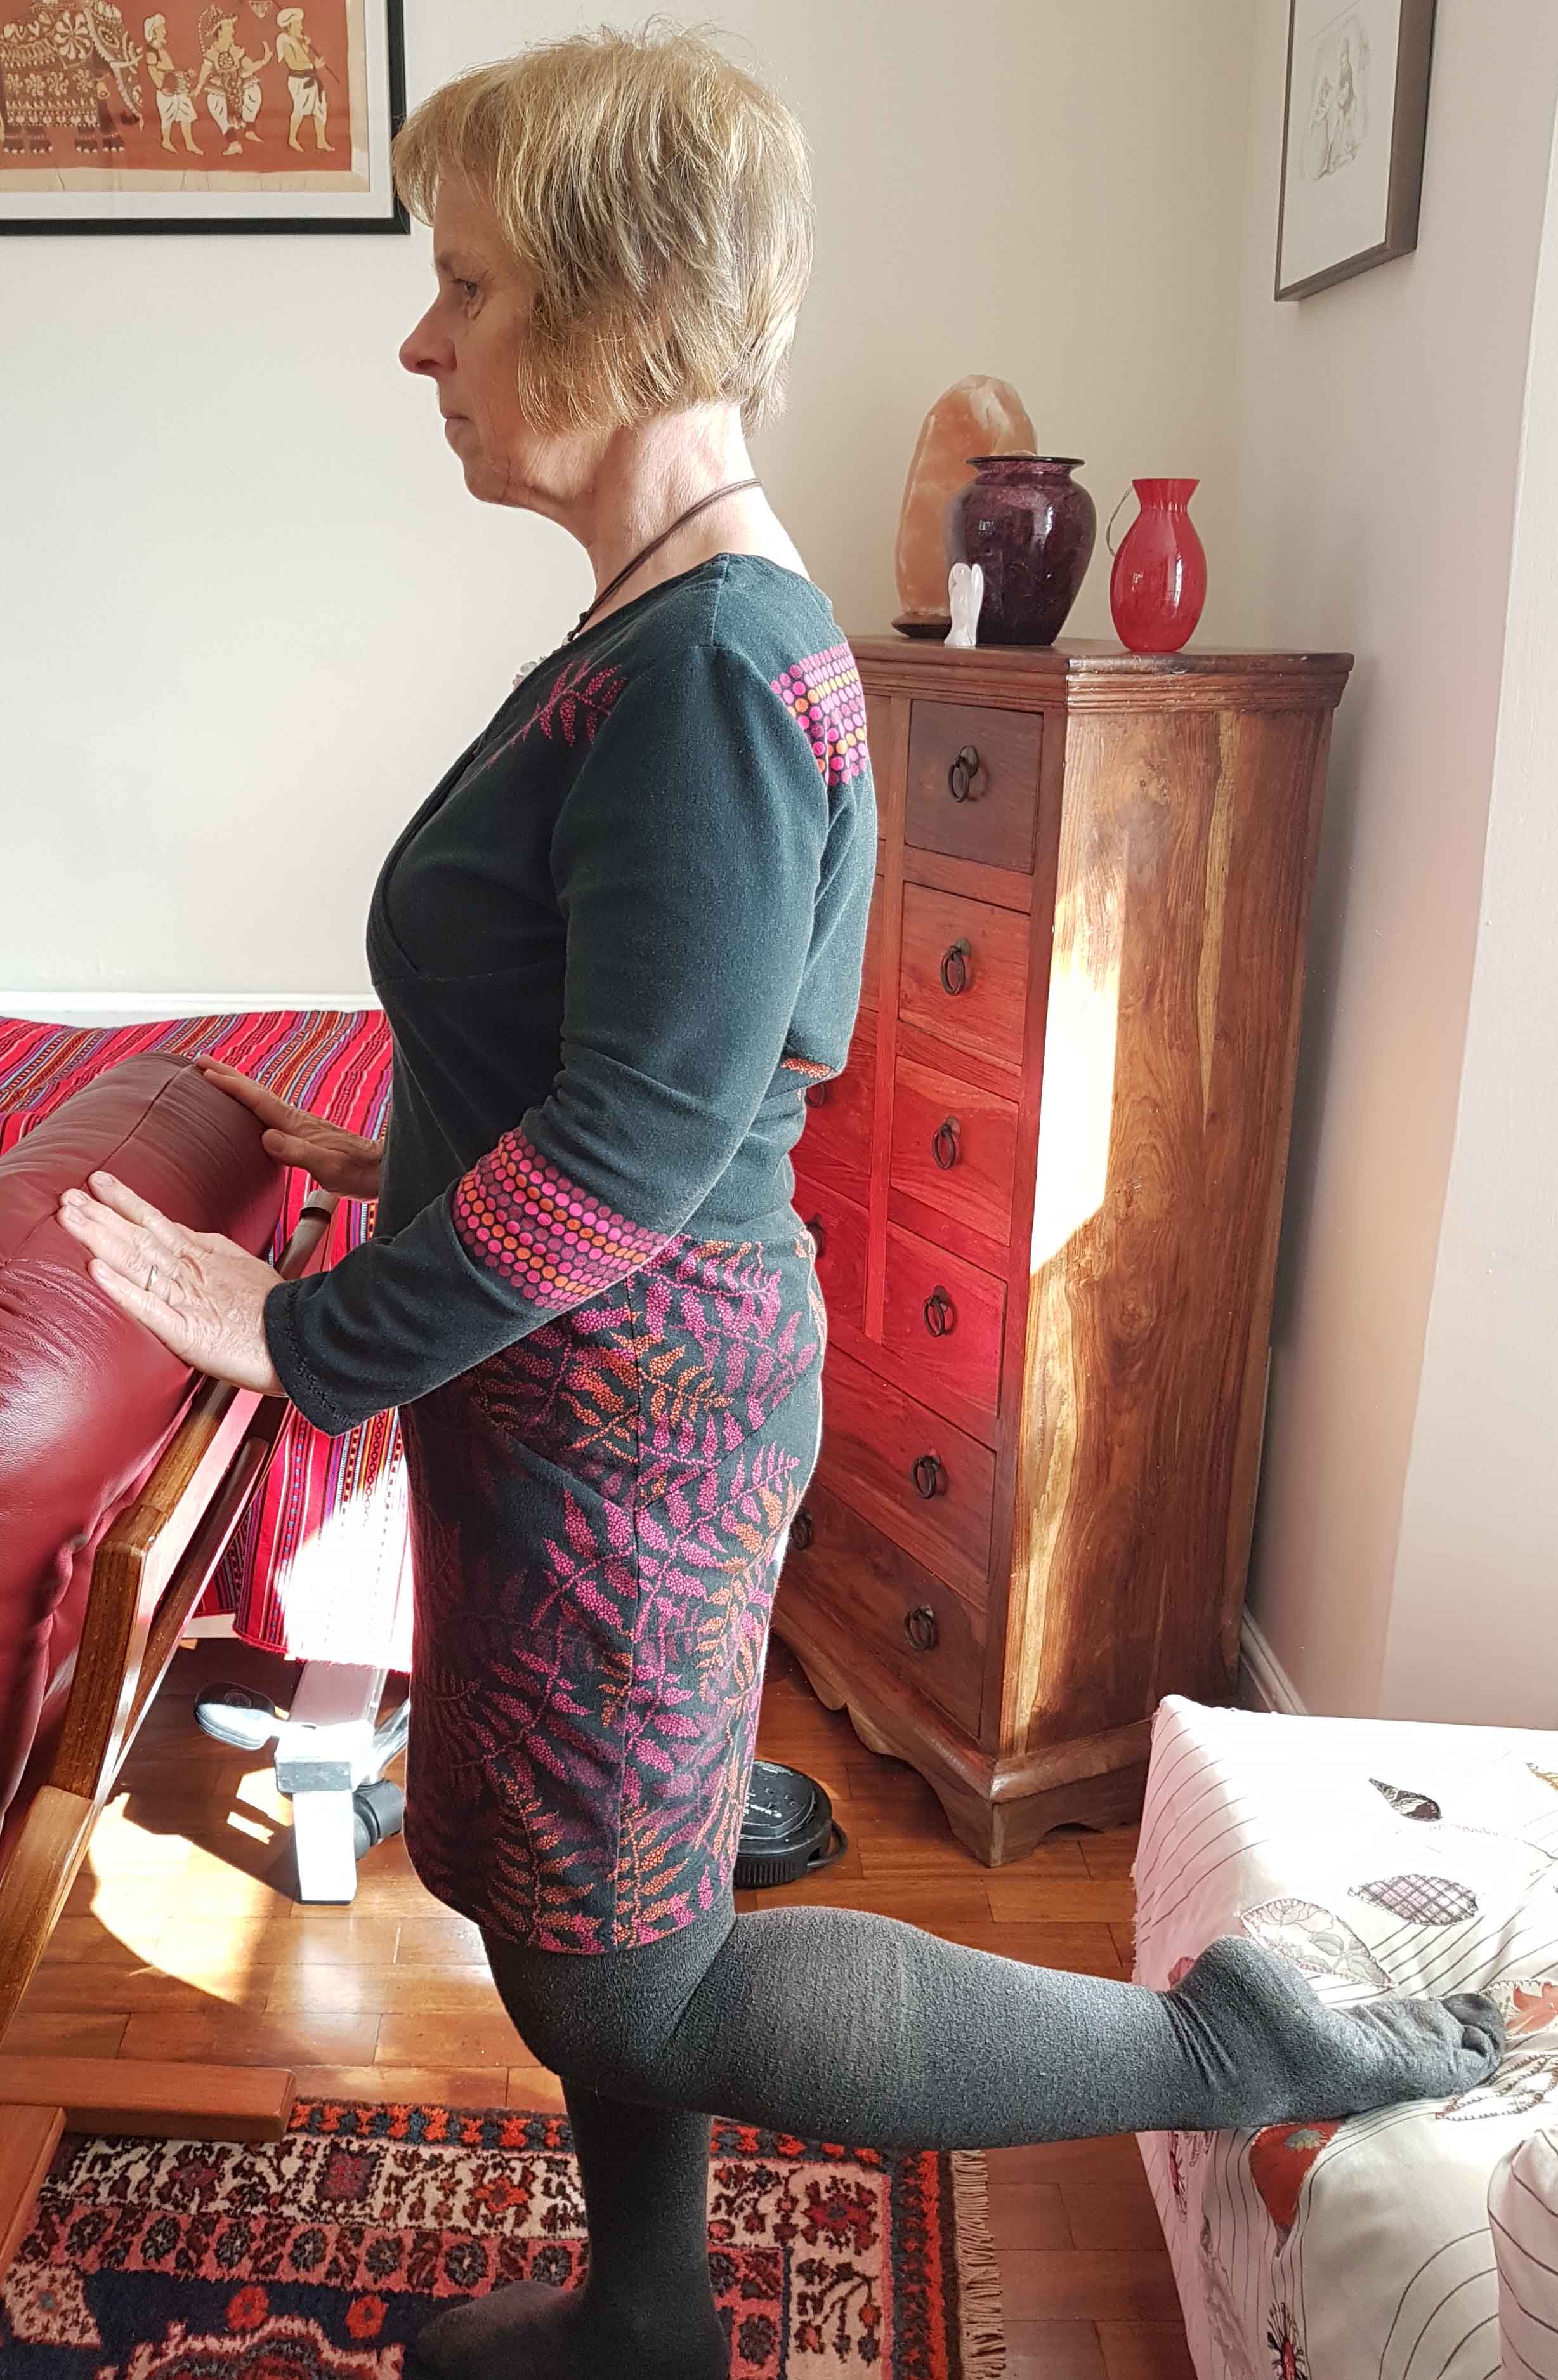
Stand with your back towards a sofa of a chair with a pillow on
the edge of it. Have something to hold onto in front. Place the
top of one foot on the sofa/chair behind you. Don't move your
pelvis, keep it straight throughout. Now bend your supporting leg
until you feel a stretch, hold on if needed. Move in and out of
the stretch. If your balance is excellent, you can raise your
arms over your head. This is two for the time of of one, one leg
stretches, the other is strengthened, and it engages your core -
three benefits.
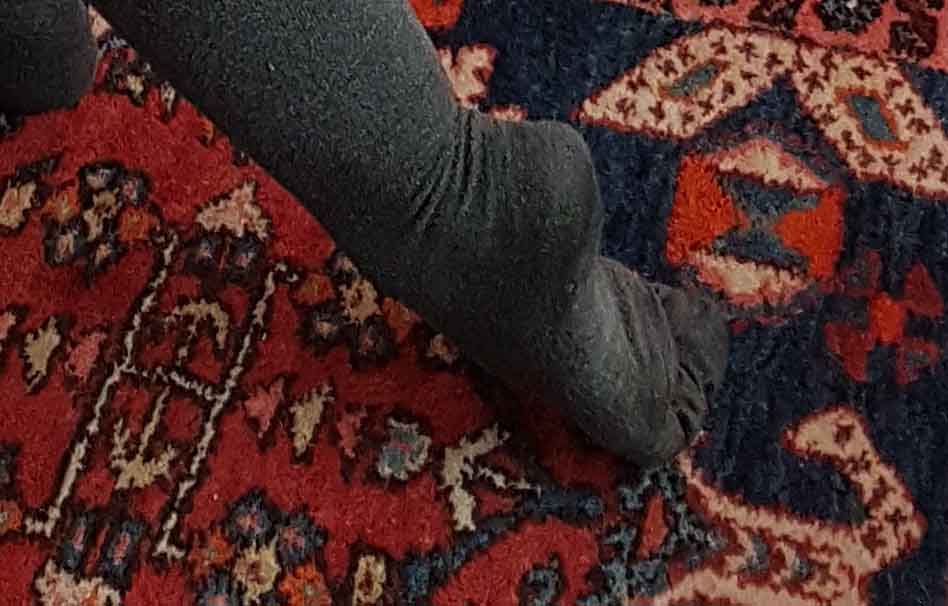
While you are standing place the top of your toes of one foot on
a soft surface on the floor. You might want to move your foot
slightly so that all toes get a stretch. To increase the stretch,
bend your standing leg.
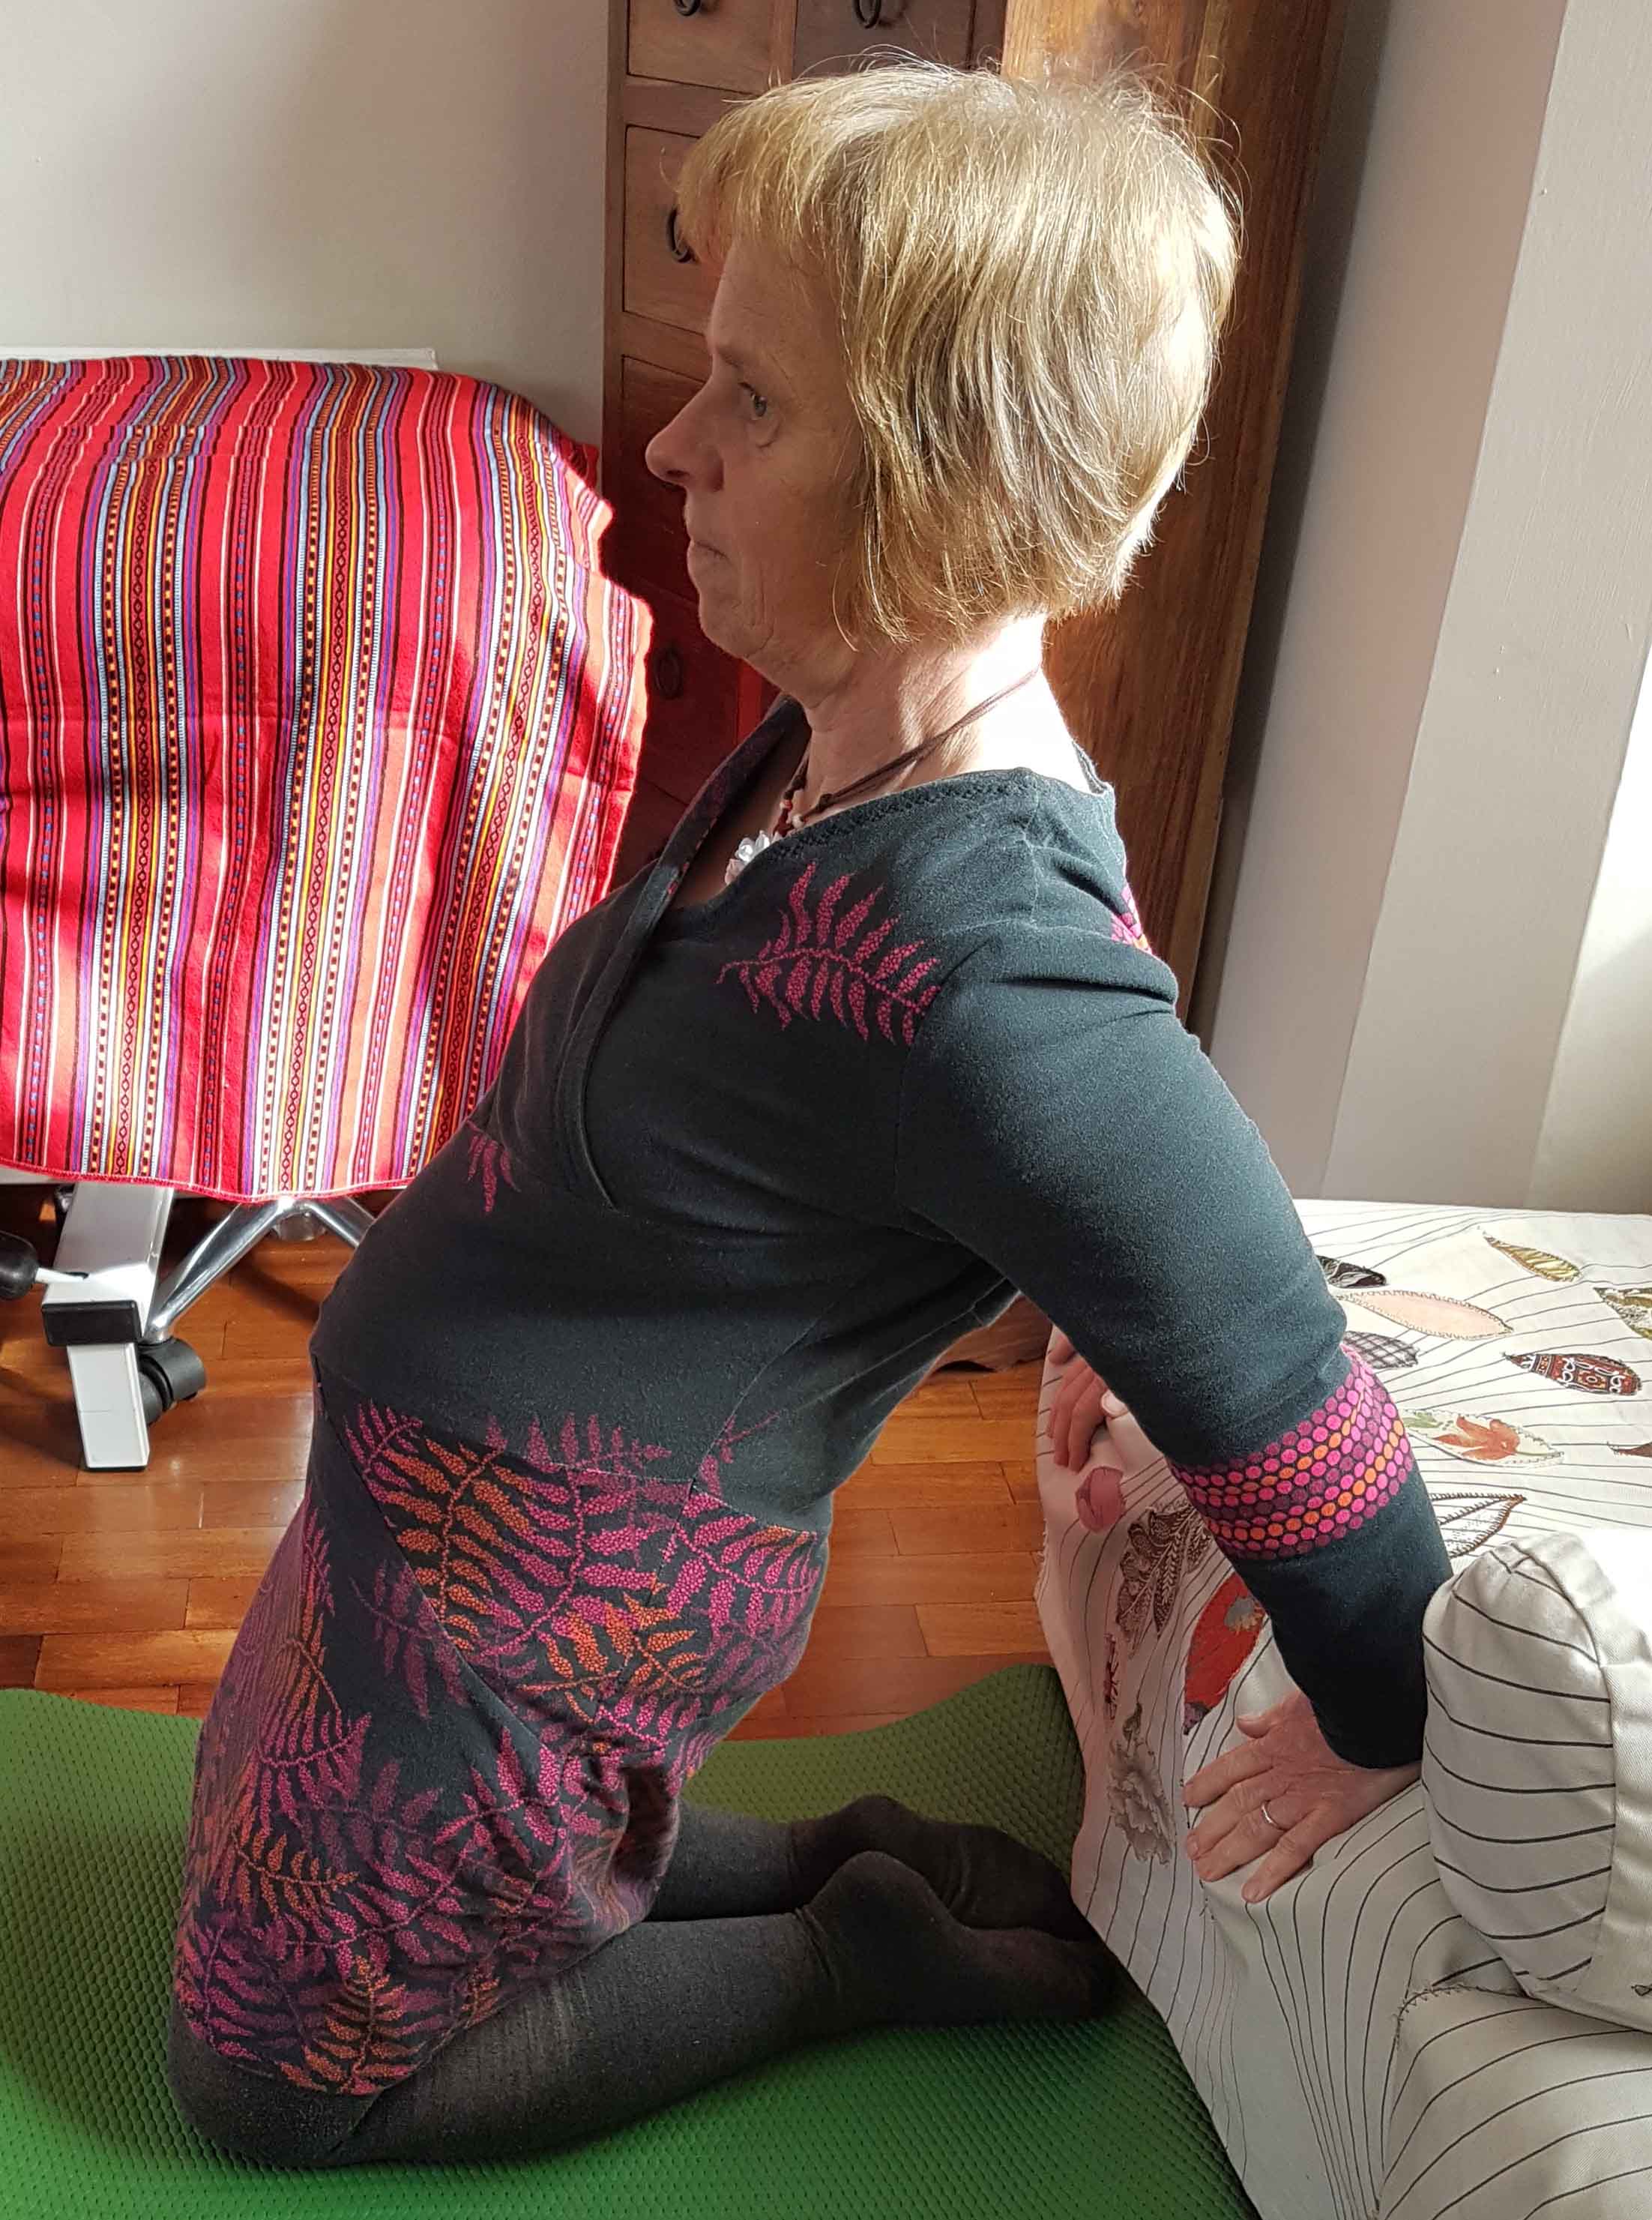
Kneel facing away from a sofa. Put your hands on the sofa and lean back. Now push out your hips and flatten your lower back. Hold. If that is easy for you, put your hands on the floor behind you and lift your hips (after moving away from the sofa). Make sure you don't arch your lower back. This is a good stretch for the quads, hip flexors, top of the feet and arms.
The next exercise is a MET - Muscle Energy Technique - you can do on yourself. Sit down with your legs bent and your feet flat on the floor. Place one hand in the middle of your thigh. With about twenty percent of your strength attempt to lift up your thigh towards your chest, but hold your leg down with your hand. Hold for about twelve seconds and repeat three times. Do the other leg.

For the side of the body you might want to start by visiting the
neck exercises again.
Stand with your back against a wall, legs about shoulder width apart. Bring your sacrum, ribcage, shoulders and heels towards the wall. Tuck your chin in, and if possible have the back of your head touch the wall. Bend gently from one side to another while staying in contact with the wall. Stroke the side of your thigh and reach as far down your leg as you can with each bend. Now hold a stretch on one side. Feel the space between your hip and ribs expand. To increase the stretch, lift up the arm and hold for about twelve seconds.
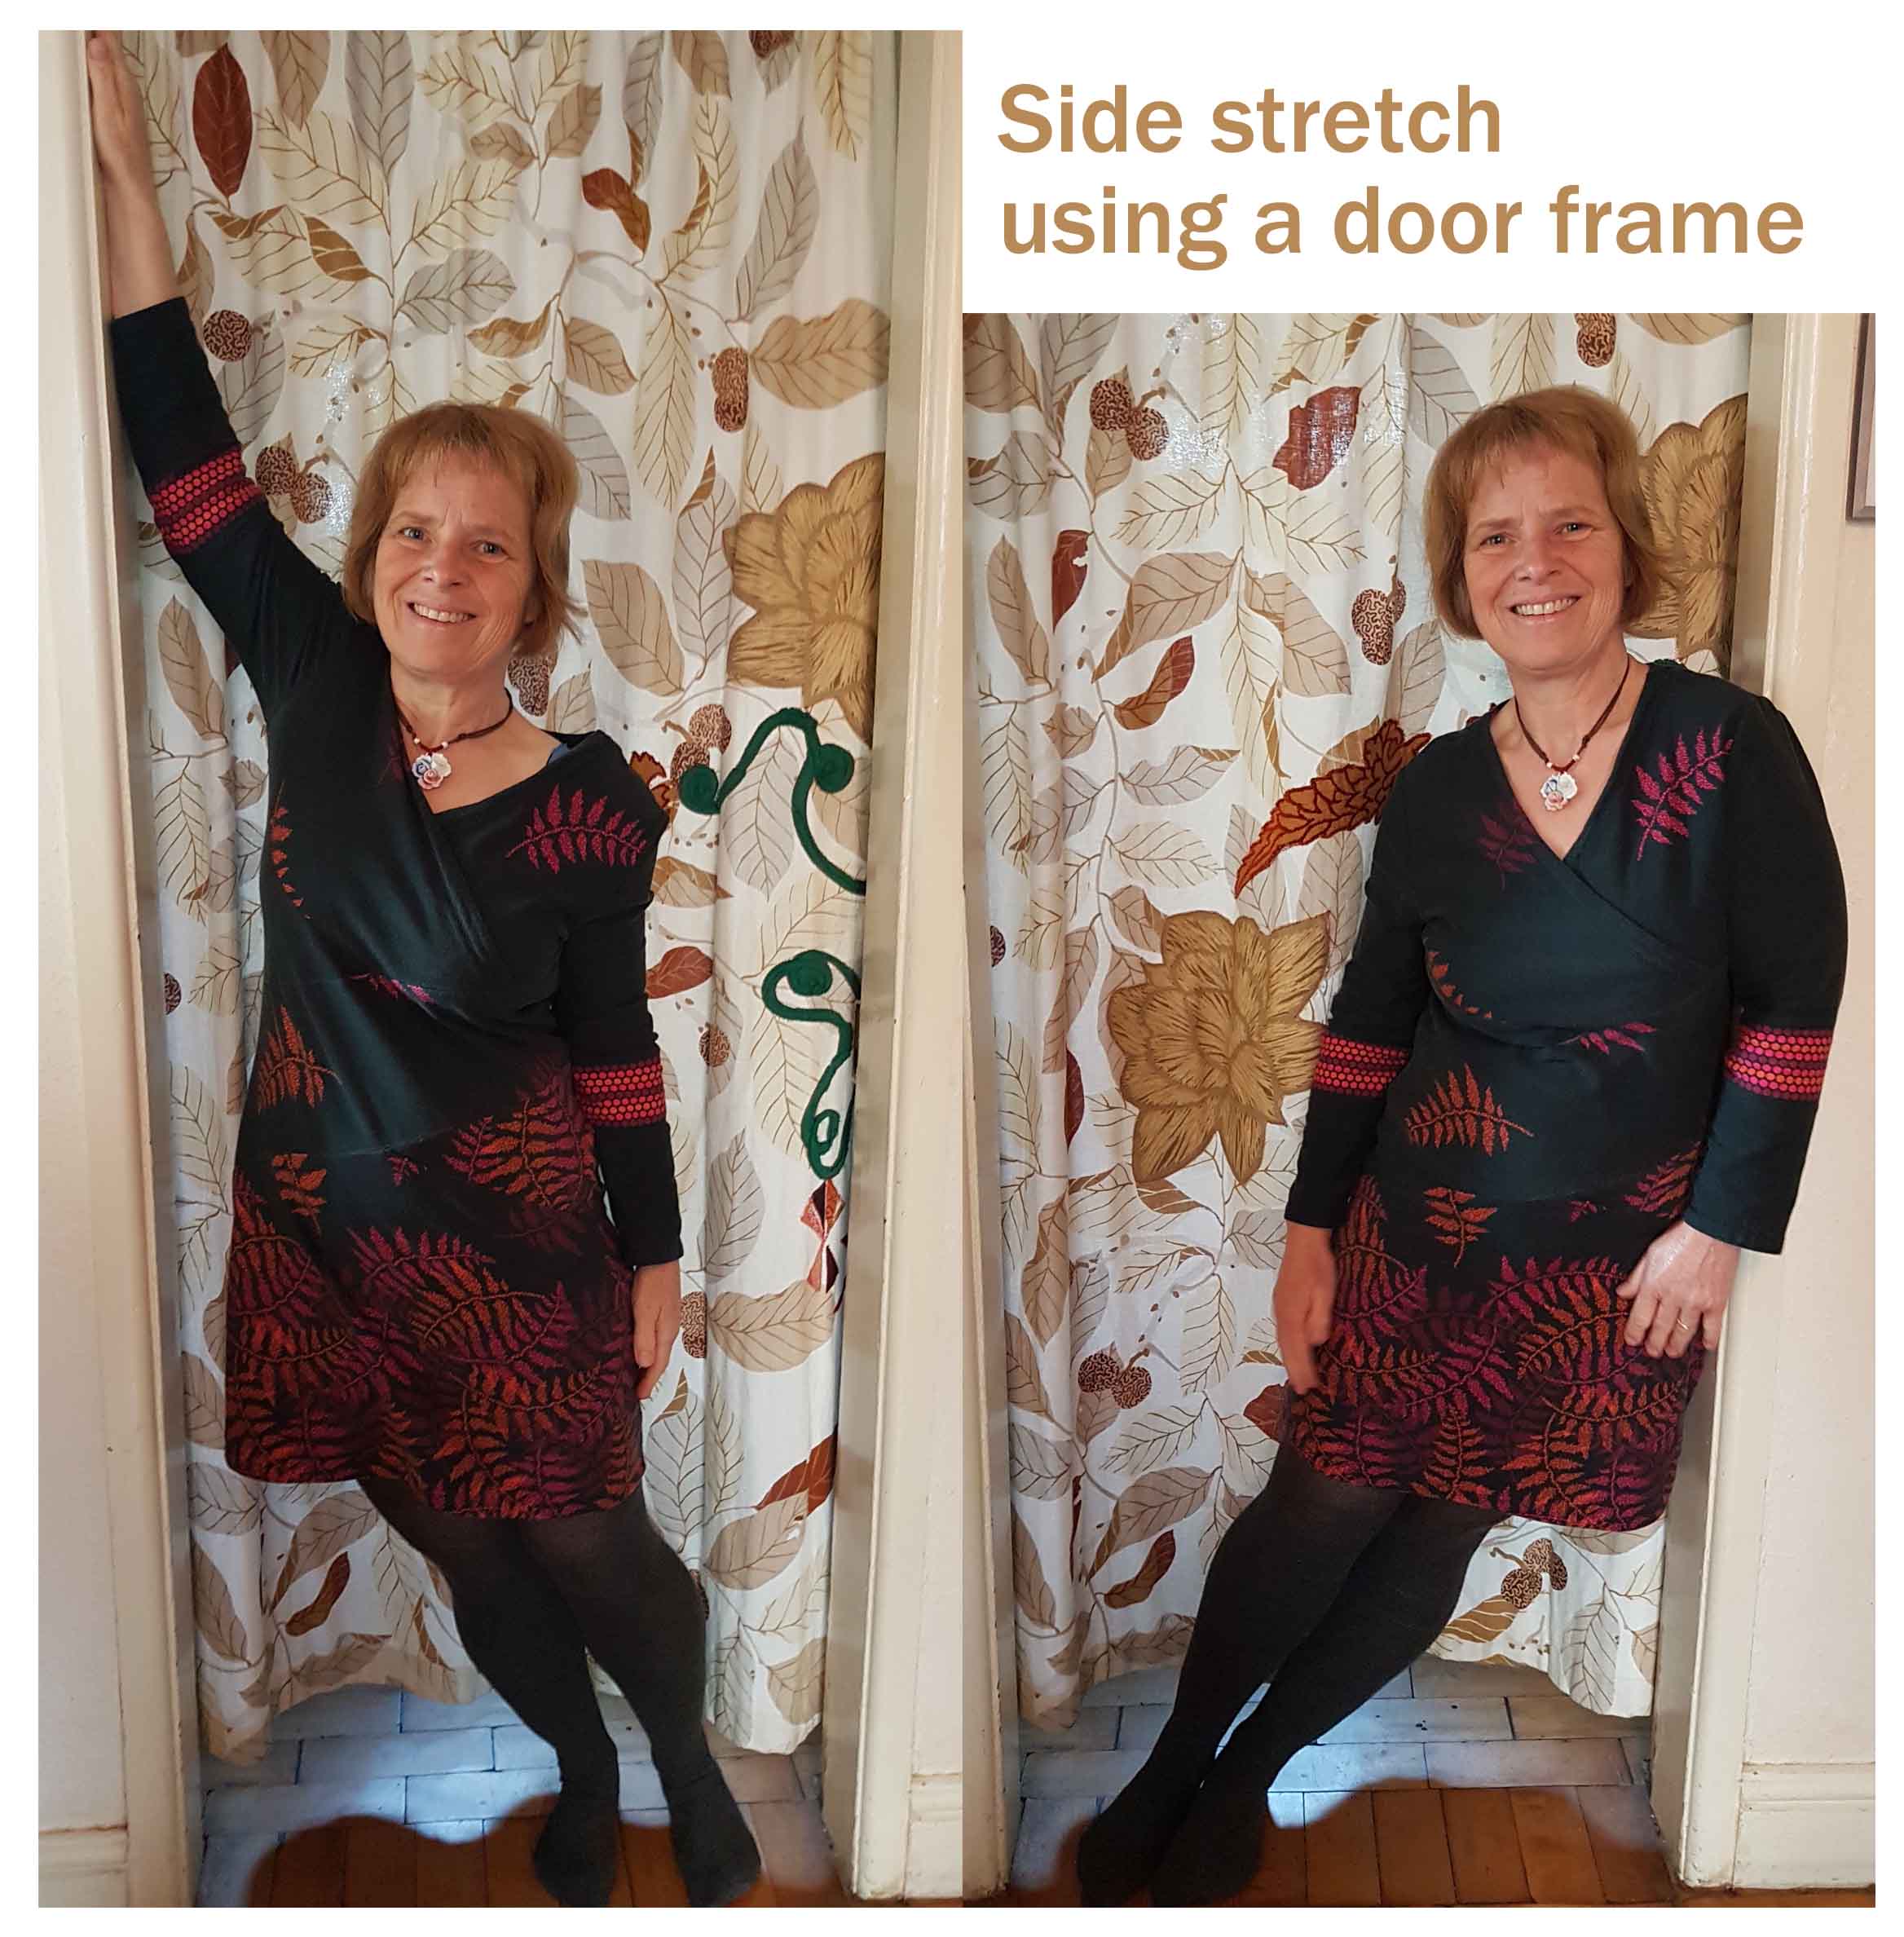
Stand in a doorway, put one arm up the door frame so that your
palm reaches as high as you can. Now gently let your hipbone move
towards the side with the arm raised, you can let your hand slide
on the frame. Don't twist your hips. You should feel a stretch on
that side. To increase the stretch stand further away from the
side you are leaning towards. If your shoulder is not allowing you
to lift your arm up, you can rest the side of your chest against
the door frame instead. The pictures shows me without slippers,
for more control I would recommend wearing footwear that does not
slip.
To finish, imagine you are a cat that has just woken up. Give yourself a good wriggle and stretch the way only a cat can do. Then find a comfortable position, take a couple of deep breaths and enjoy the rest of your day.
Shoulder and arm stretches
These stretches should be comfortable at all times. The swinging
of the arms is great for easing movement restrictions - as long as
you stay comfortable.
Stand tall, lift up your chest, unlock your knees. Let your arms hang loose by your side. Move your shoulders in deliberate slow circles, start with bringing your shoulder blades down. Make the shoulder circles as big as possible. You may hear clicking noises - I do after a session at the computer. Keep your arms relaxed.
Make sure you have enough space around you. Keep your arms and hands relaxed and heavy. Swing your arms backwards and forwards, small movements first, then you can make them bigger. You can bend your knees with each move and get a bit of a rhythm going, even combing this with a squat.
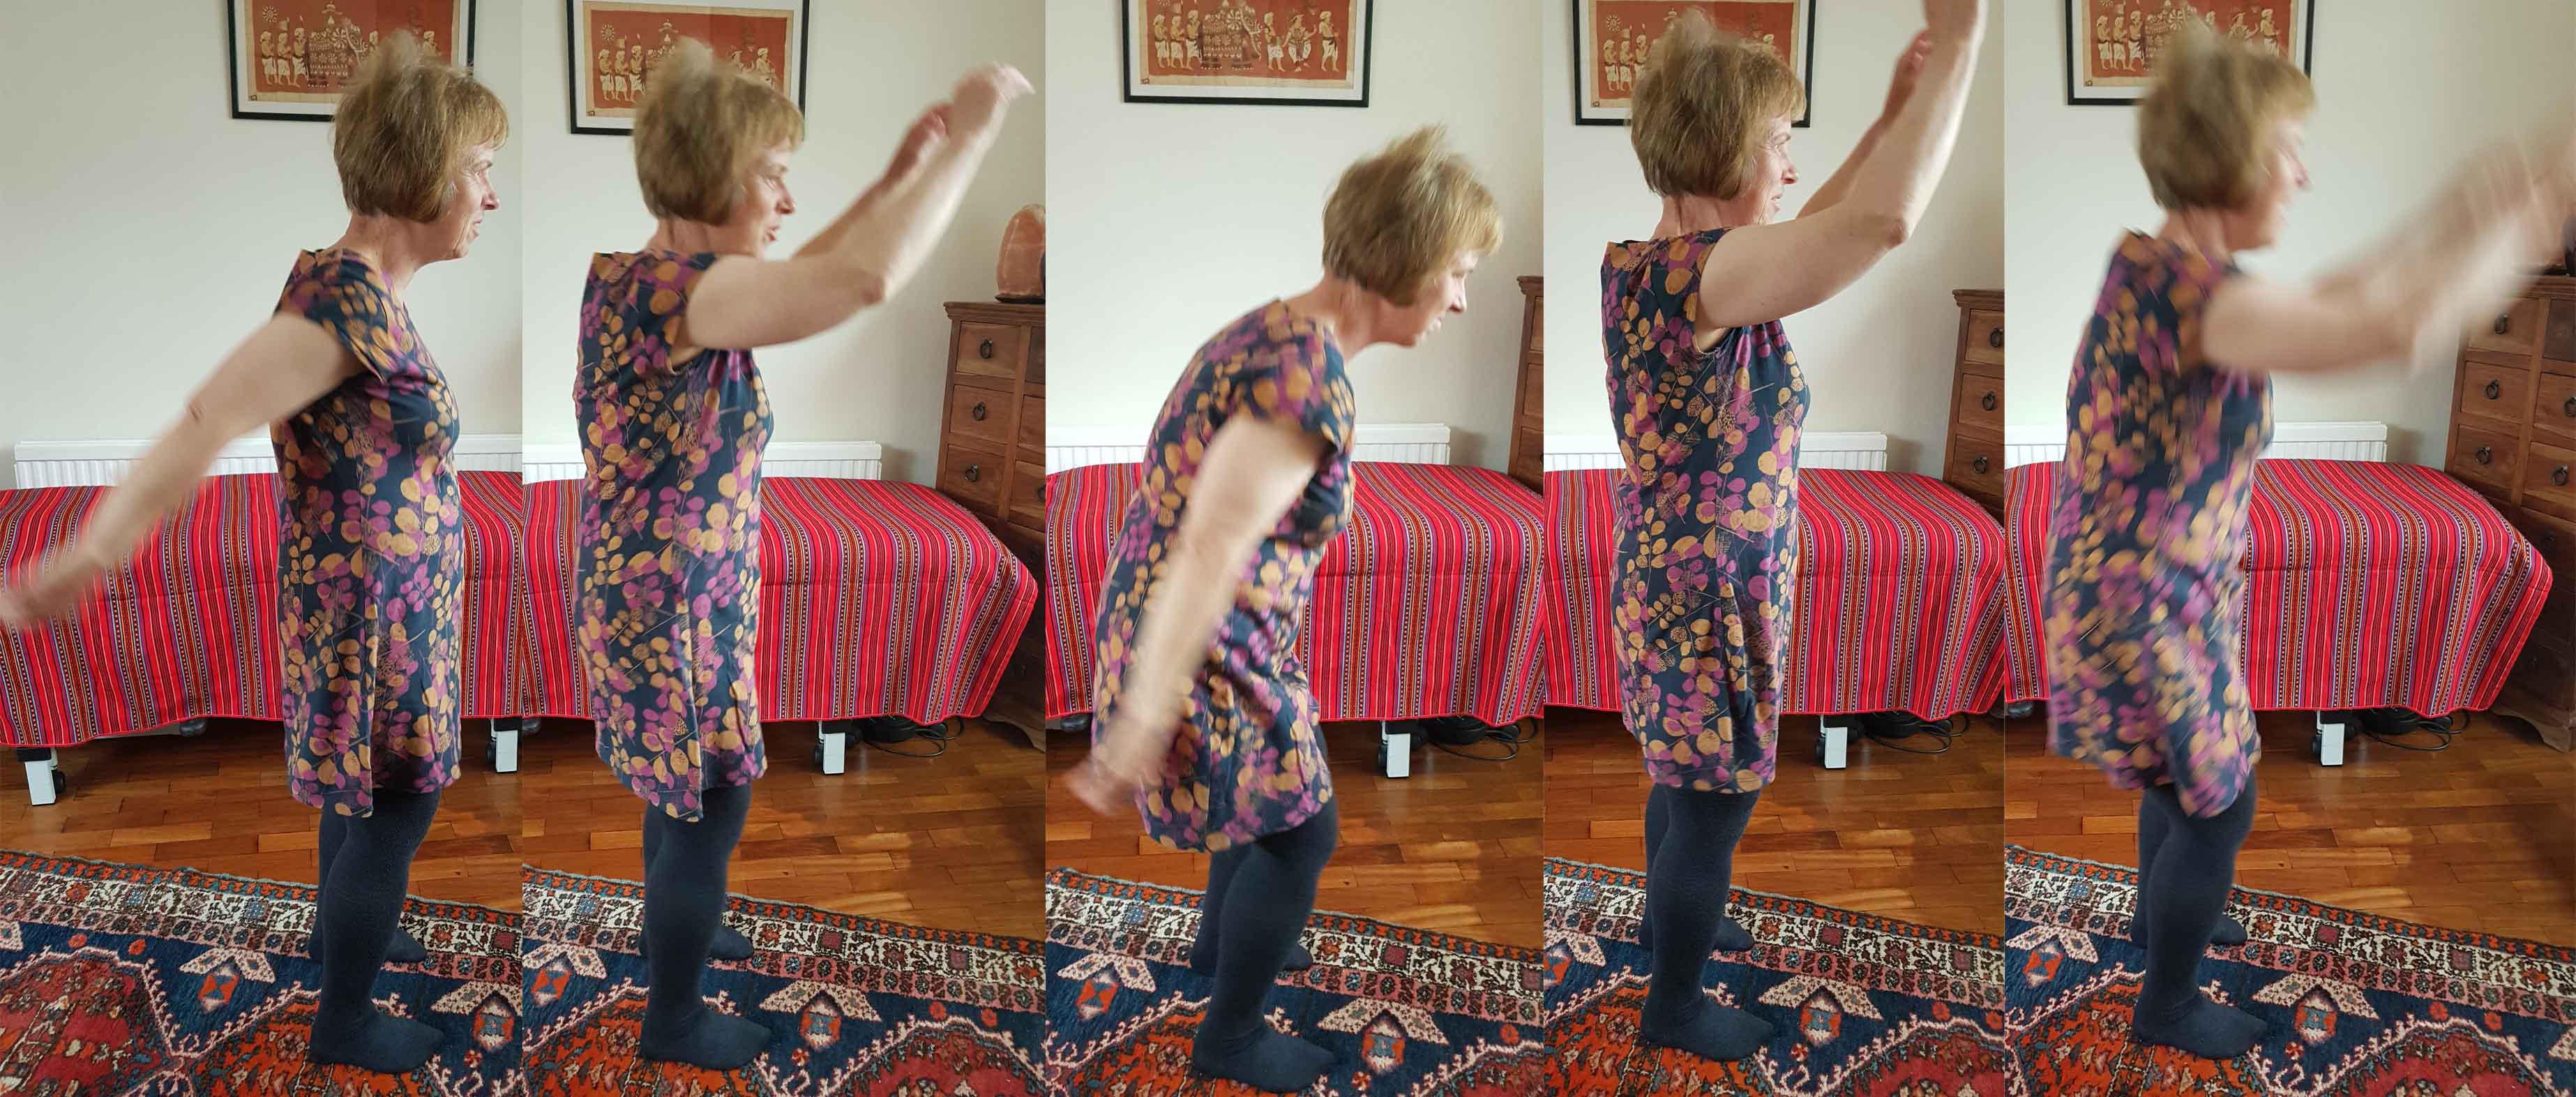
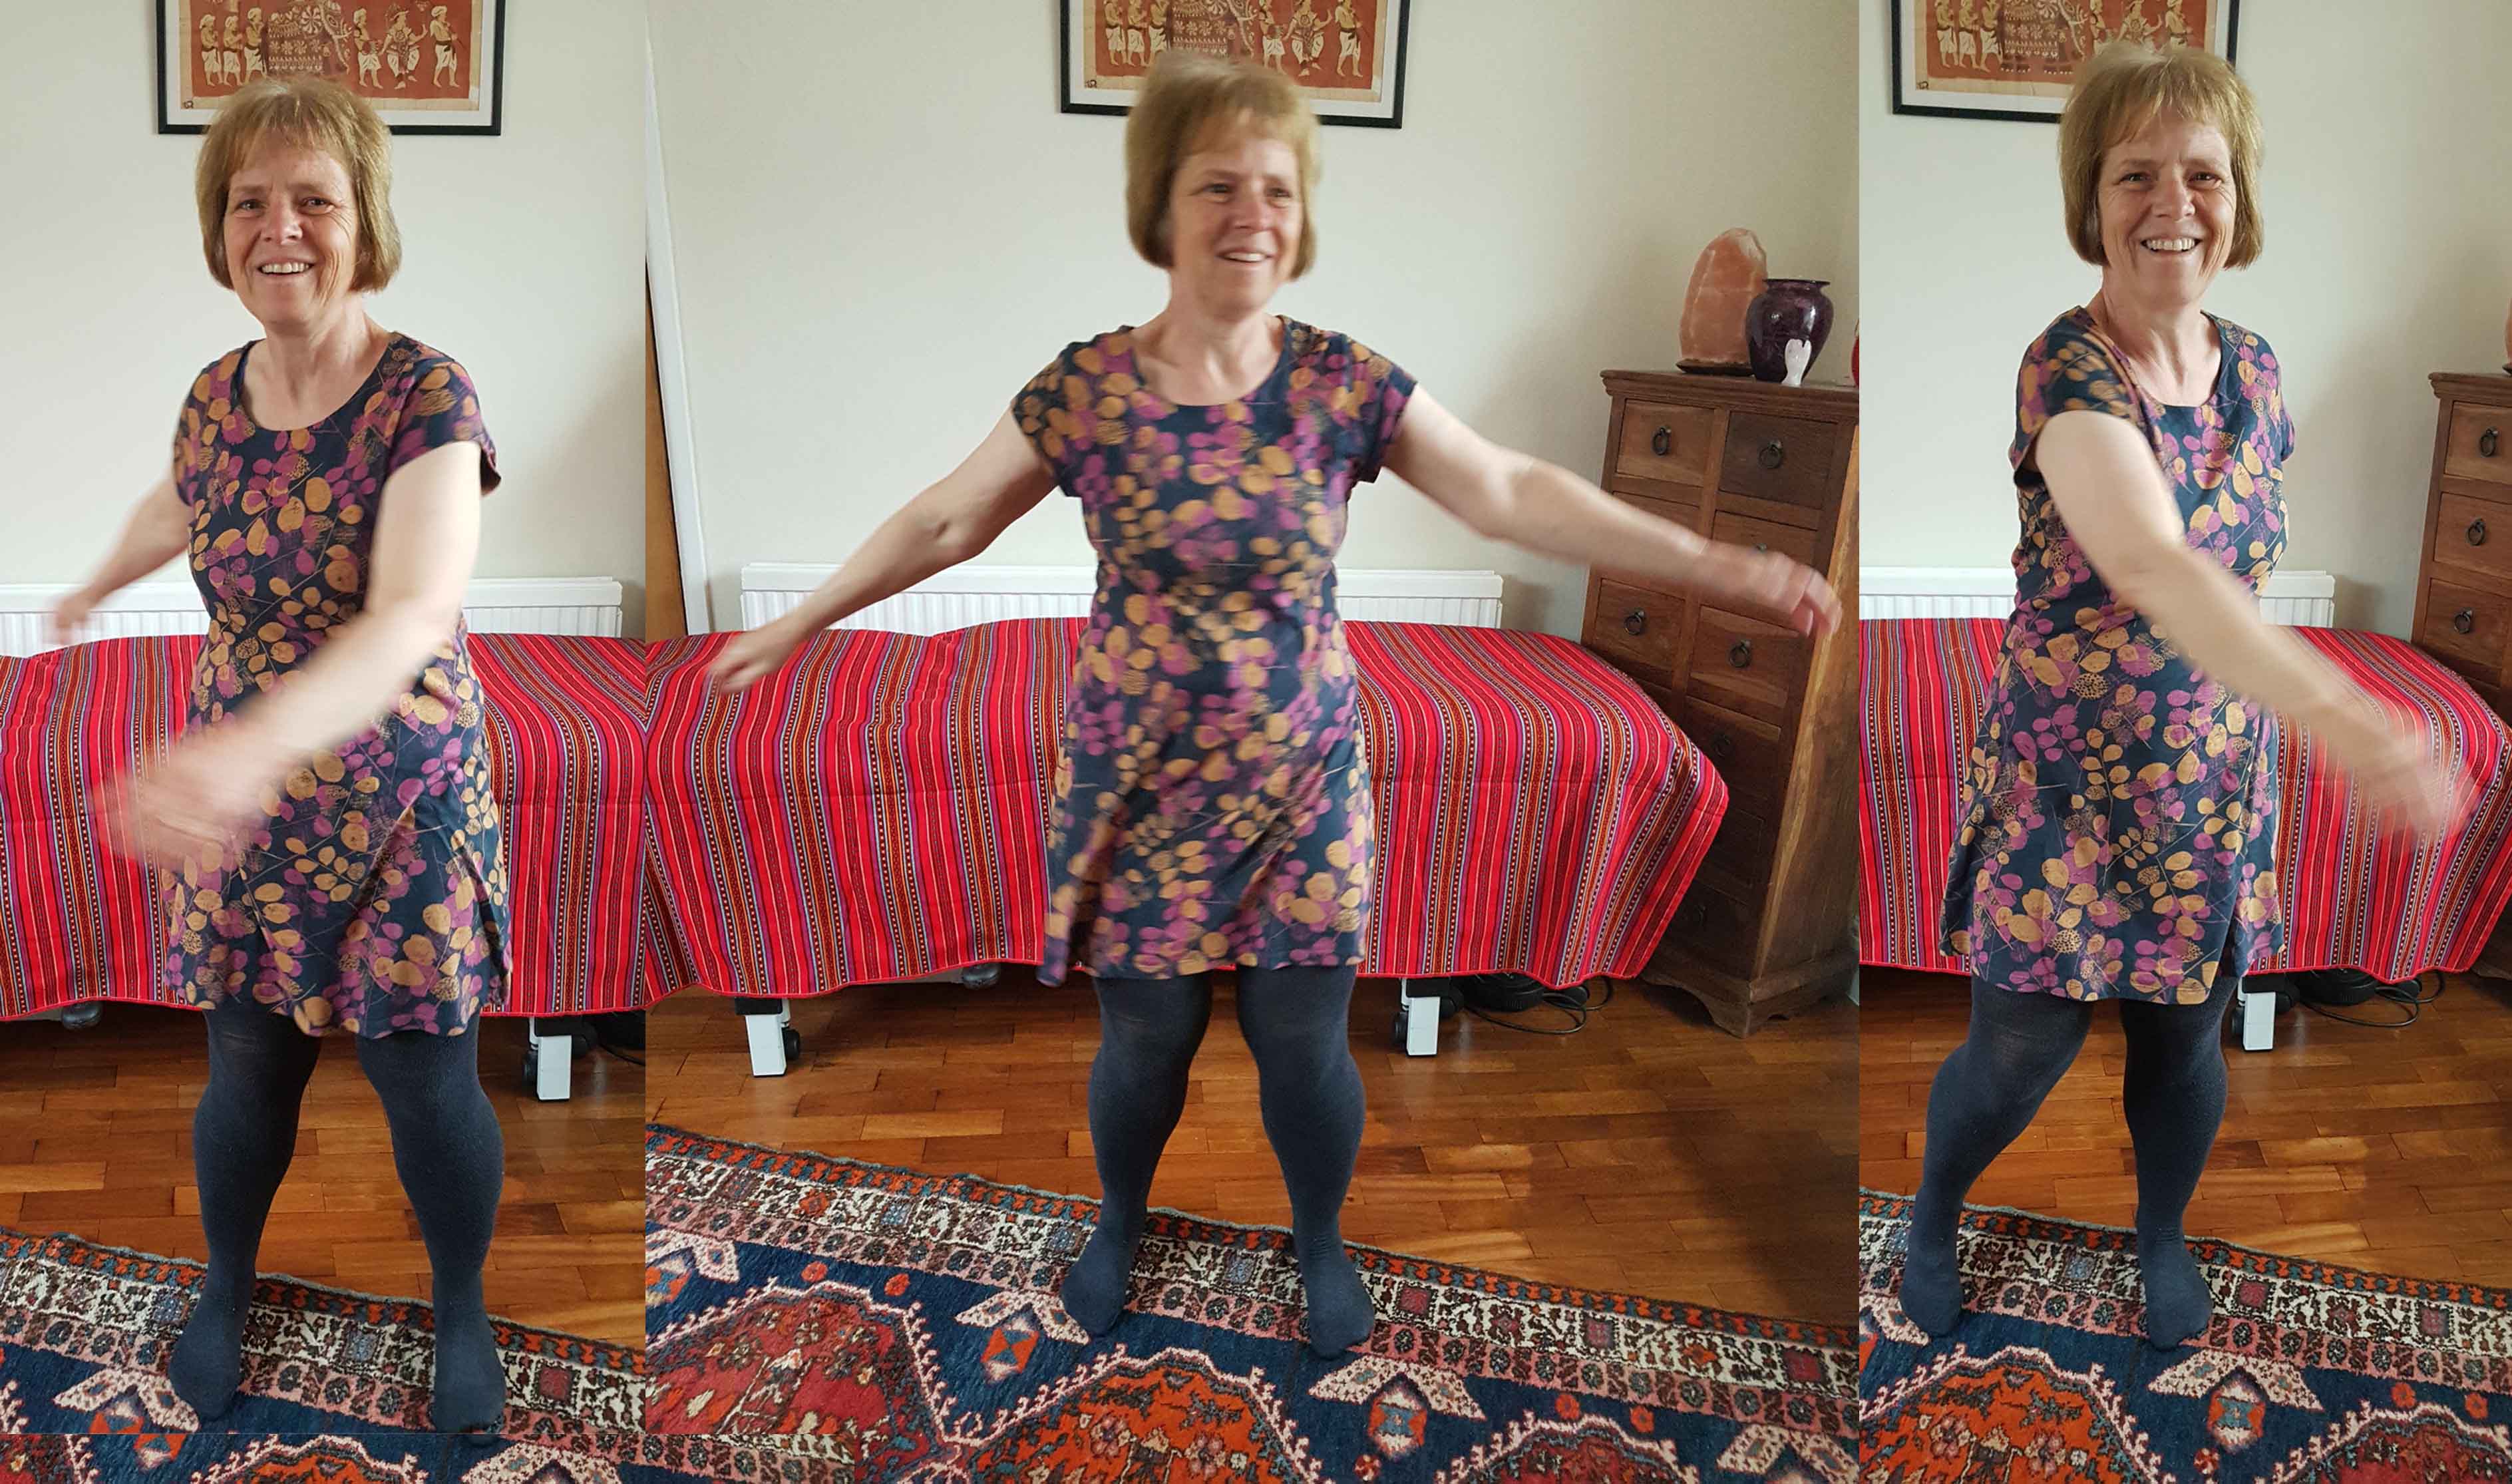
Now stand with your legs shoulder width apart, knees still unlocked and with plenty of space around you. First keep your hips still and swing your arms around you by moving your upper back. First one way, then the other, and so on. Small movements first, then increase the speed of the swinging. You will notice that your circles become bigger. You can tap your body where your hands land, giving yourself an invigorating massage. At a next stage you can move your hips, too, and pivot on one foot. Go with the flow, stay relaxed, feel how your arms move.
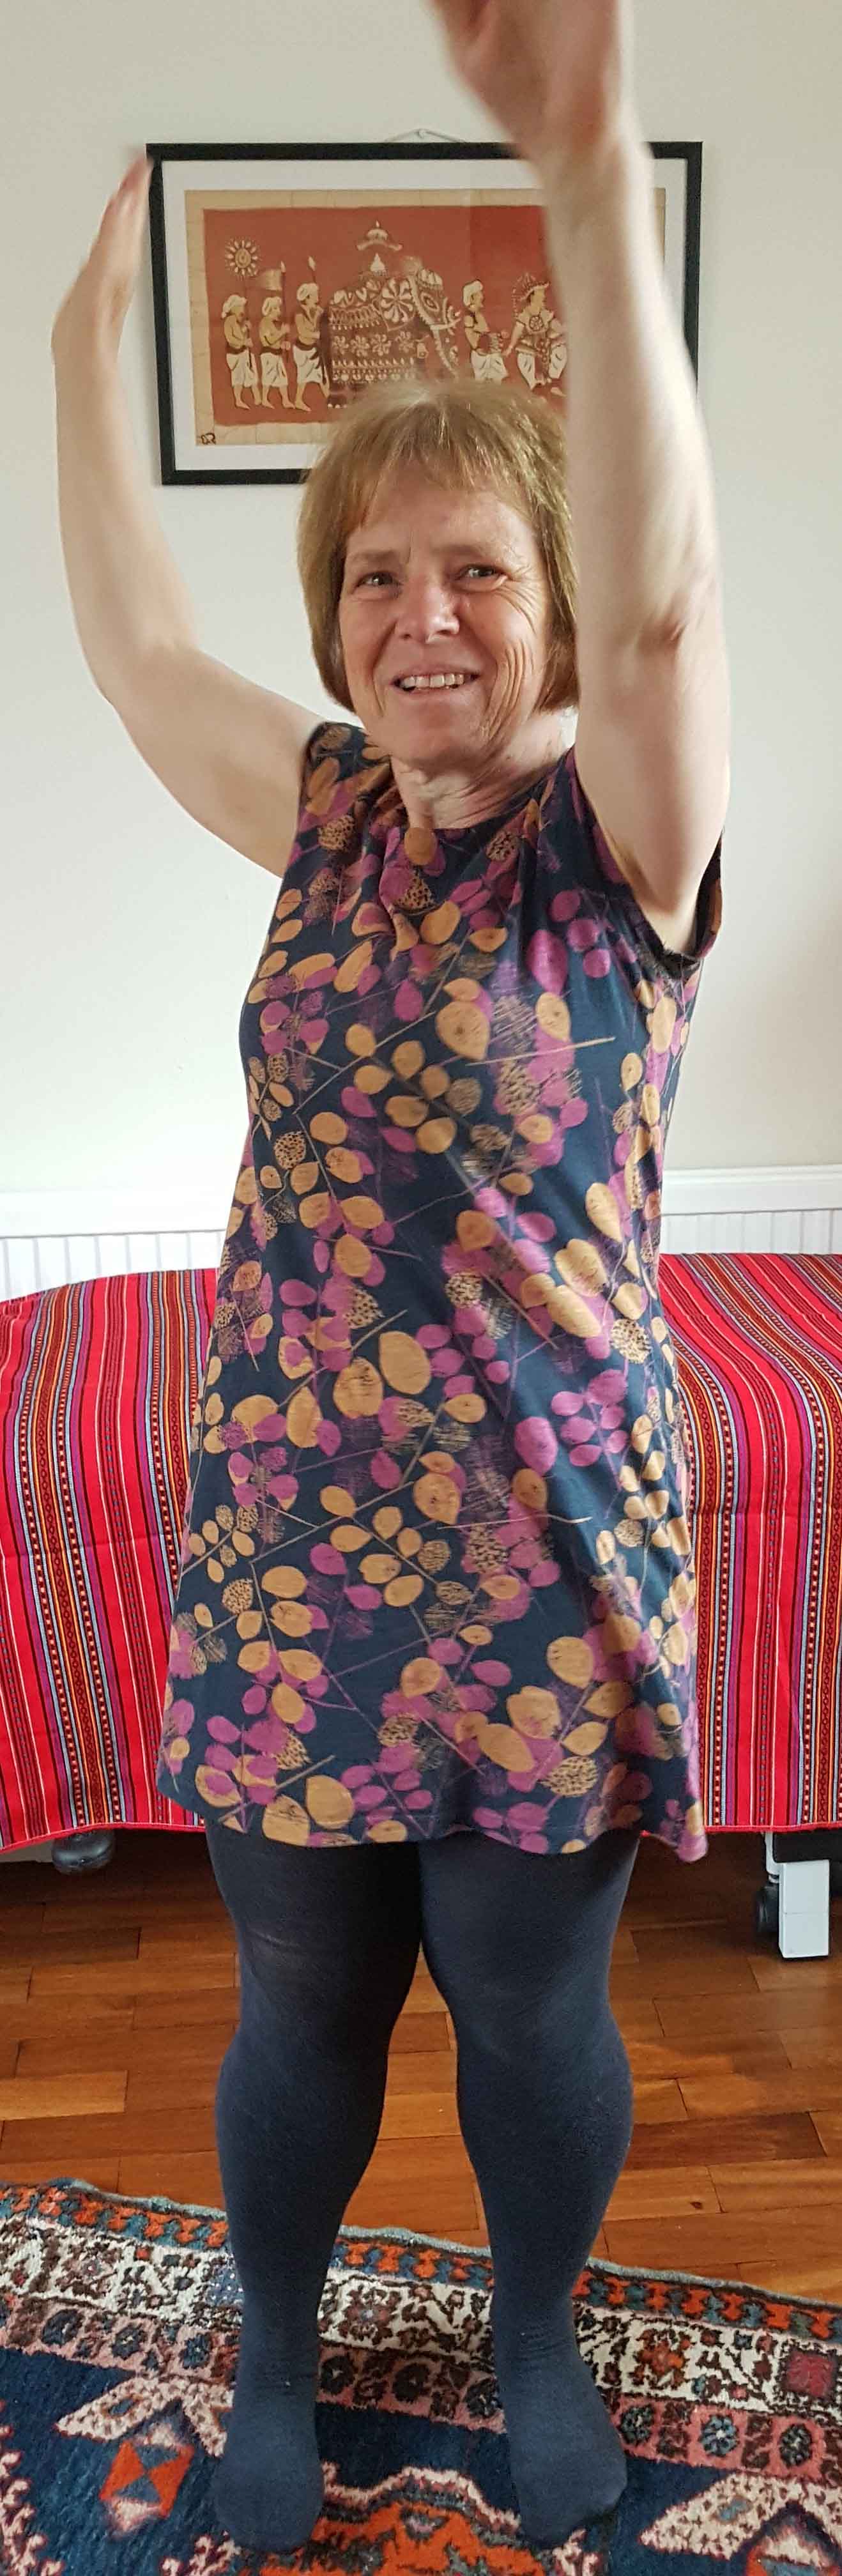
Now make a big circle with one arm, stretching your fingers to make it as large as possible. Go both ways on both sides. The advanced version of this exercise is to do both arms at the same time but in opposite directions. Have fun. I find it helps if you start with both arms stretched out at the top. Go both directions with each arm.
Find a door frame and stand in front of it facing the room. Bring
your arms up so that they are level with your shoulders. Bend your
elbows ninety degrees with your palms facing forward. Place your
elbows, lower arms and hands on the door frame. Keep your shoulders away from your ears. Now
shift your weight until you feel a stretch across your chest,
obviously while staying steady on your feet. Hold. You can vary
this stretch by moving your upper arms higher or lower.
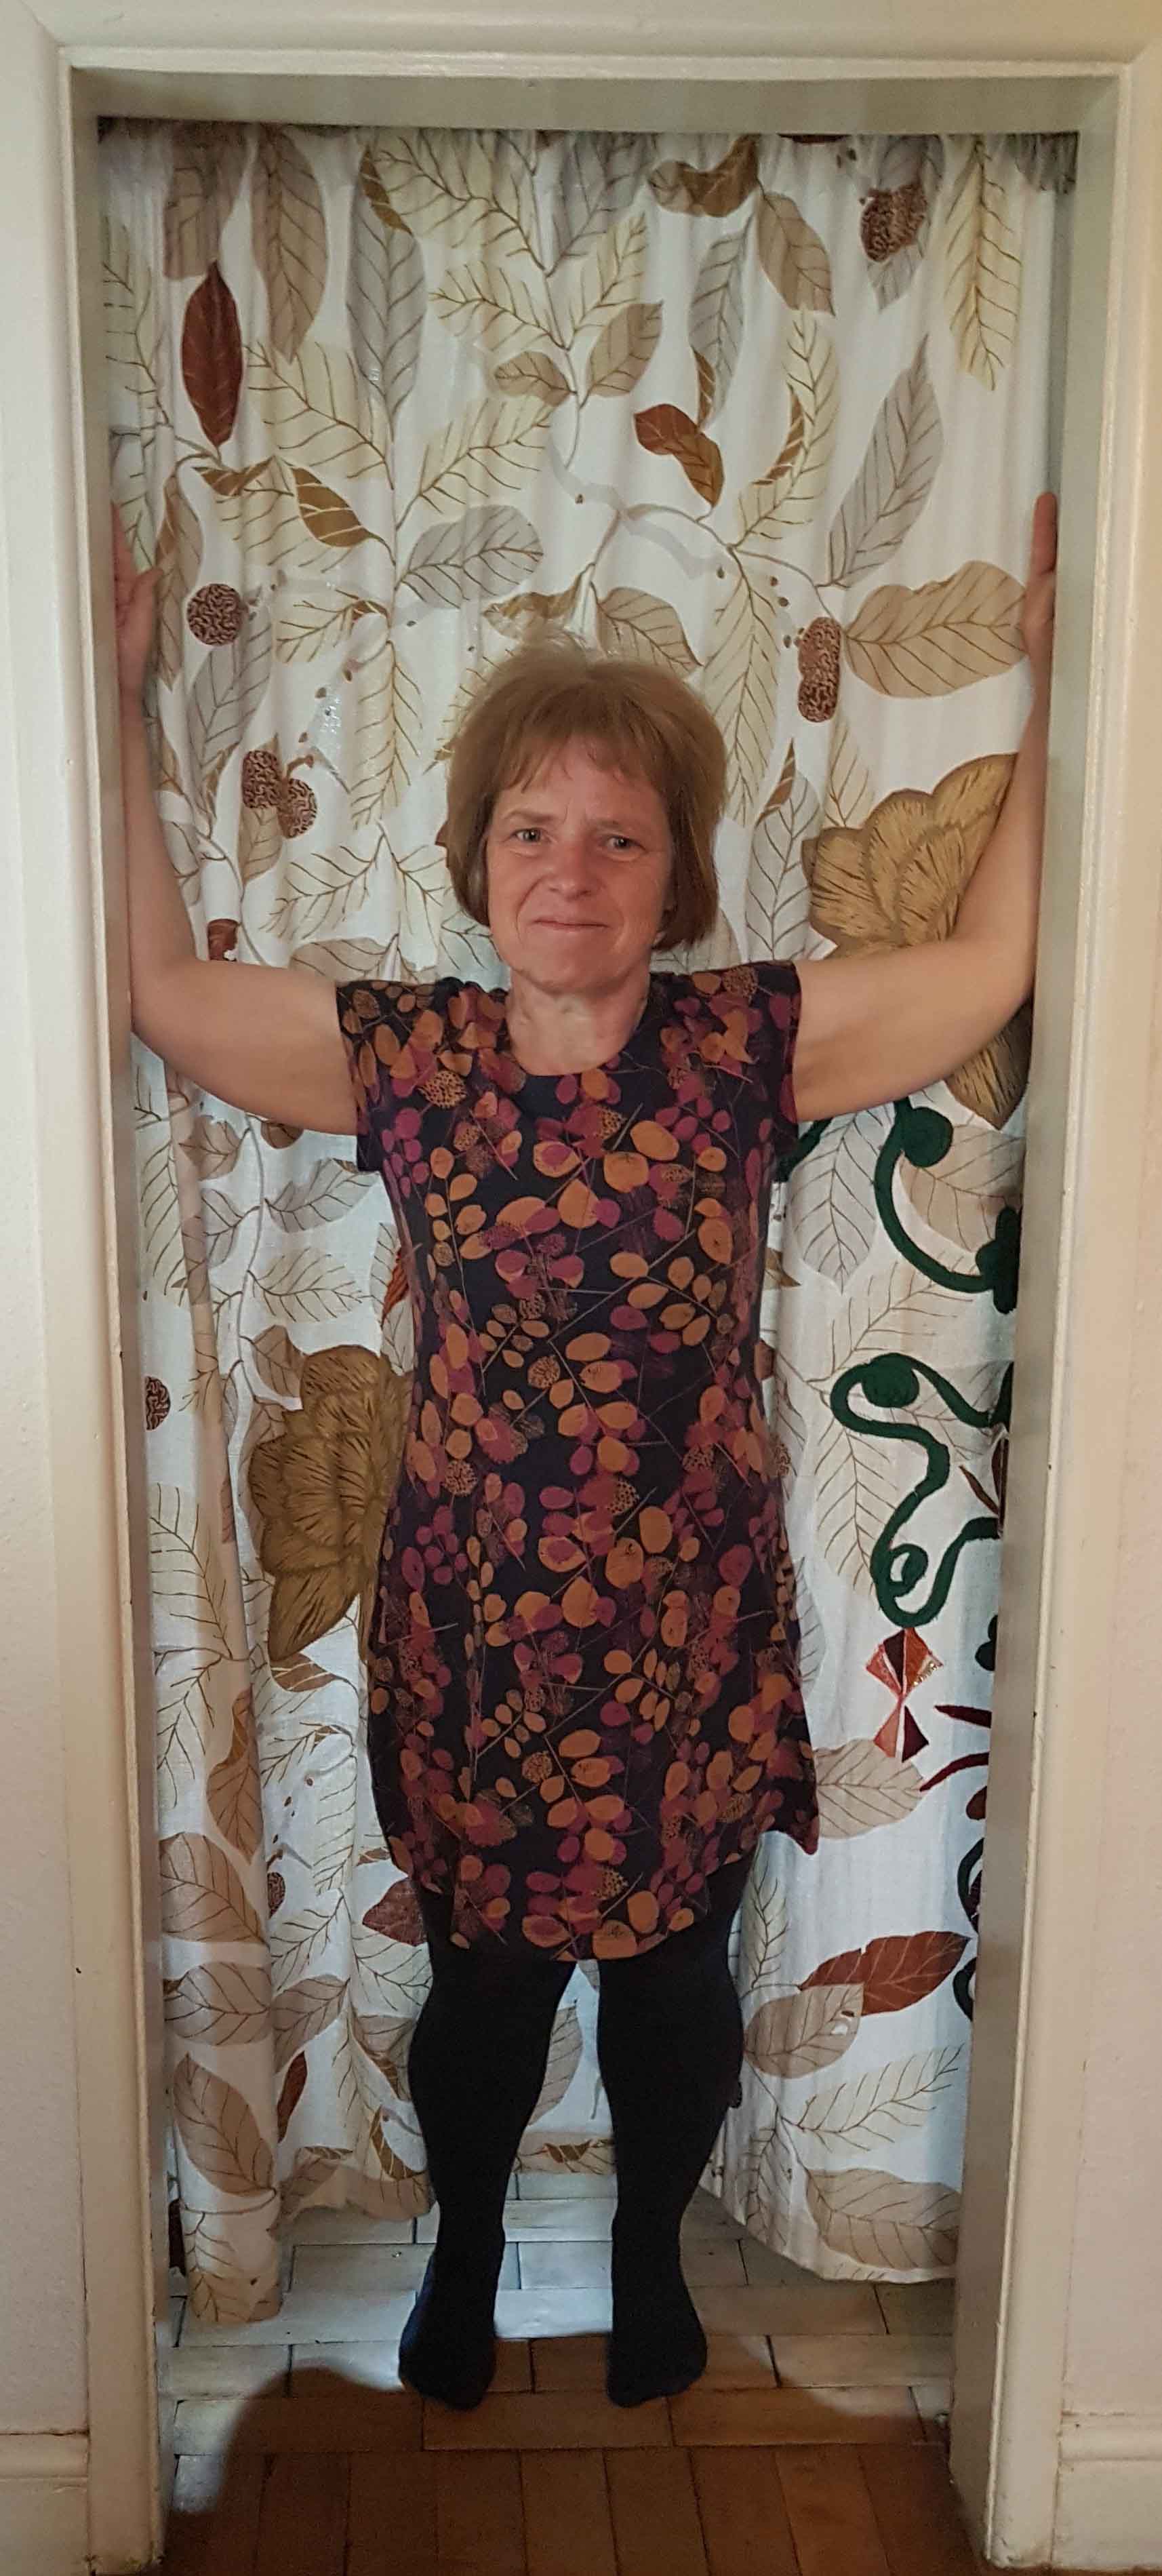
Tall people can even use the top of the door frame for a stretch, but I can't reach.
Most of us get tight arms and hands, sometimes without us
noticing it. When massaging your hands and arms you have to watch
that you don't damage the massaging hand or thumb. Here are a
couple of ideas.
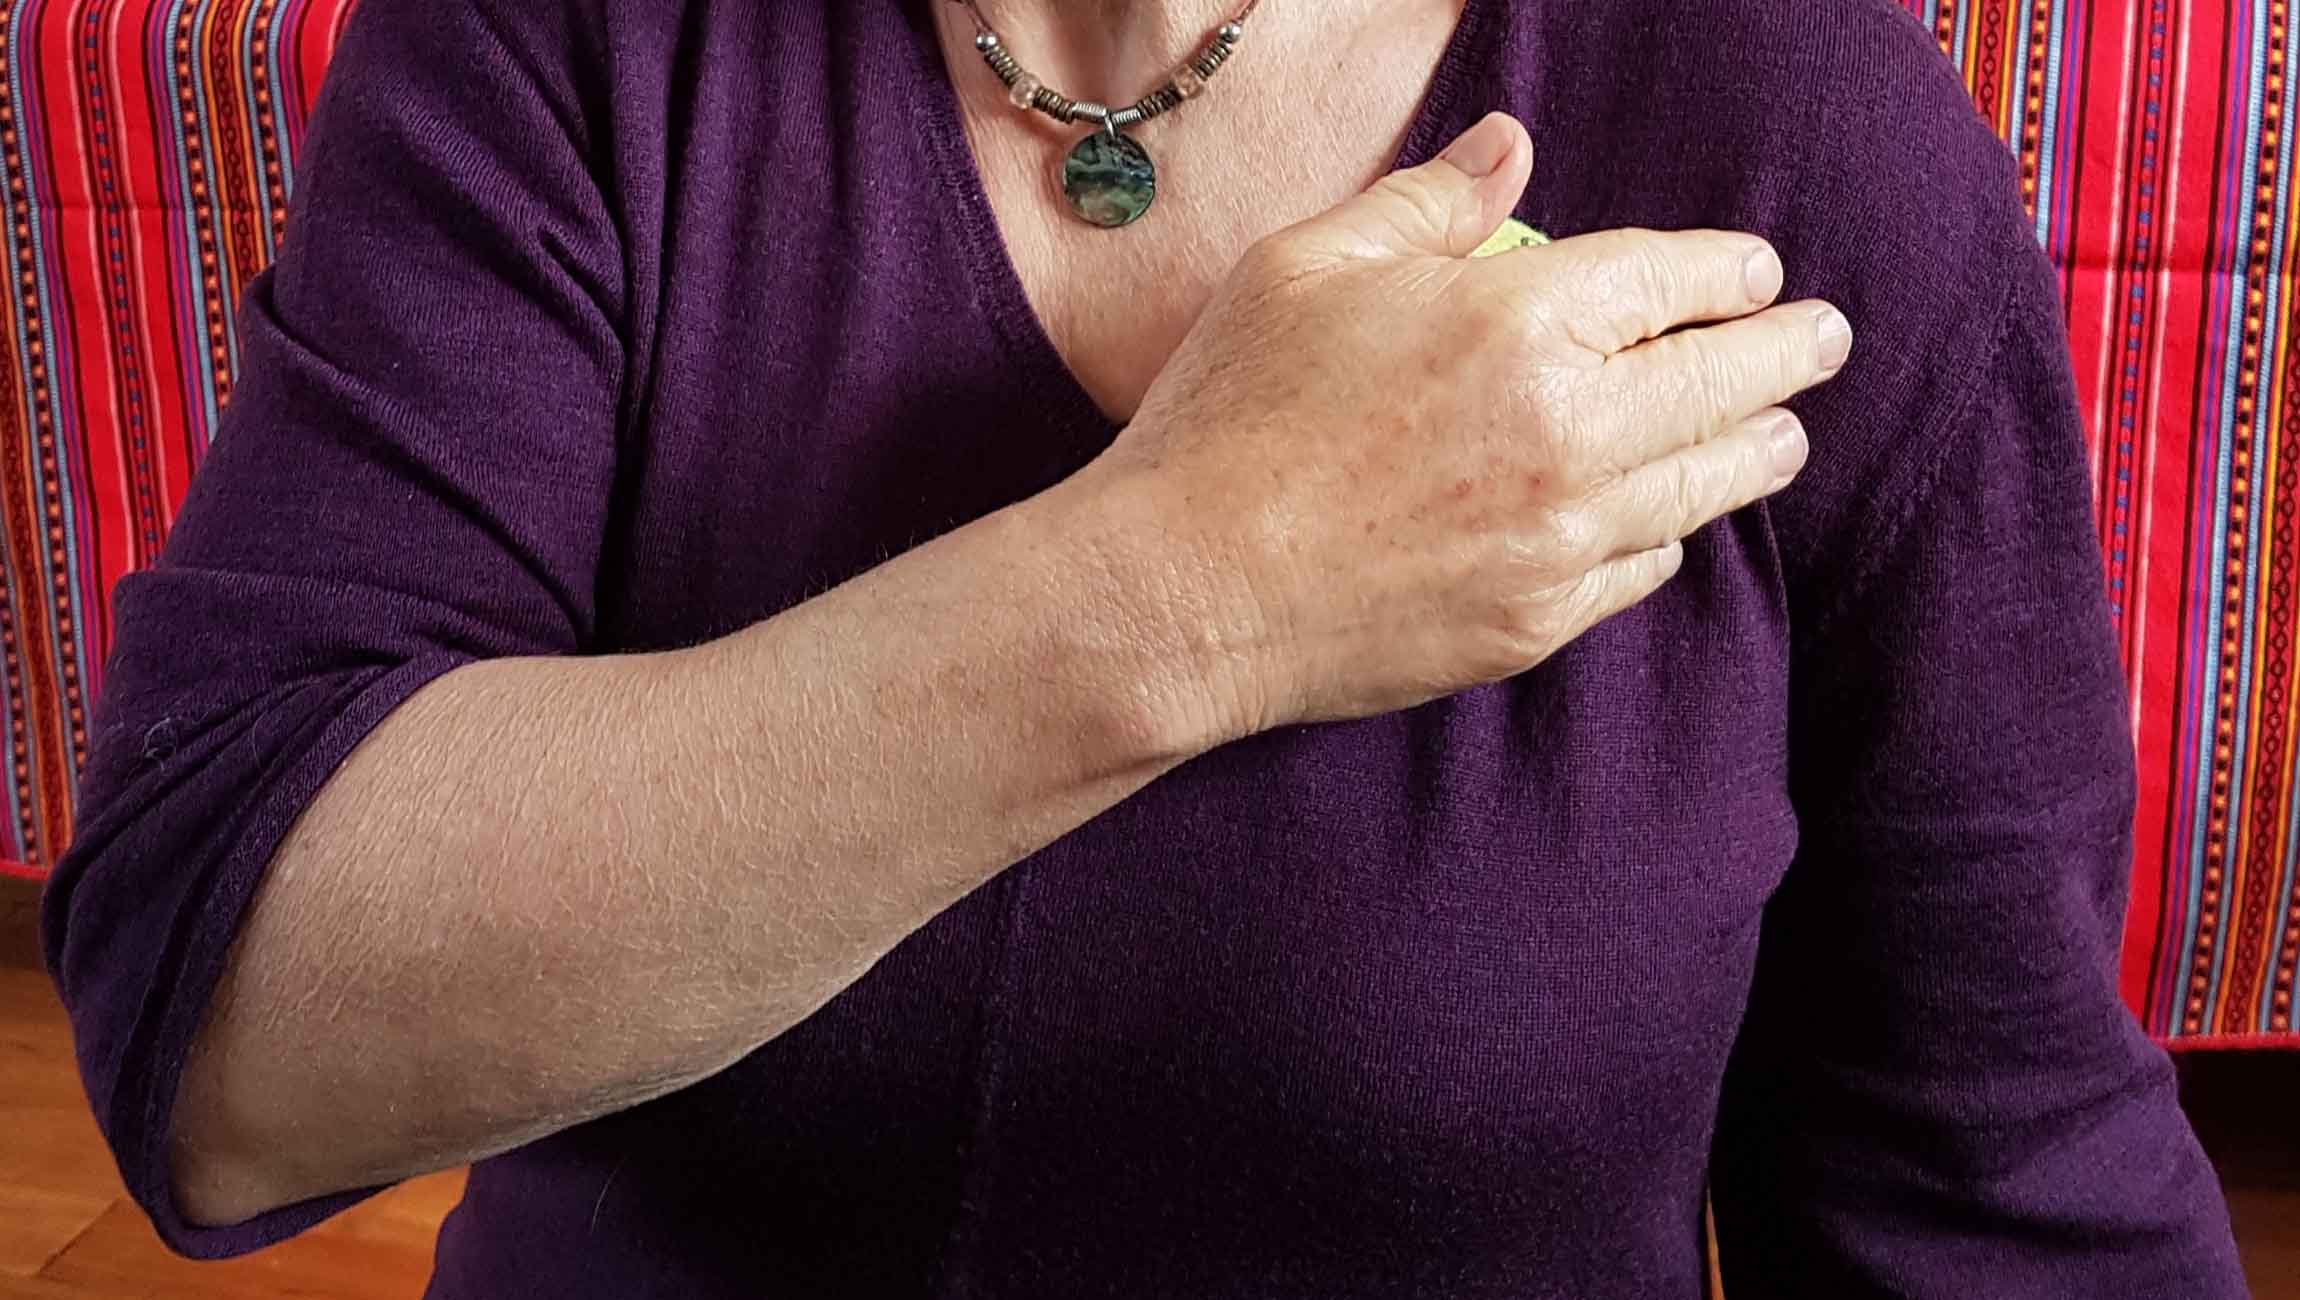
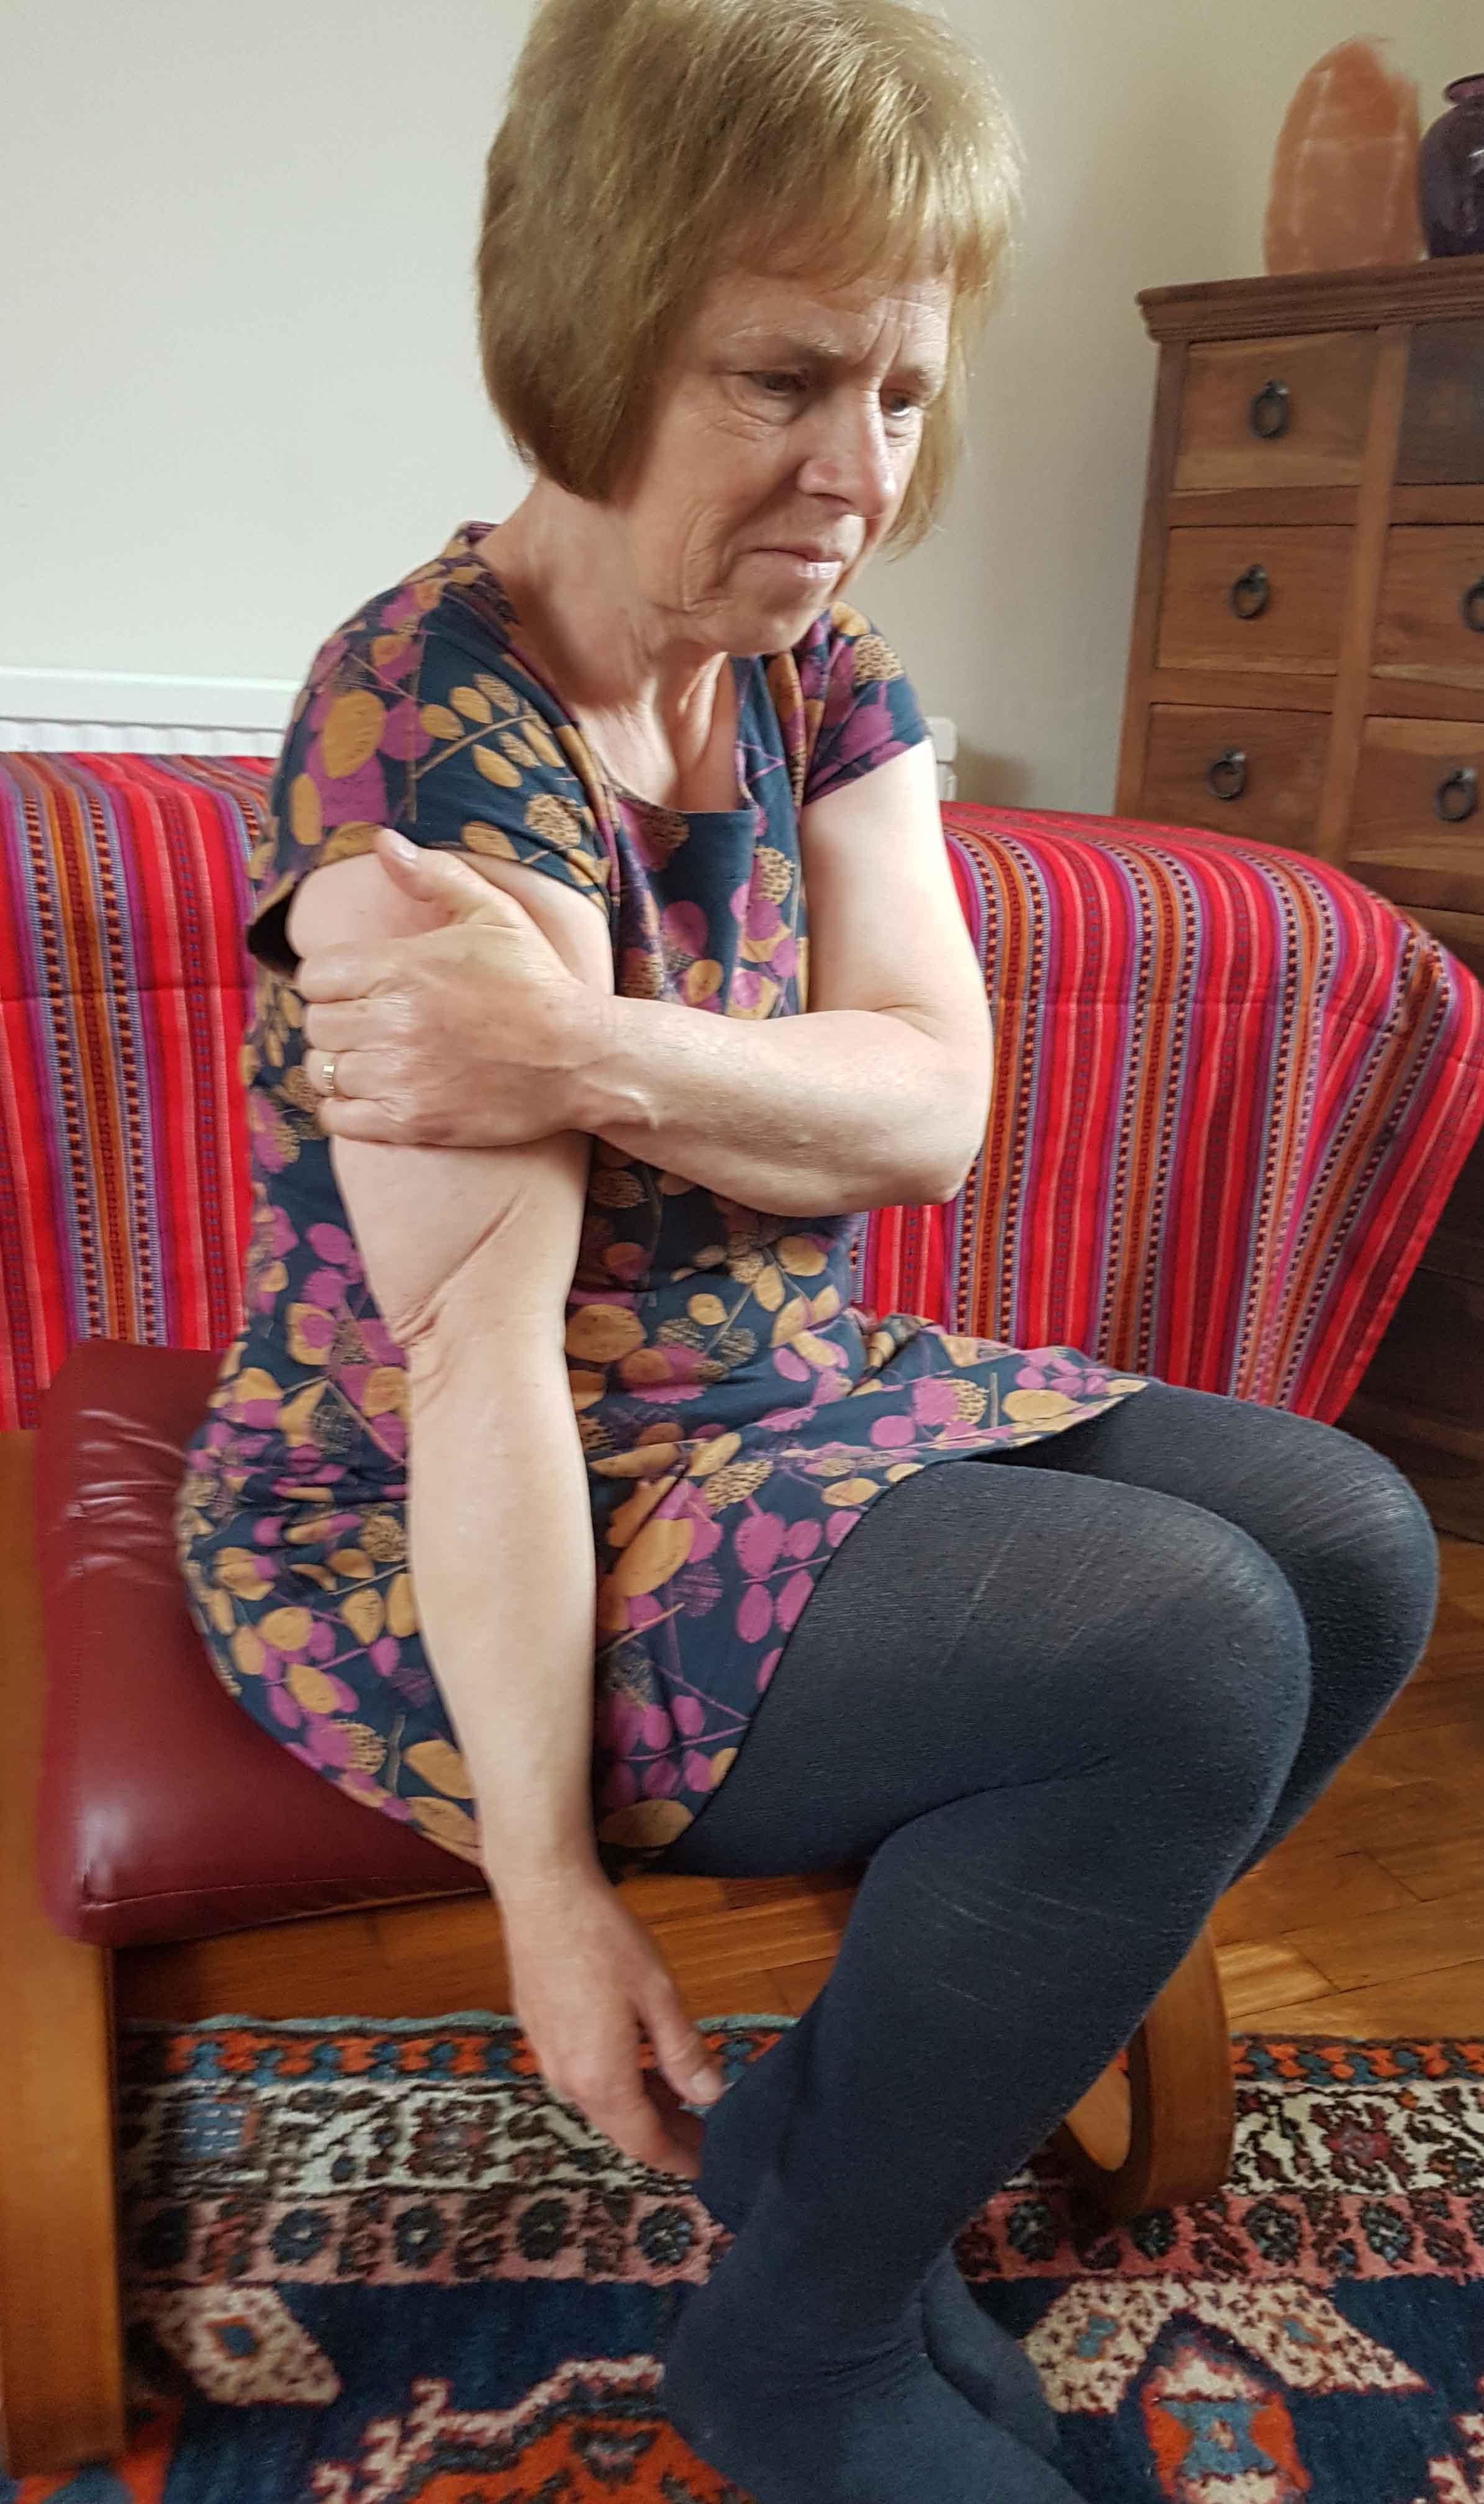
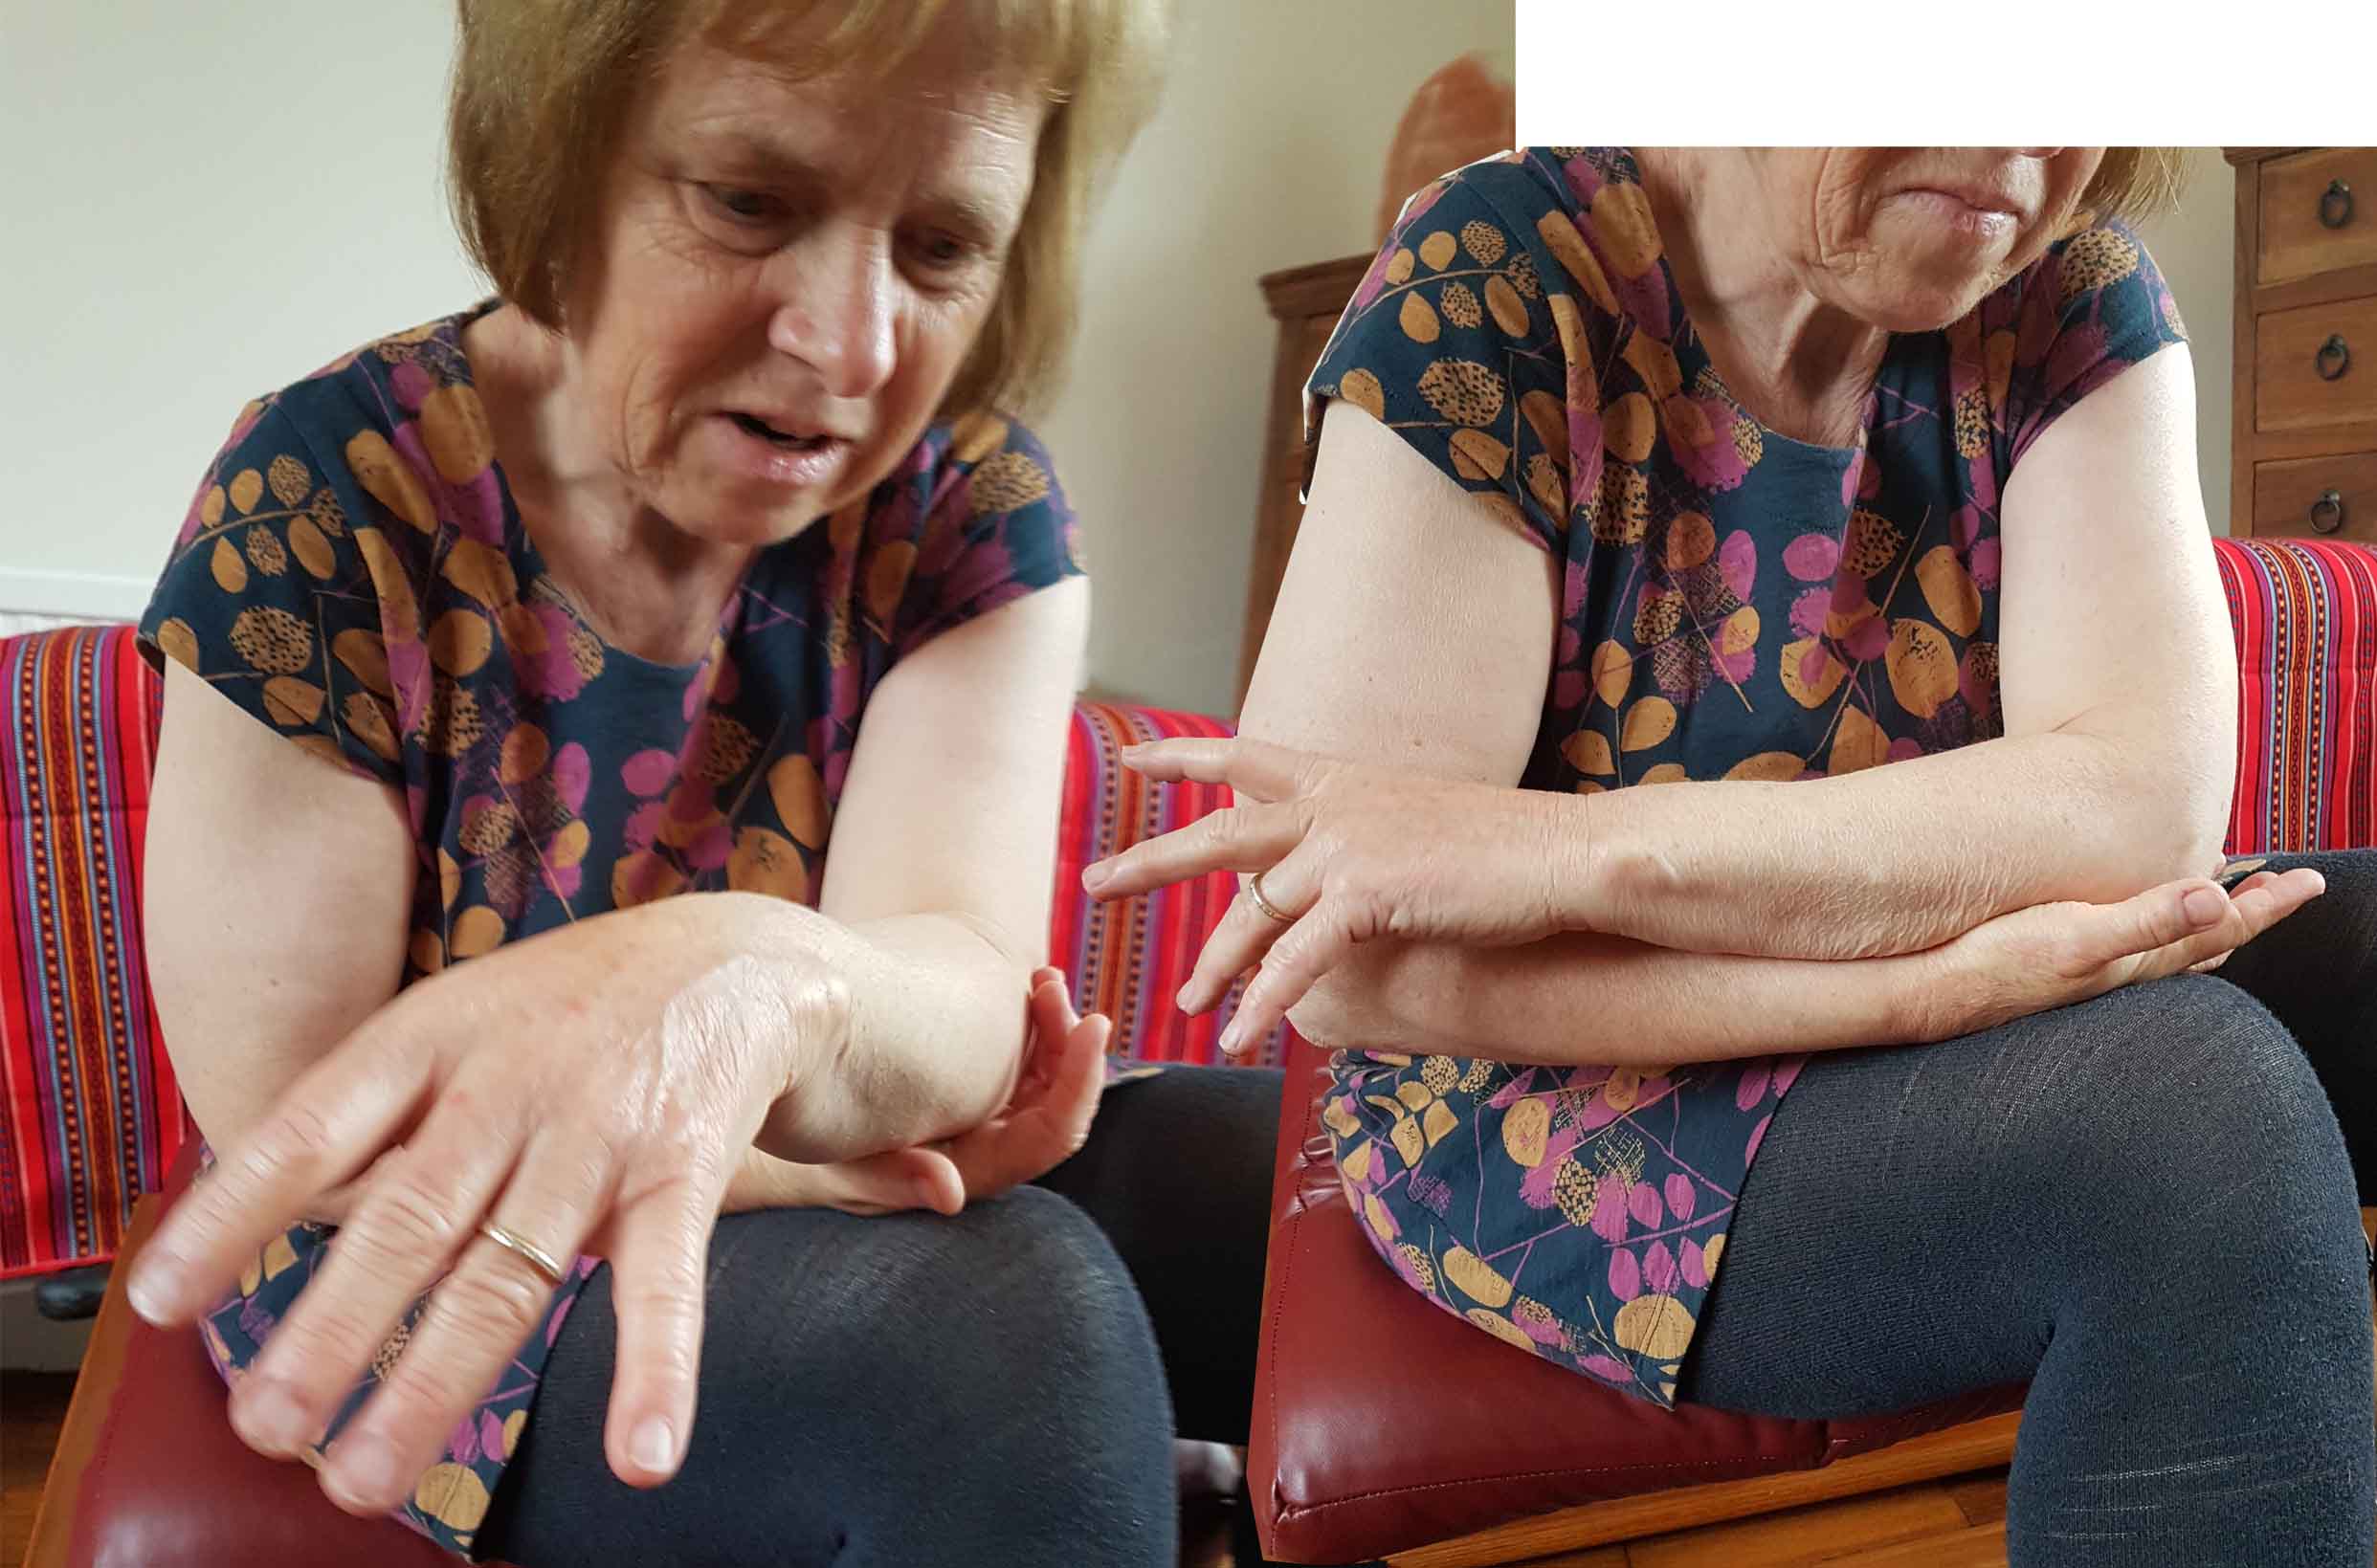
Sit tall and let one arm hang on the side so that the back of your hand faces forwards. With the other hand grab the muscle at the back of the upper arm (the triceps). Slowly rotate the arm so that the palm of the hand faces forward while keeping hold of the muscle. You can also let your fingers slide over the muscle, this works better on bare skin. Do this in a relaxed fashion, keep your hand loose.
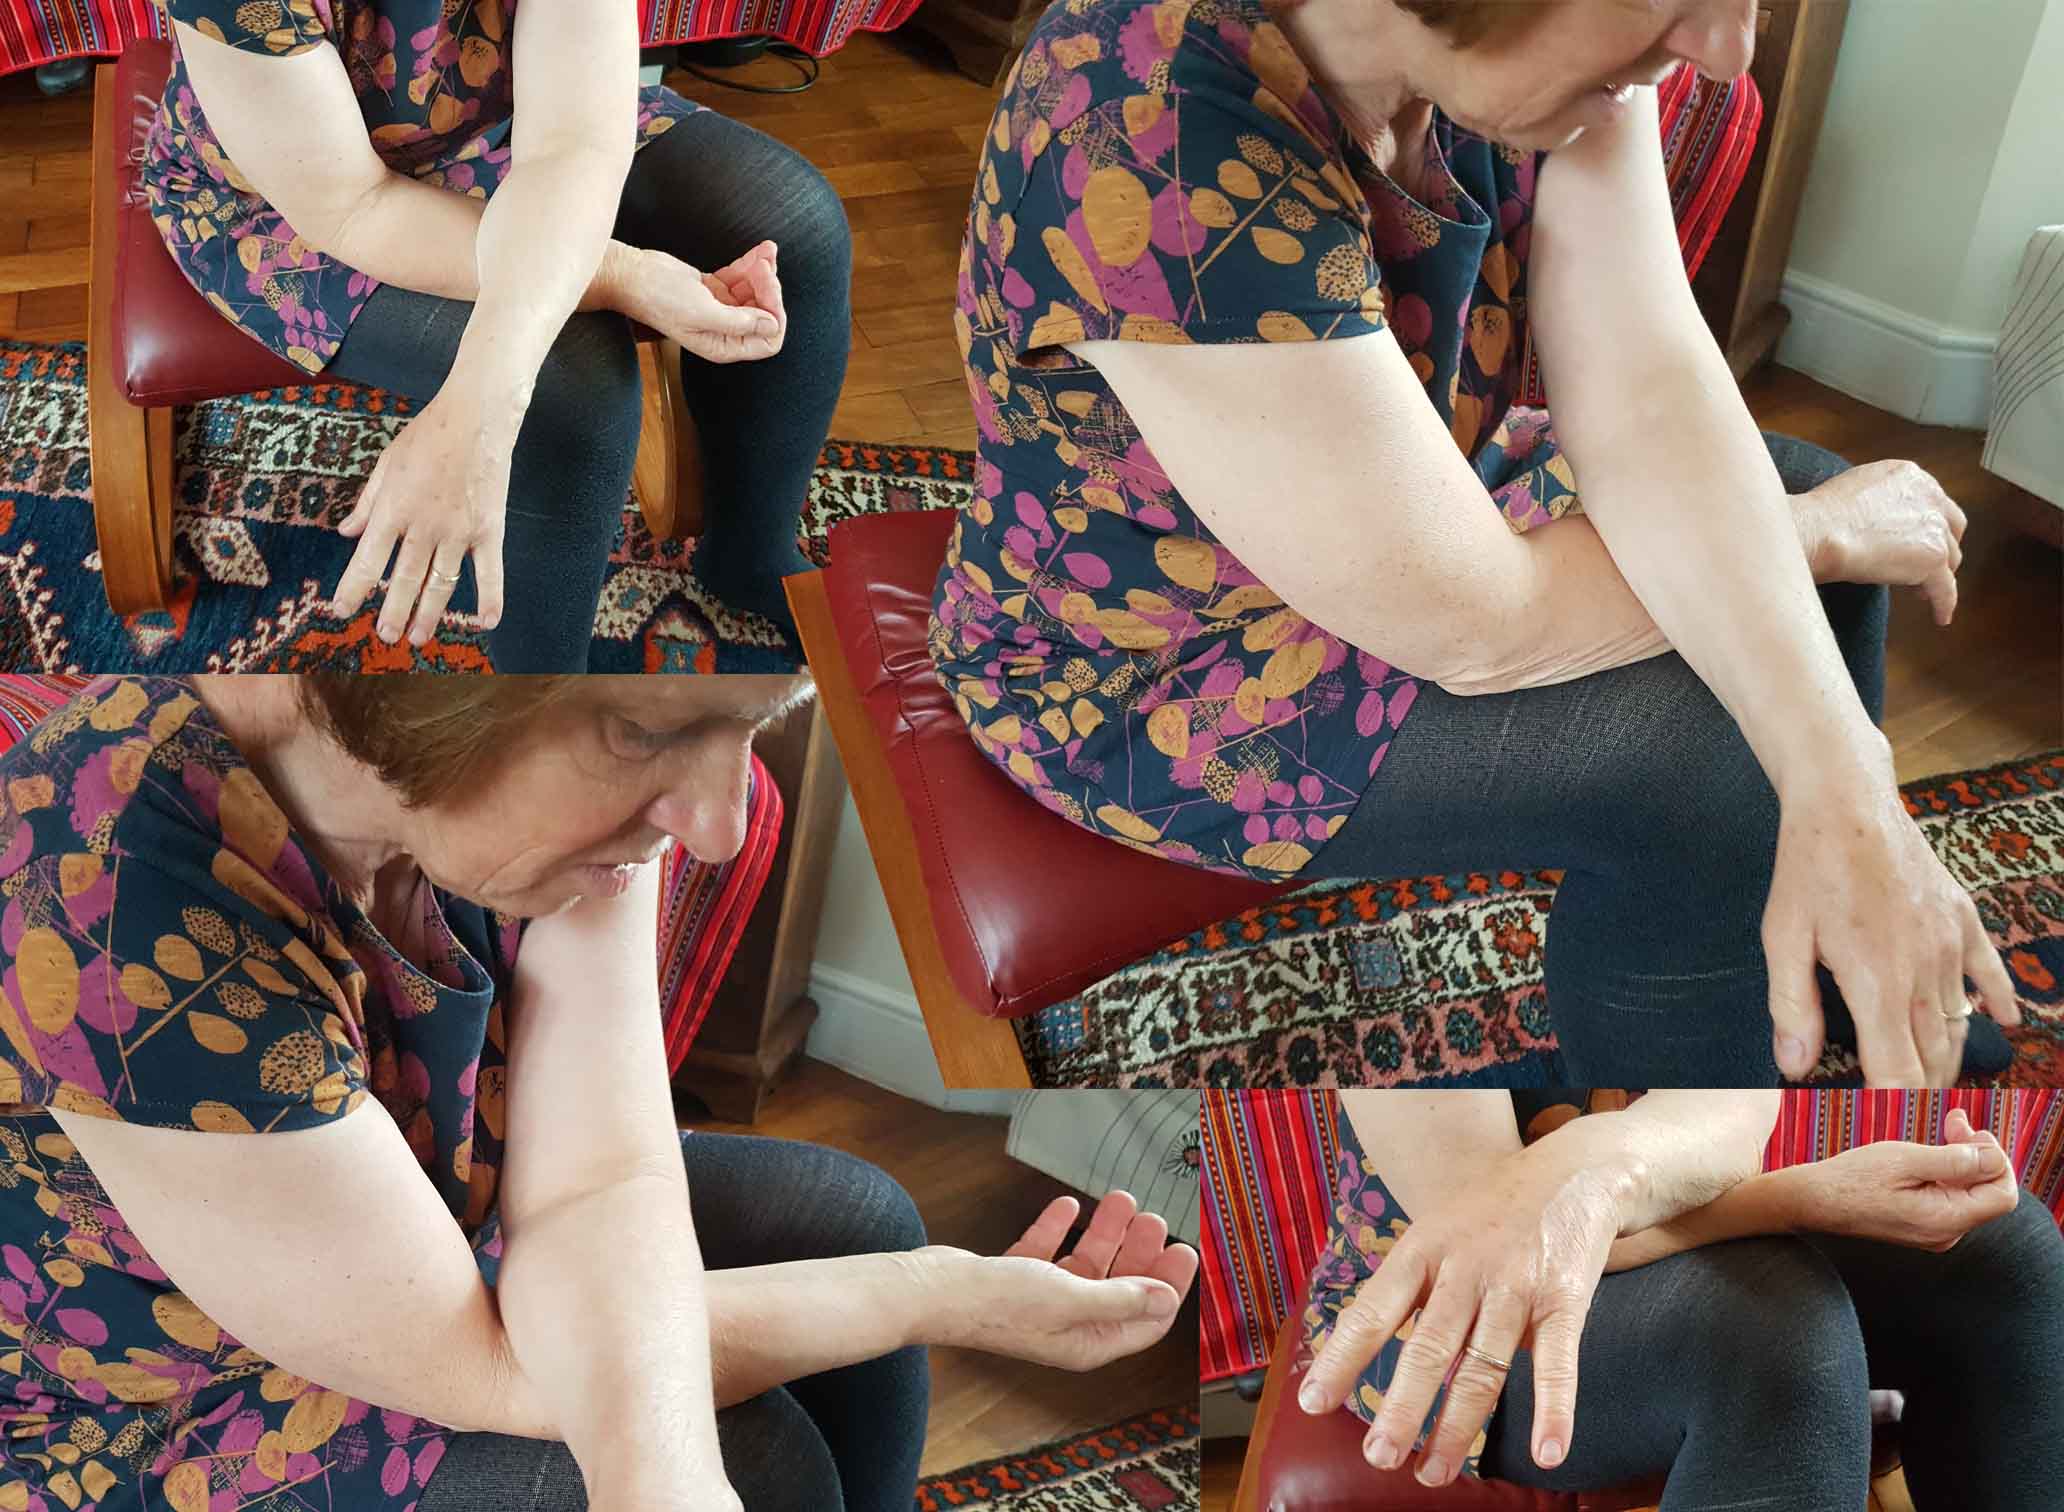
You can use your lower arm to massage the other lower arm. For this you need to sit so that your feet are flat on the floor. Place one arm across your thighs, the other arm across it. Now lean on your top arm, move - either with the top arm while keeping hold of the tissues of the bottom arm, or the bottom arm - wrist rotations, big movements of hand, etc. You can do this with the bottom arm palm up or down, depending on which side of the lower arm you would like to loosen. Now place the back of your hand on one thigh and place your forearm across it. Lean on your forearm.
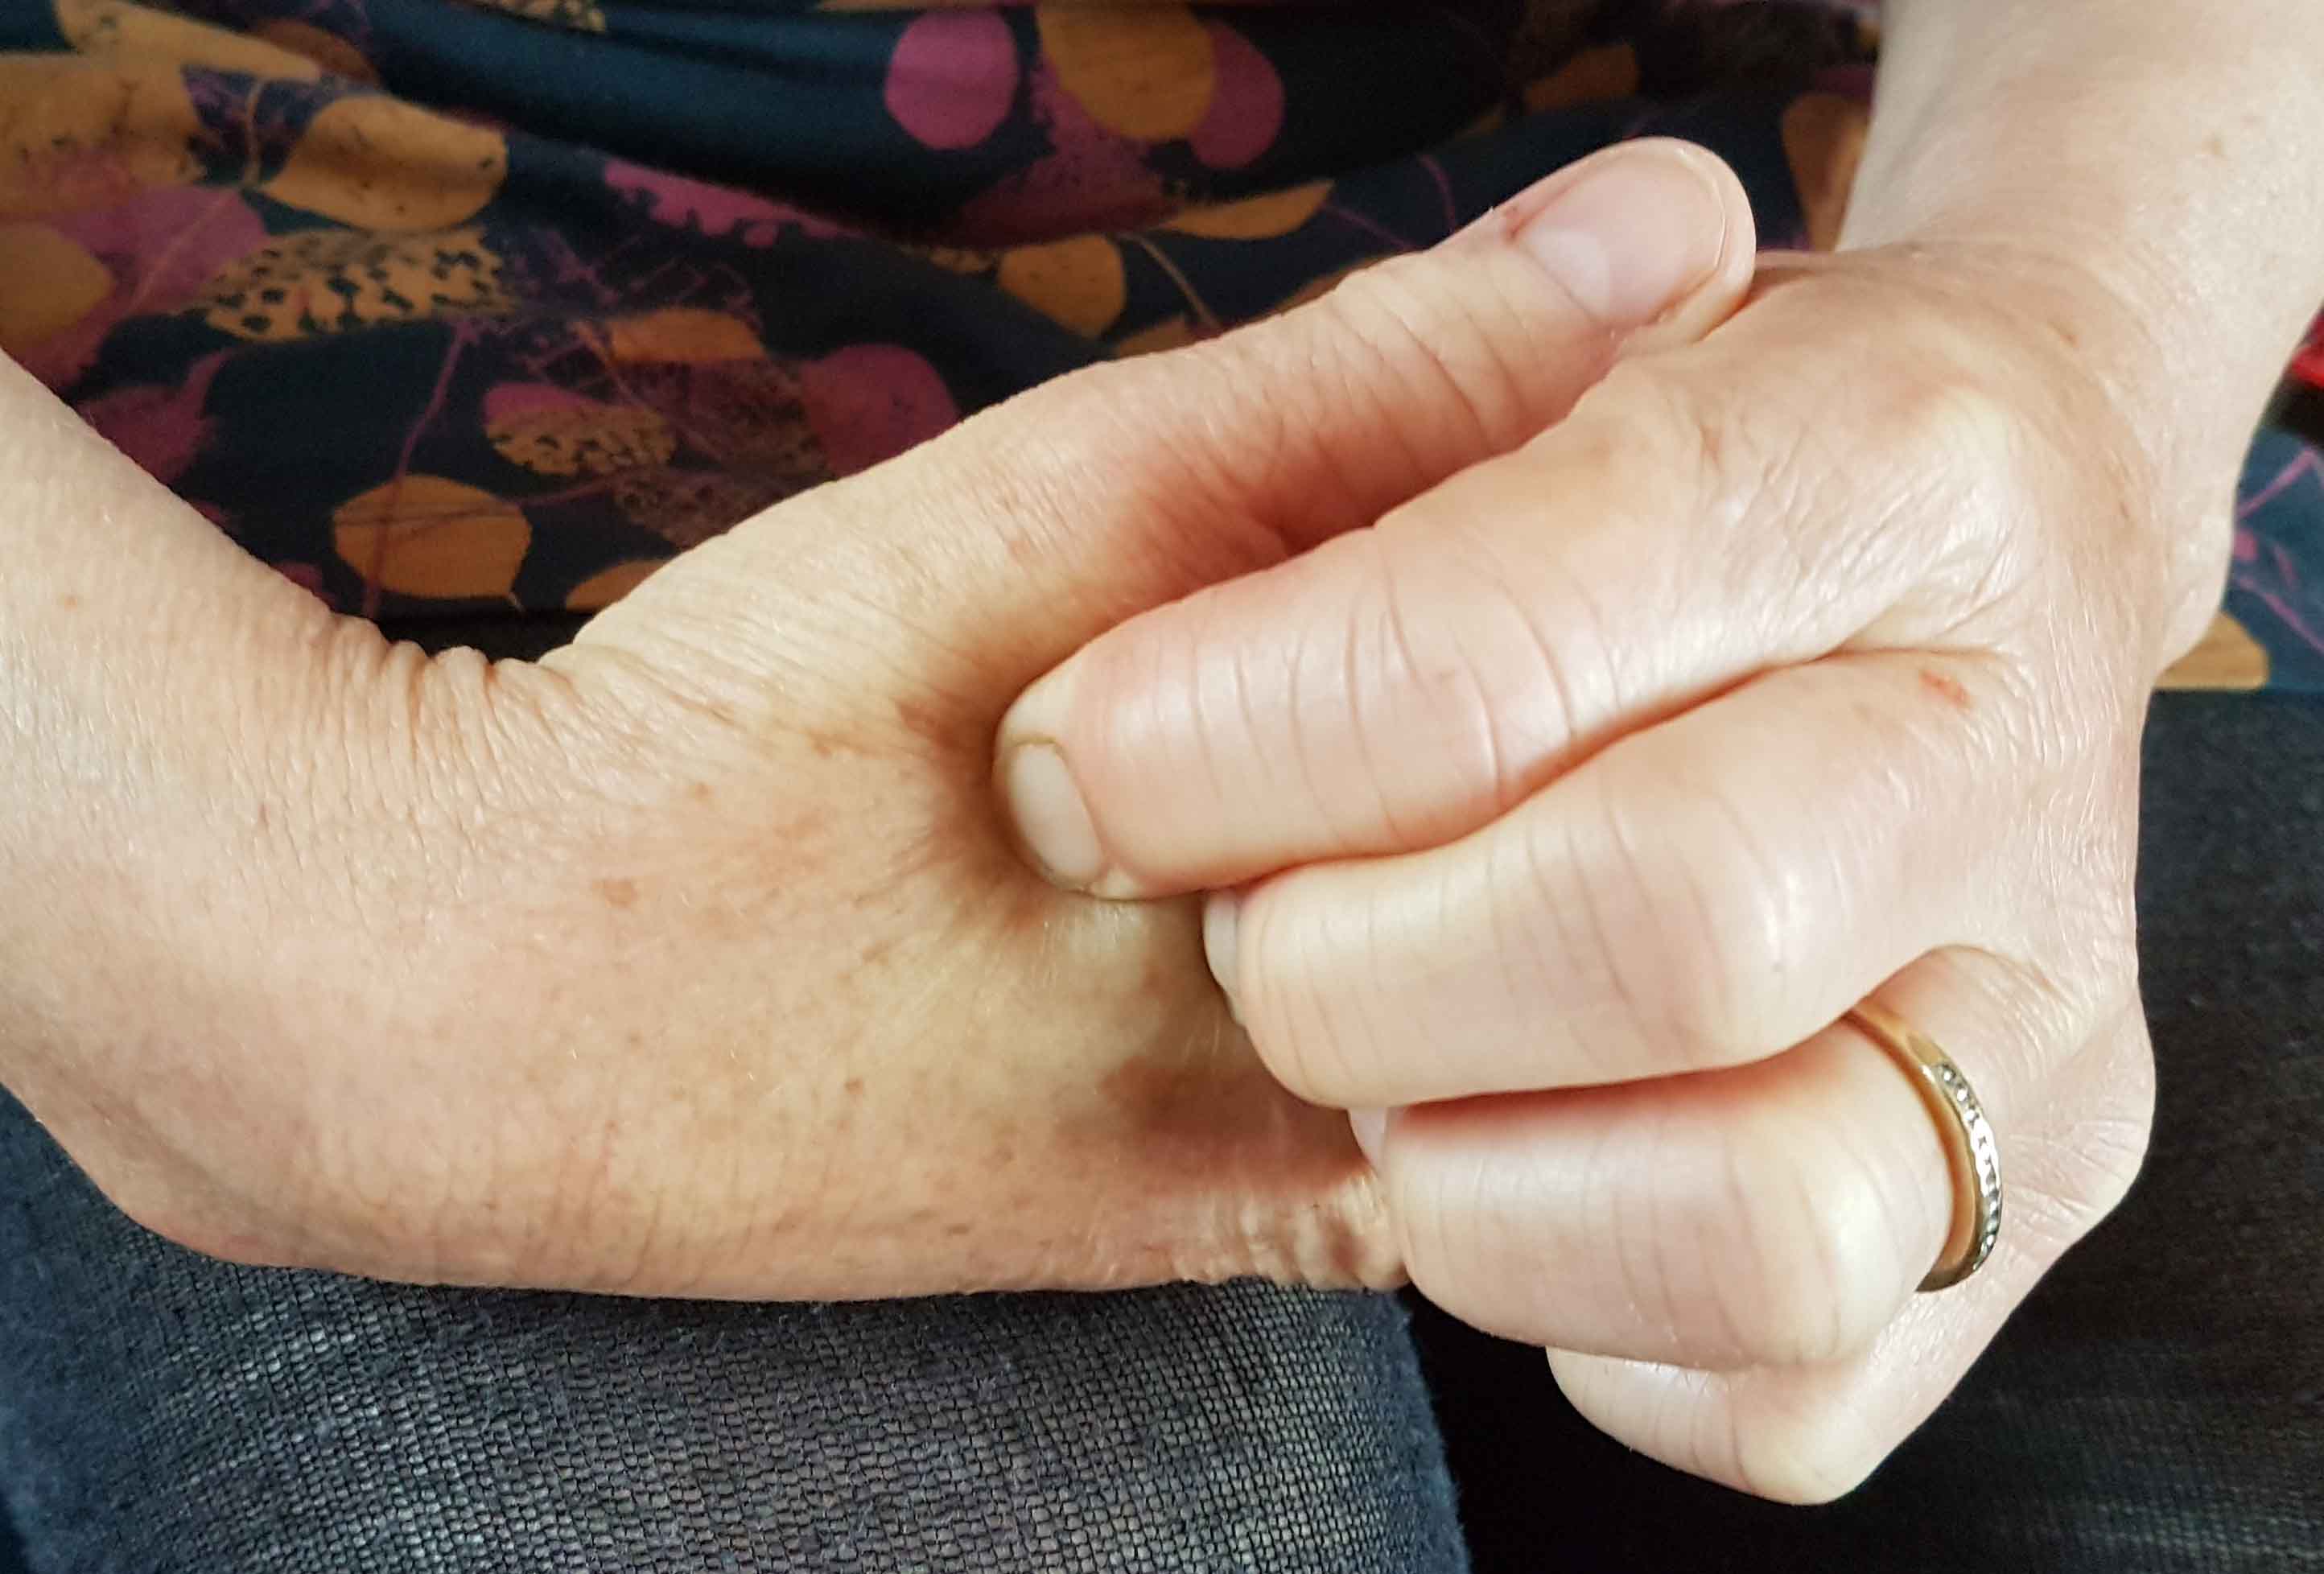
Press into the webbing between your thumb and your forefinger until you find an exquisitely tender point. Hold and breathe. In my experience there is no way of doing this gently or saving your fingers. This acupressure point "brings the energy down", so is good for anxiety and headaches. Avoid in pregnancy unless you want to help the birth along.
Finish this set of stretches with a few more shoulder rotations. Or for a more vigorous option, lift your shoulders to your ears and drop them suddenly.
Lower back, hamstring and buttock stretches
This is a series of stretches with your legs up a wall. Having
your legs up a wall is a great way to spend some time, it is easy
to stretch and gives you energy as the fluid pooled in the legs
has an opportunity to join the rest of your circulation. Even when
we are fit and well, we tend to have a little bit more fluid in
our legs as the day goes on. These stretches can really help with
lower back pain.
You can lean your legs against a wall either on the floor (if you can get down and back up), on your bed if it is against a wall, or any soft piece of furniture that is against a wall. If you are doing it on the floor, you need a carpet or yoga matt and a pillow.
Move your bottom really close to the wall, almost up it, while on your side with your legs bent. Find a way of turning unto your back while staying with your bottom close to the wall - a bit of a challenge as you will slide away. Keep your legs bent. Get your head comfortable with a pillow, keep you chin slightly tucked in.
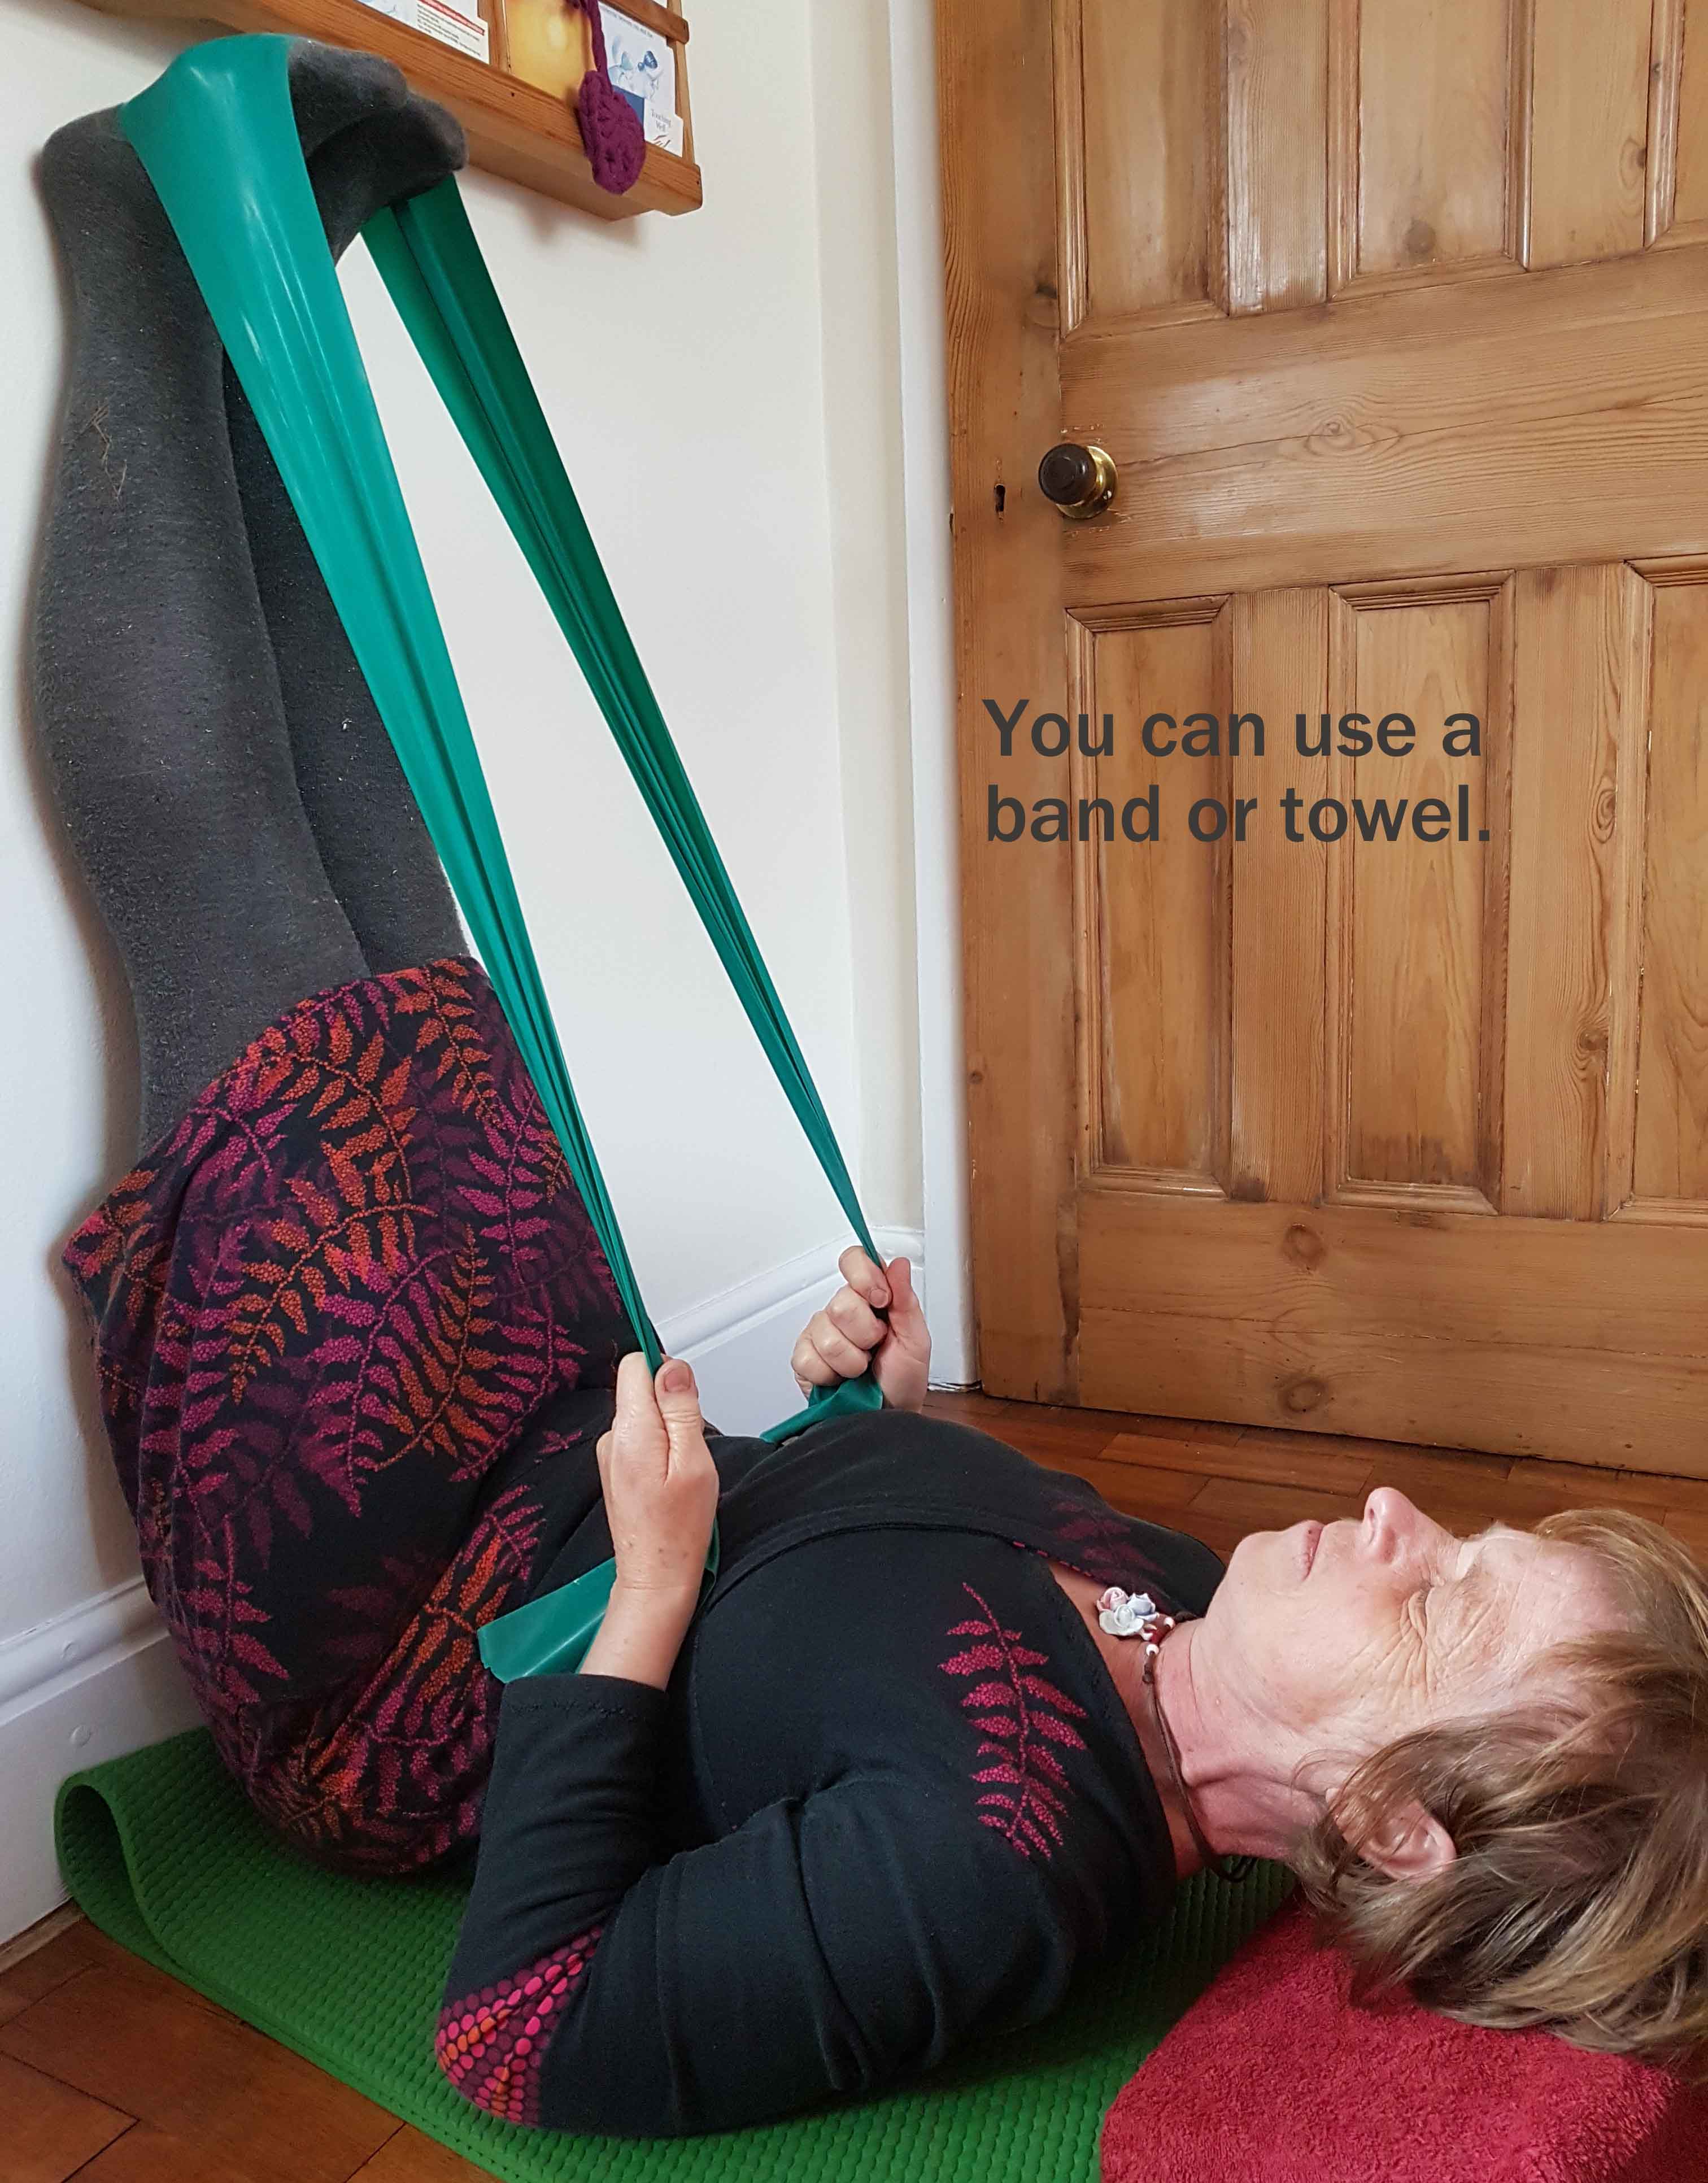
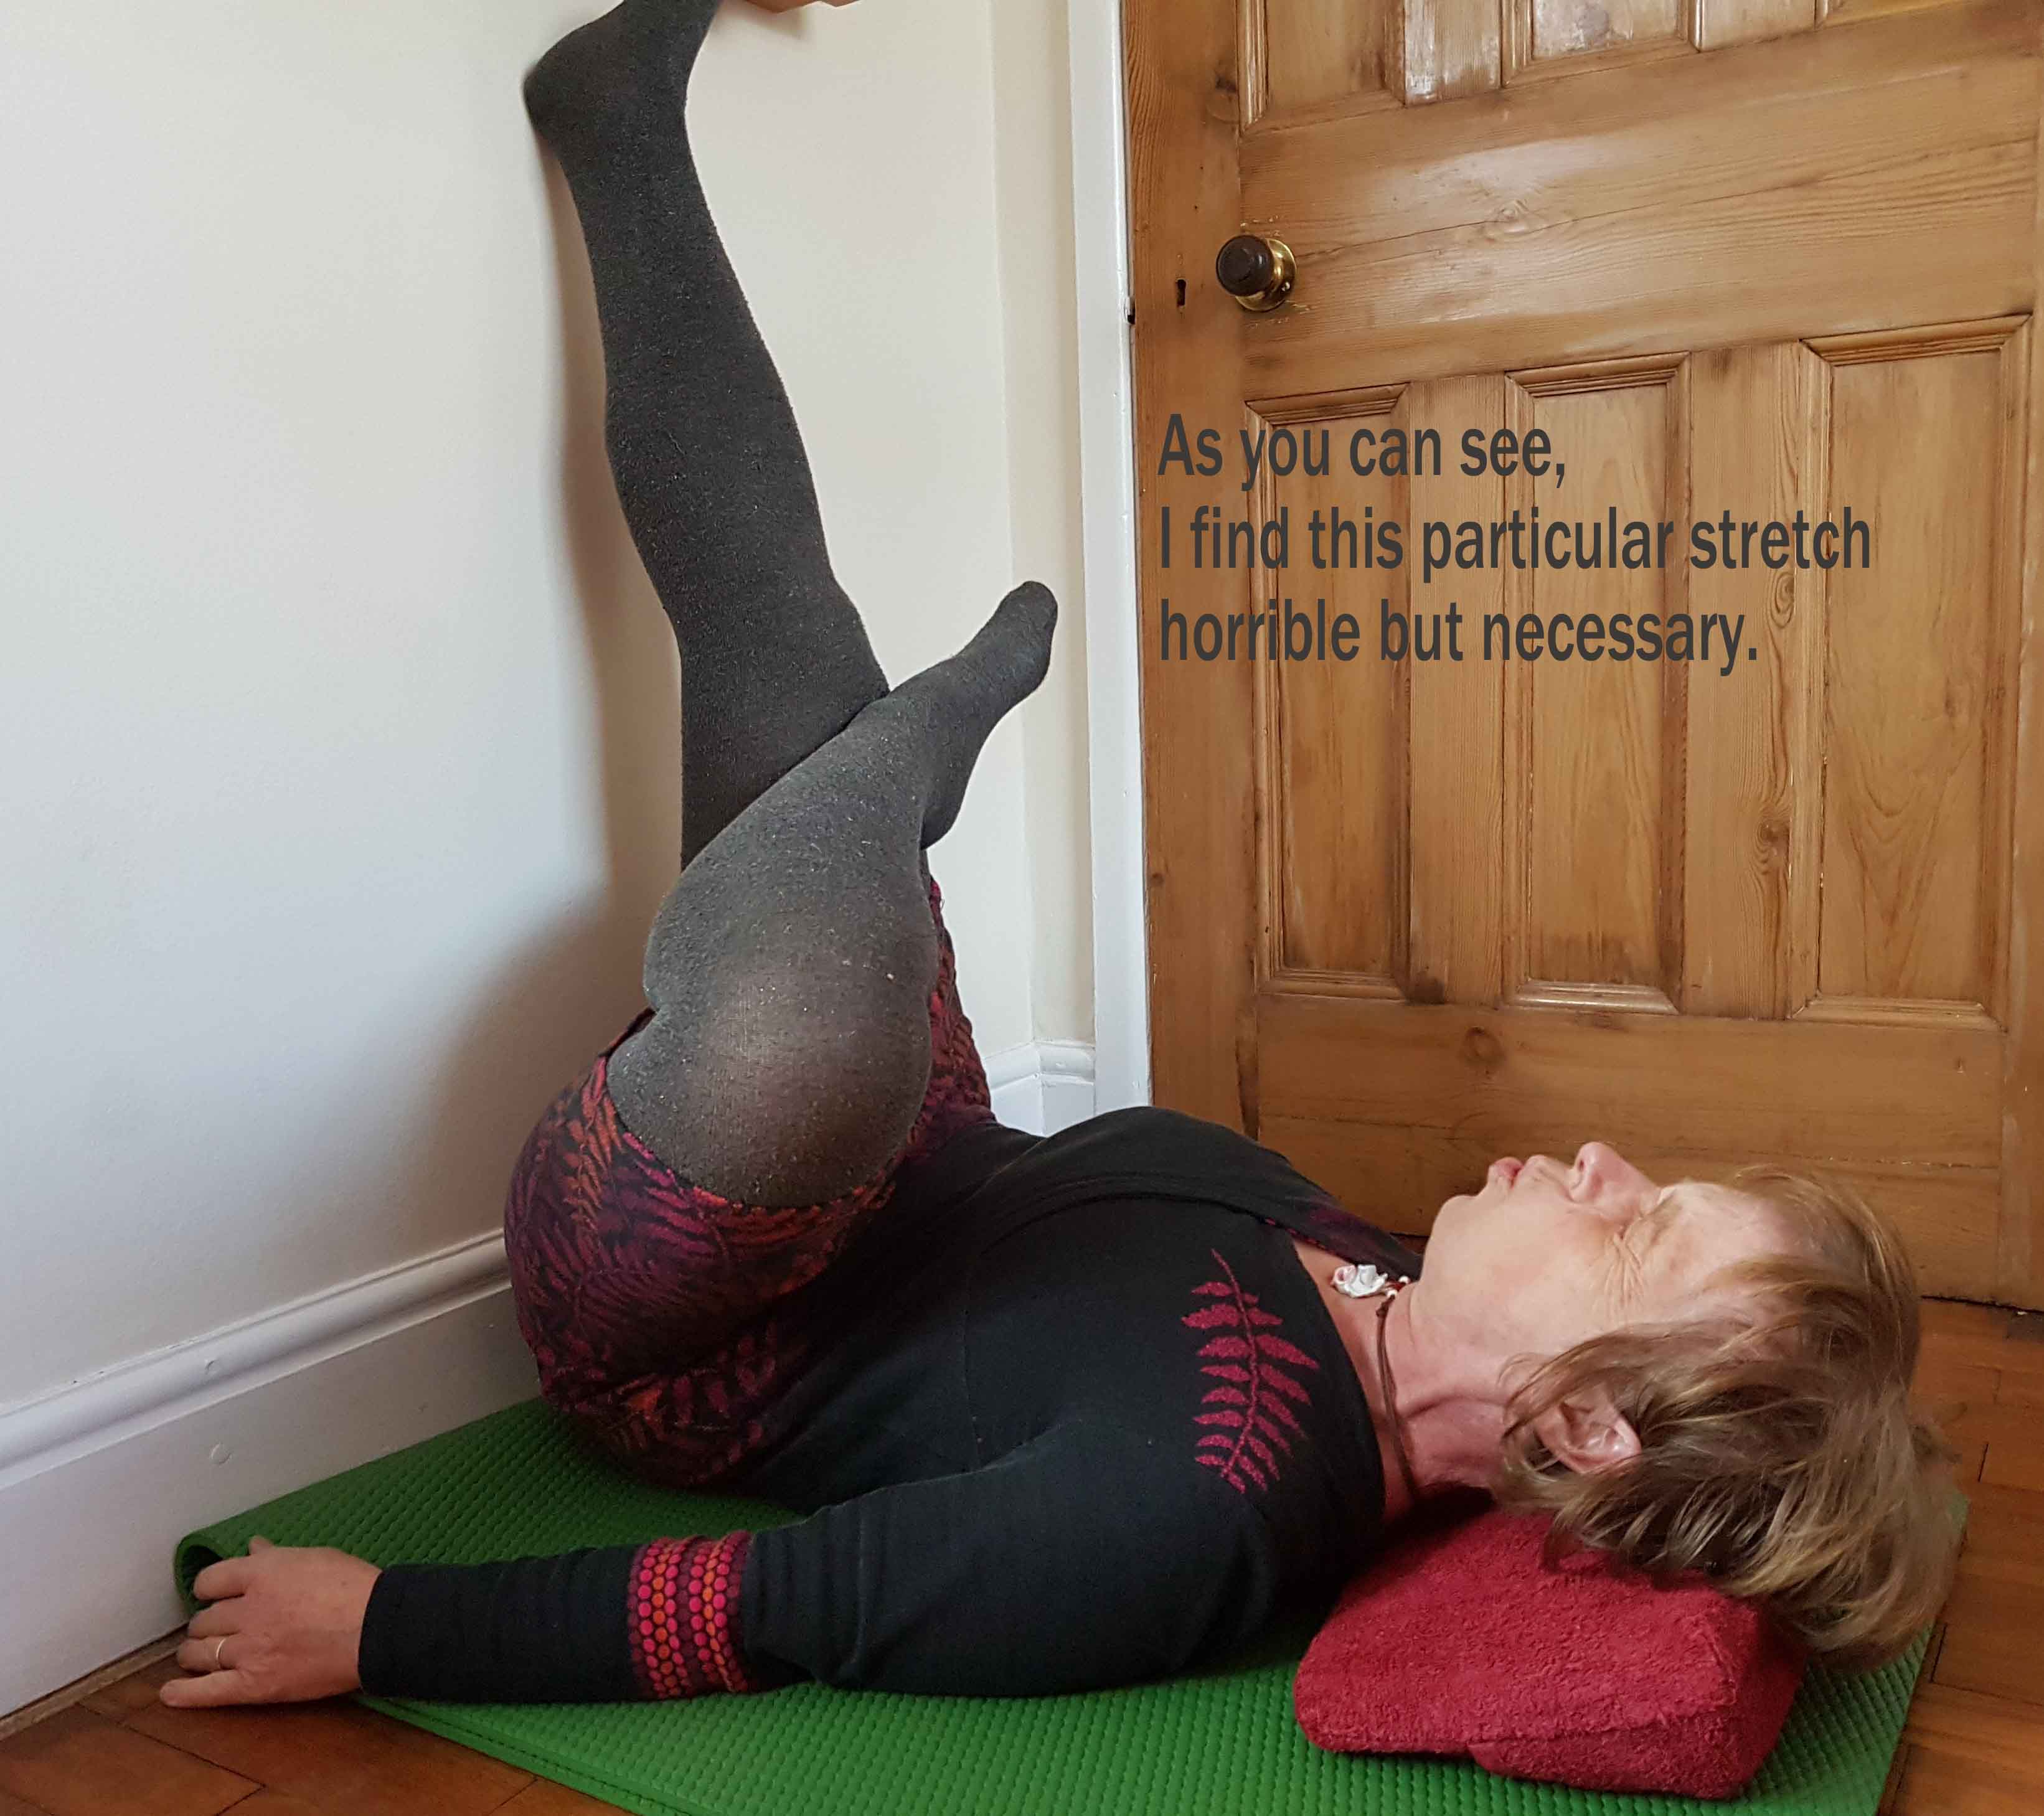
Straighten your legs until you feel a stretch in the back of your legs. Rest, breathe, let your shoulders ease towards the floor/bed. Allow the back of your body to lengthen, don't let your lower back arch. After a little while you may be comfortable to straighten your legs a little more. Again, rest and breathe. Repeat. The next stage is moving your feet and ankles, for best effect nice and slow. You can start with big movements of your toes, get them moving. Then involve your whole foot, scrunch it up and stretch your toes towards your nose. You may feel all this in the back of your legs, do these movements until they feel easy(ish). Now involve your ankles - big circles both directions. Last in this section, pull your feet and toes towards you, in other words, flex your ankle. You will really feel this in the back of your legs, but it will ease. You can use a towel or an exercise band to make the stretch more intensive.
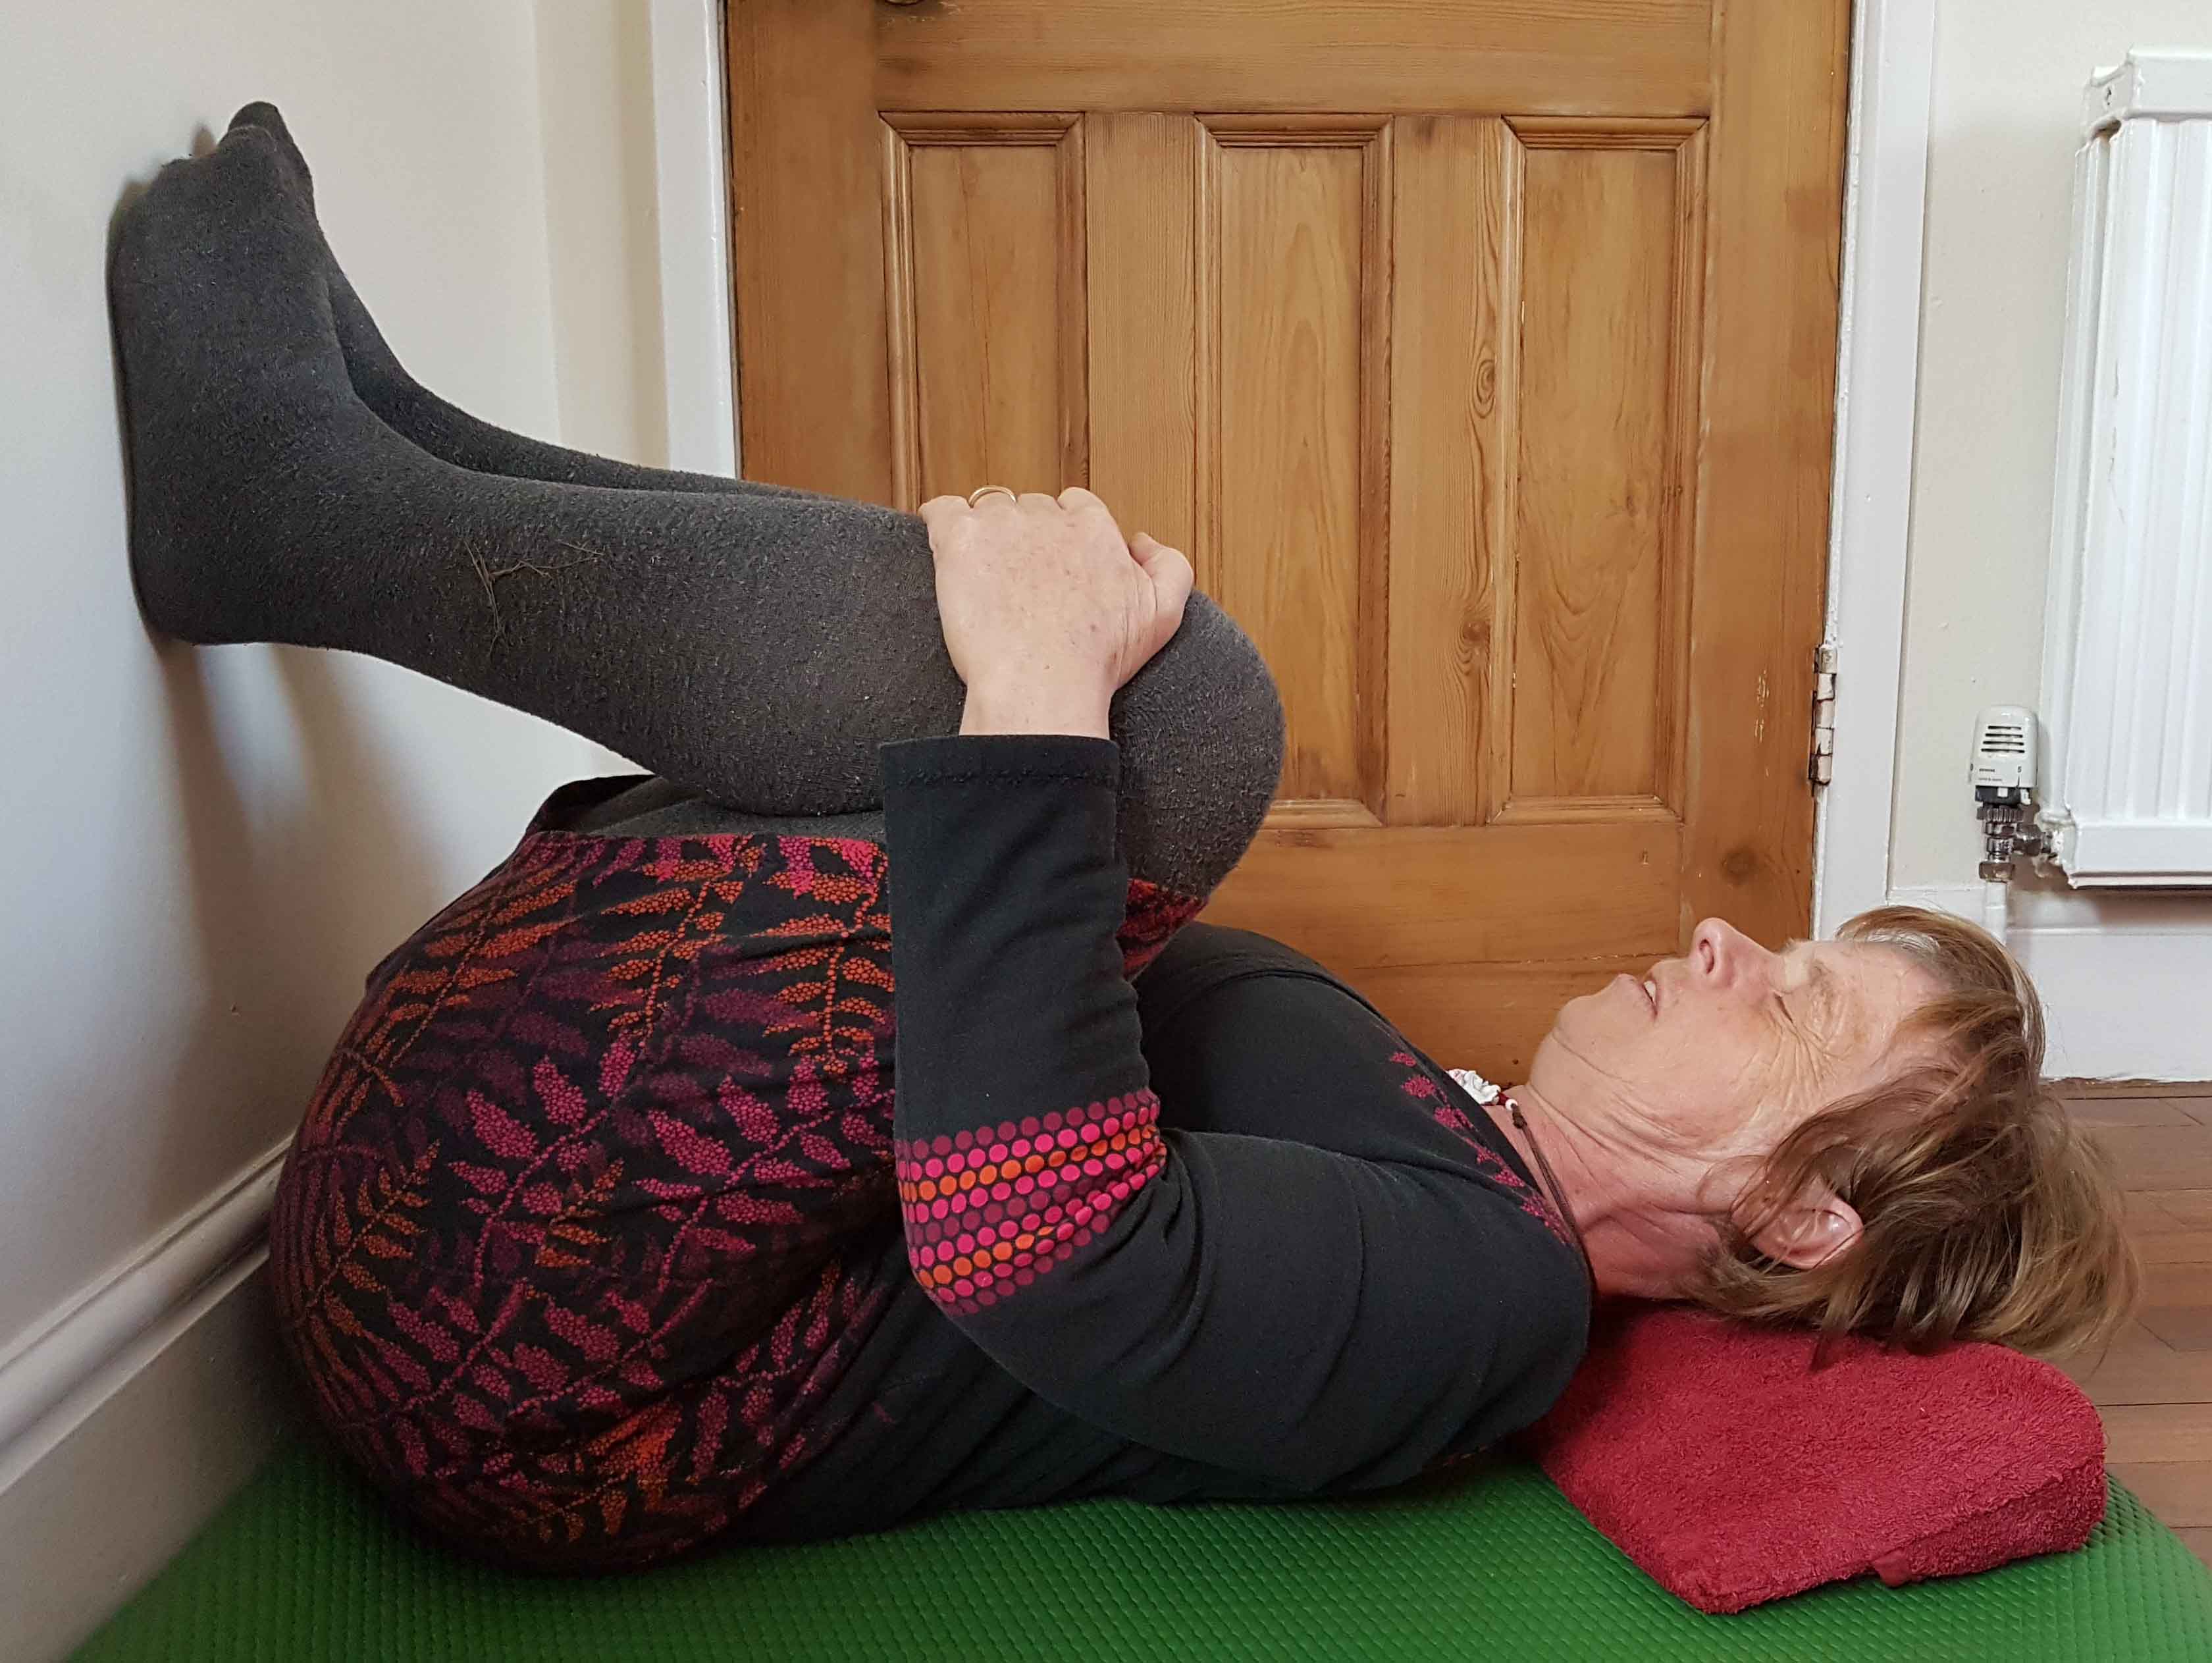
For the lower back stretch bring your thighs towards your chest, bending your legs. You can use your feet to push off the wall for an extra stretch. Hold. You can hug your knees and move slightly from side to side, enjoy the opening of your lower back. You can use a towel or an exercise band.
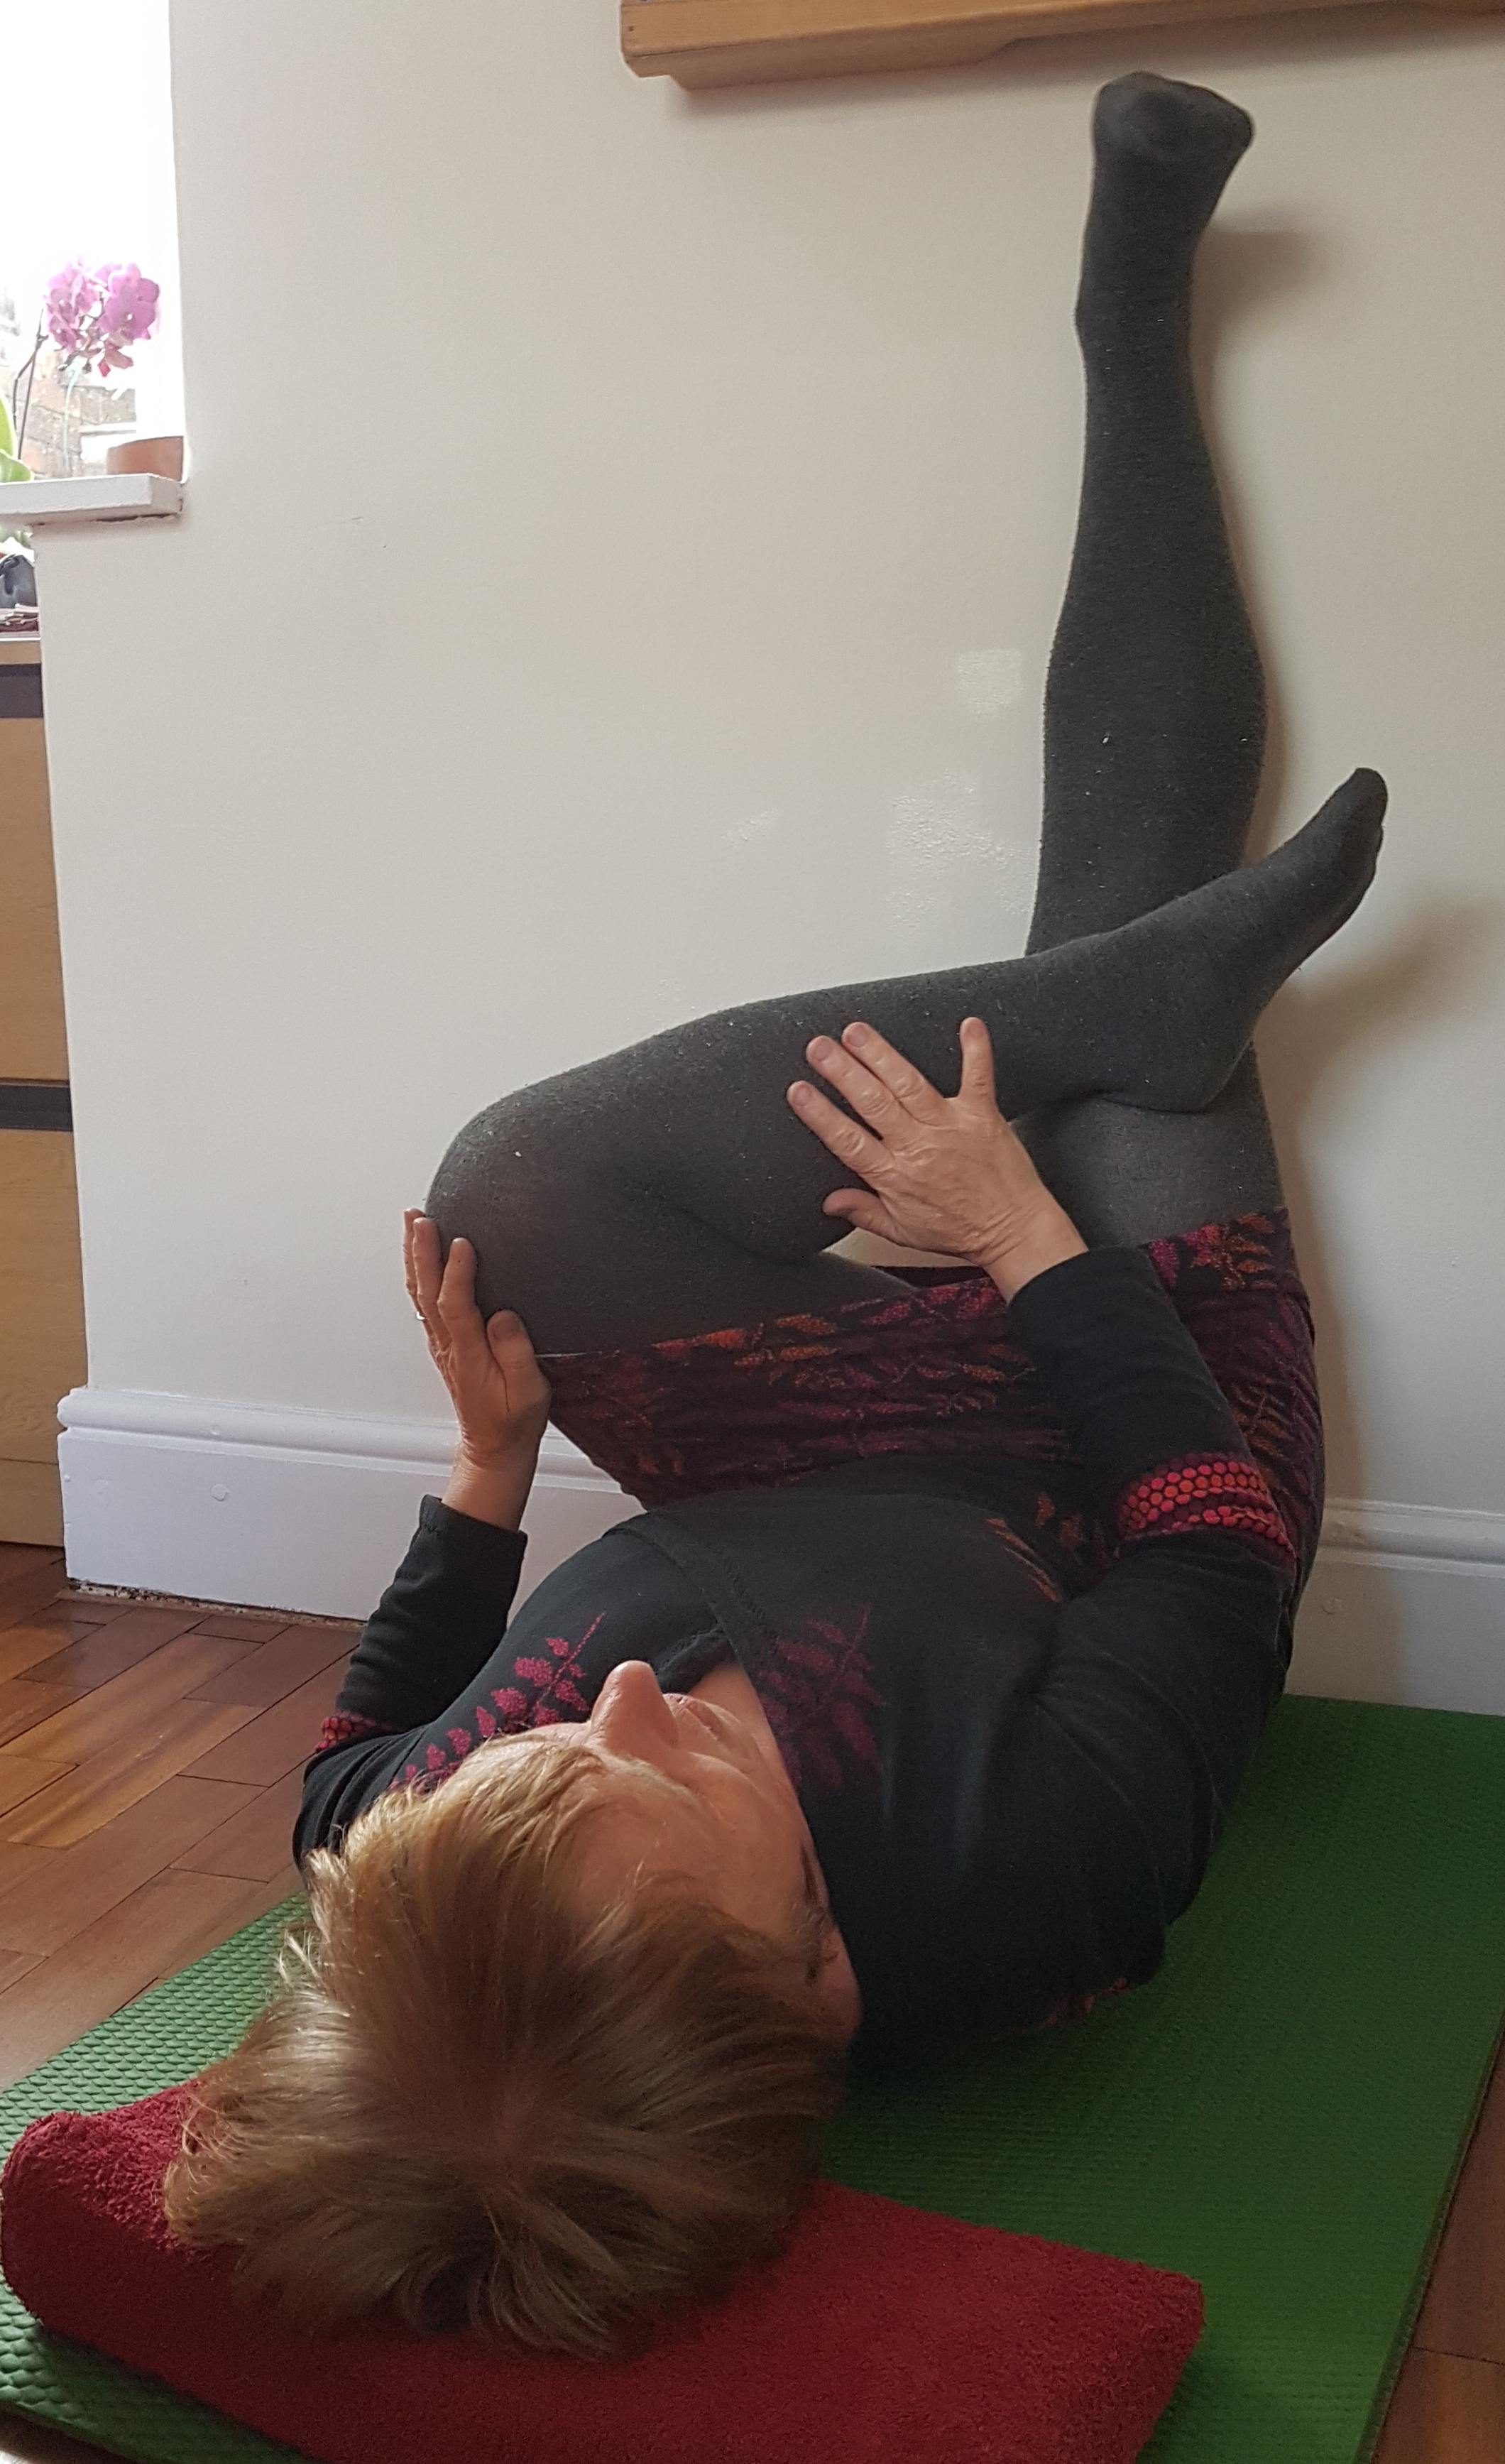
To stretch buttock, to be precise your piriformis muscle, straighten your legs again and bring the outside of one ankle over your other thigh, so that the leg is bent and out to the side. Bend the leg that is up against a wall more and more until you feel a stretch. Your lower back may lift off the floor. Hold. I find this particular stretch horrible but necessary. Do the other side.
Finally, hug your legs again. Roll to your side. Uncurl yourself and get up and enjoy the rest of the day.
Neck stretches
Sit or stand upright, lift up from your chest, tuck your chin in slightly.
Slowly turn your head to one side, hold when you can’t turn any further, attempt to look behind you. Hold. For extra interest move your jaw, open and close, screw up your face, big slow movements. Turn your head to the other side, and do the same. Notice the difference.
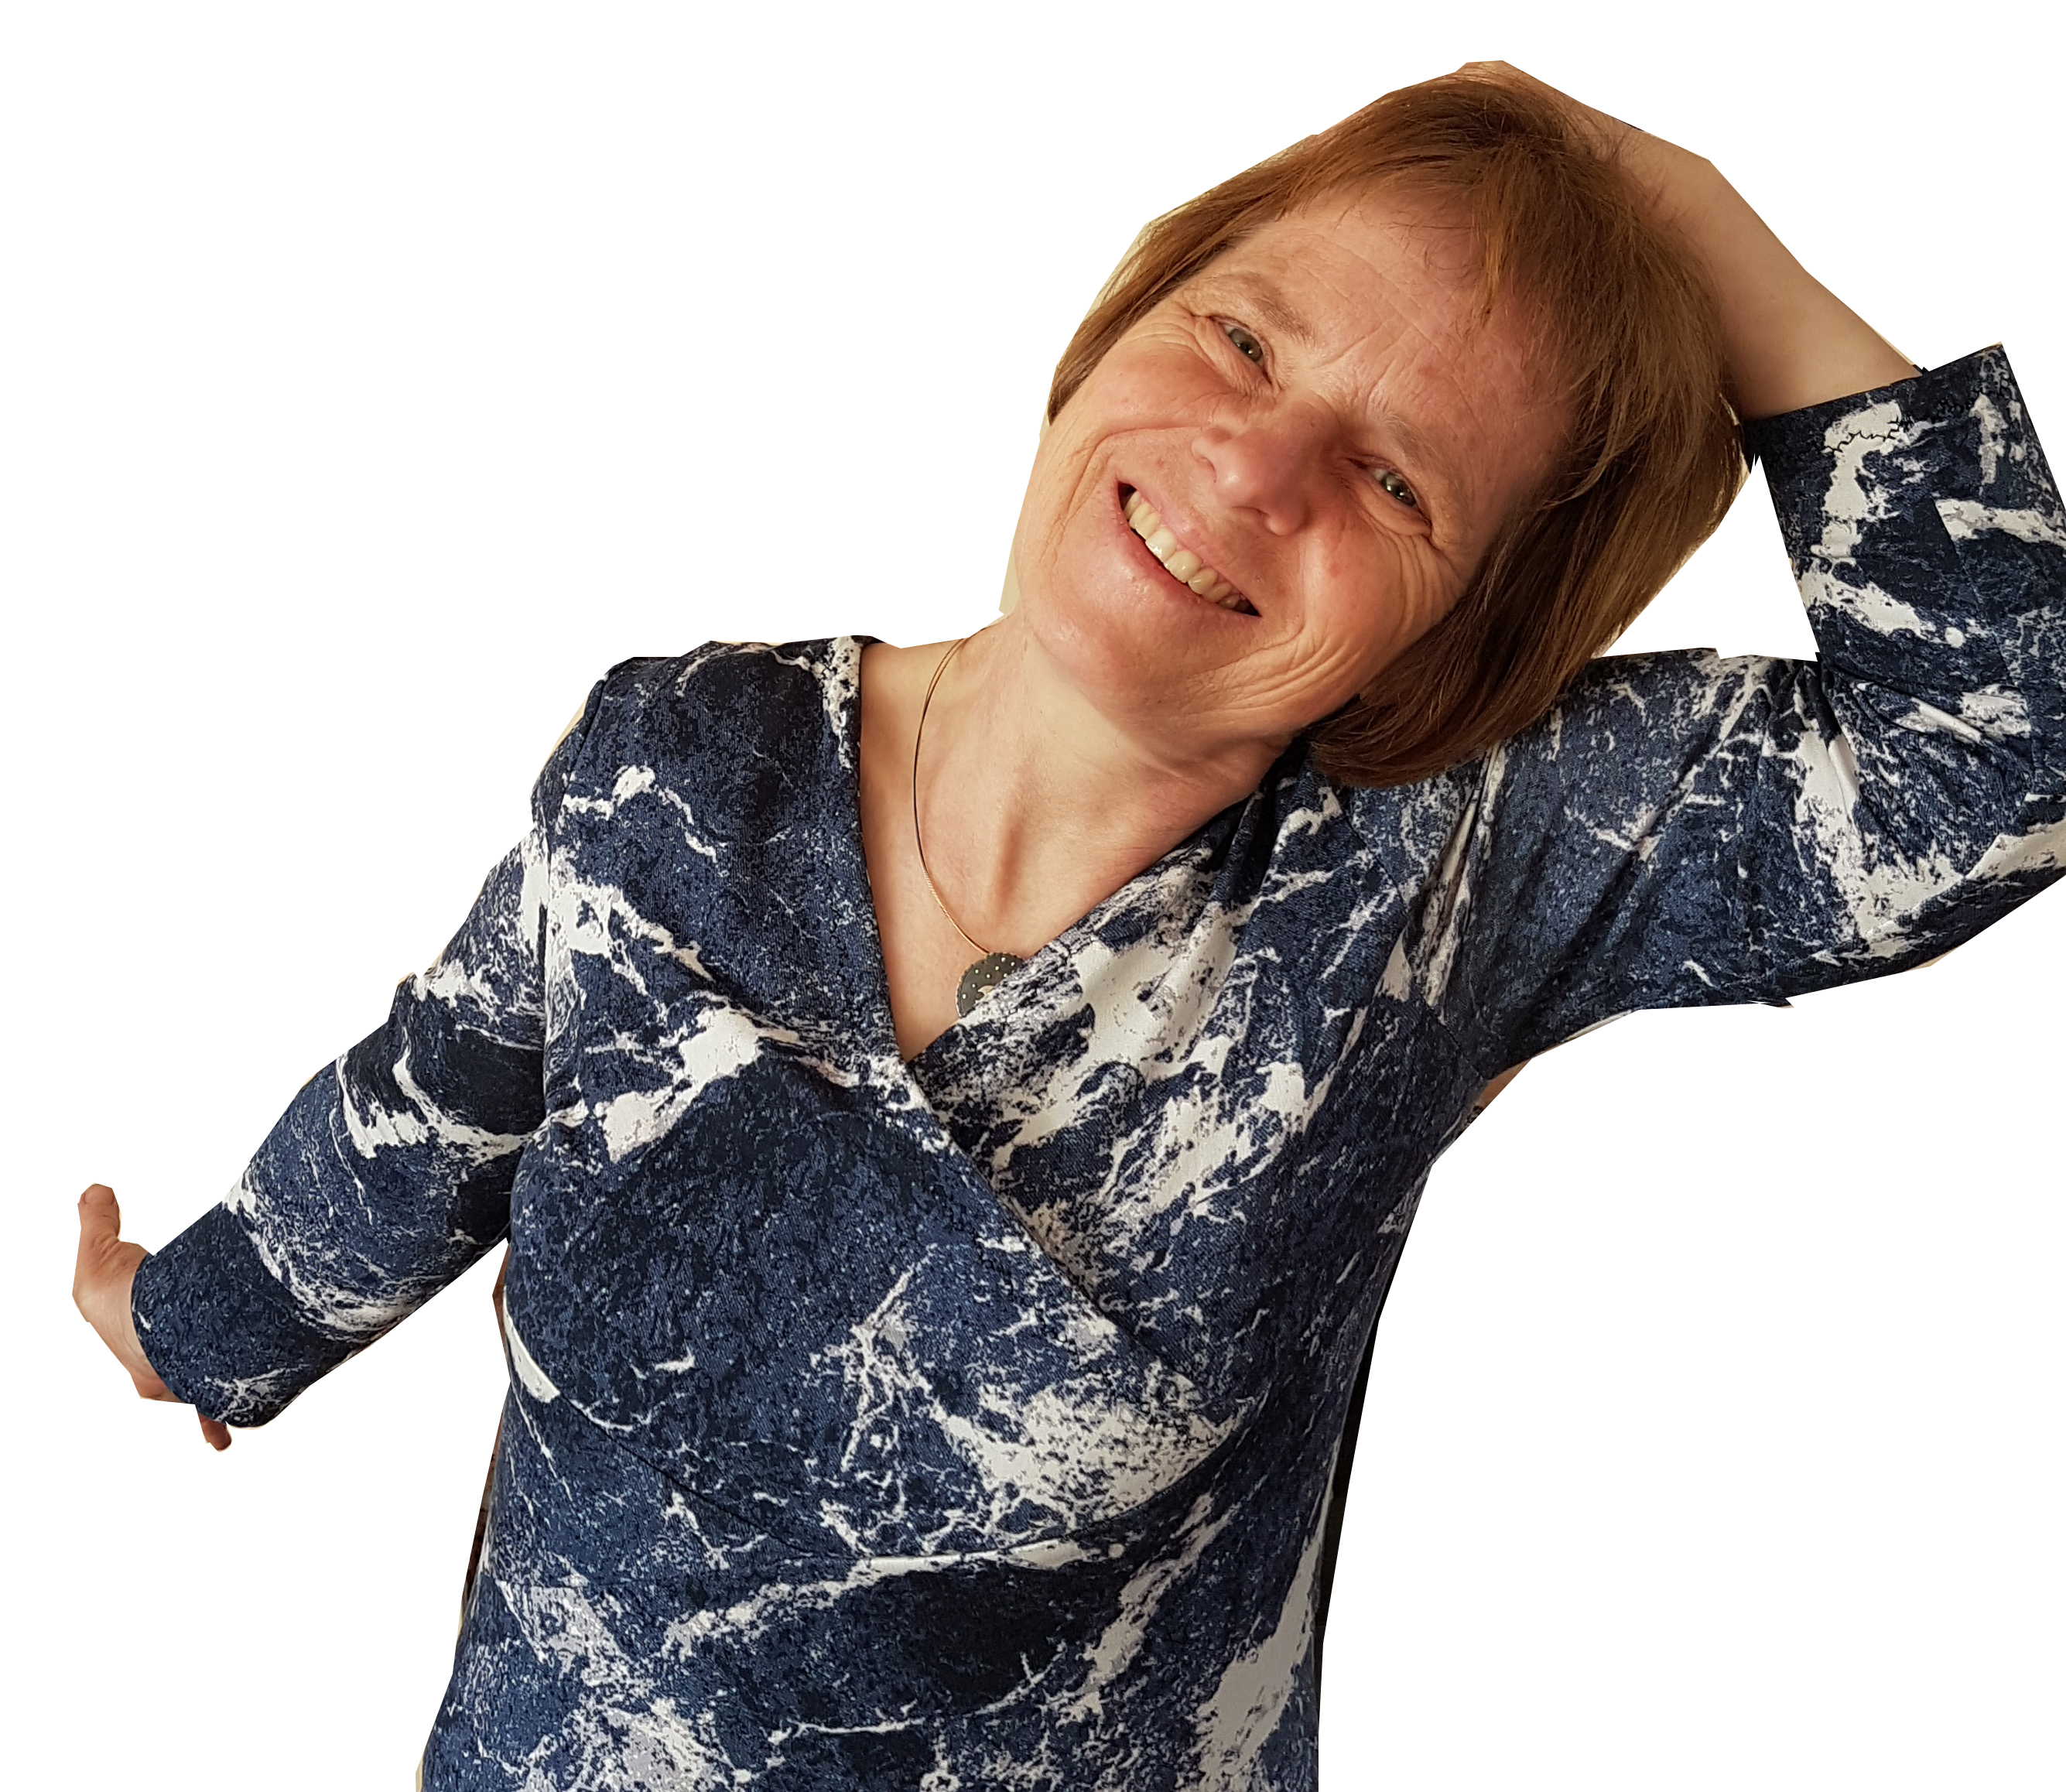
Now bring one ear to the near shoulder, let the other shoulder drop. Wait. Next bend your arm at the wrist and stretch your arm out, imagining that it is elongating like a telescope. Hold. Place your hand just above your ear and let the weight of your arm deepen the stretch. Don’t yank or pull. Fine-tune the stretch with small movements until you find the point that feels really good.

Slowly nod. Make sure to tuck in your chin. Interlace your fingers and place them at the highest point of your head. Feel the weight of your arms. Try small movements from side to side. Uncurl, look up, open your chest.
To finish, roll your shoulders, shake out, put some music on, move about. Or go back to what you need to do.
List of treatments
- Myofascial Release (MFR) - Saving Hands massage -
- Therapeutic massage - Maya Abdominal Therapy -
- Seated Acupressure - Indian Head Massage - Pulsing - Reiki -
- Reflexology - Tsuboki Foot Massage - Hopi Ear Candles -
- Hot and Cold Stone Massage - Myofascial dry cupping -
- Aromatherapy Massage - Aromatherapy Lymphatic Massage (ALM) -
- Fertility Massage - Pregnancy Massage - Post-natal Massage -
- Dorn Method - Breuss Massage -
- Manual Lymphatic Drainage (MLD) - Deep Oscillation - ScarWork -
- Treatment for lymphoedema - Treatment after cosmetic surgery -
- Holistic Facial - Face Vitality - Total Detox -
- Virtual sessions - Supervision
Subscribe to
my Free
Newsletter
Massage Message
Don't worry, your e-mail address is secure. I promise to use it only to send you the
Massage Message.

Recent Articles
-
Lipodema
Mar 06, 26 04:48 AM
Hi there, I have a diagnosis of lipodema, and I’d like to try MLD as a treatment to help with the pain in my legs and arms. Is Lipodema a condition you -
Dry cupping and lymphoedema
Feb 03, 26 05:51 AM
Hi Regina, I have lymphoedema and am interested in static dry cupping alongside MLD. I have seen conflicting information on the Internet (Dr Google!) -
Touching Well News
Dec 19, 25 05:30 AM
New Massage Message November 2025